
Deep Dive Into EverWeb’s Blog Post Page!
September 19th, 2024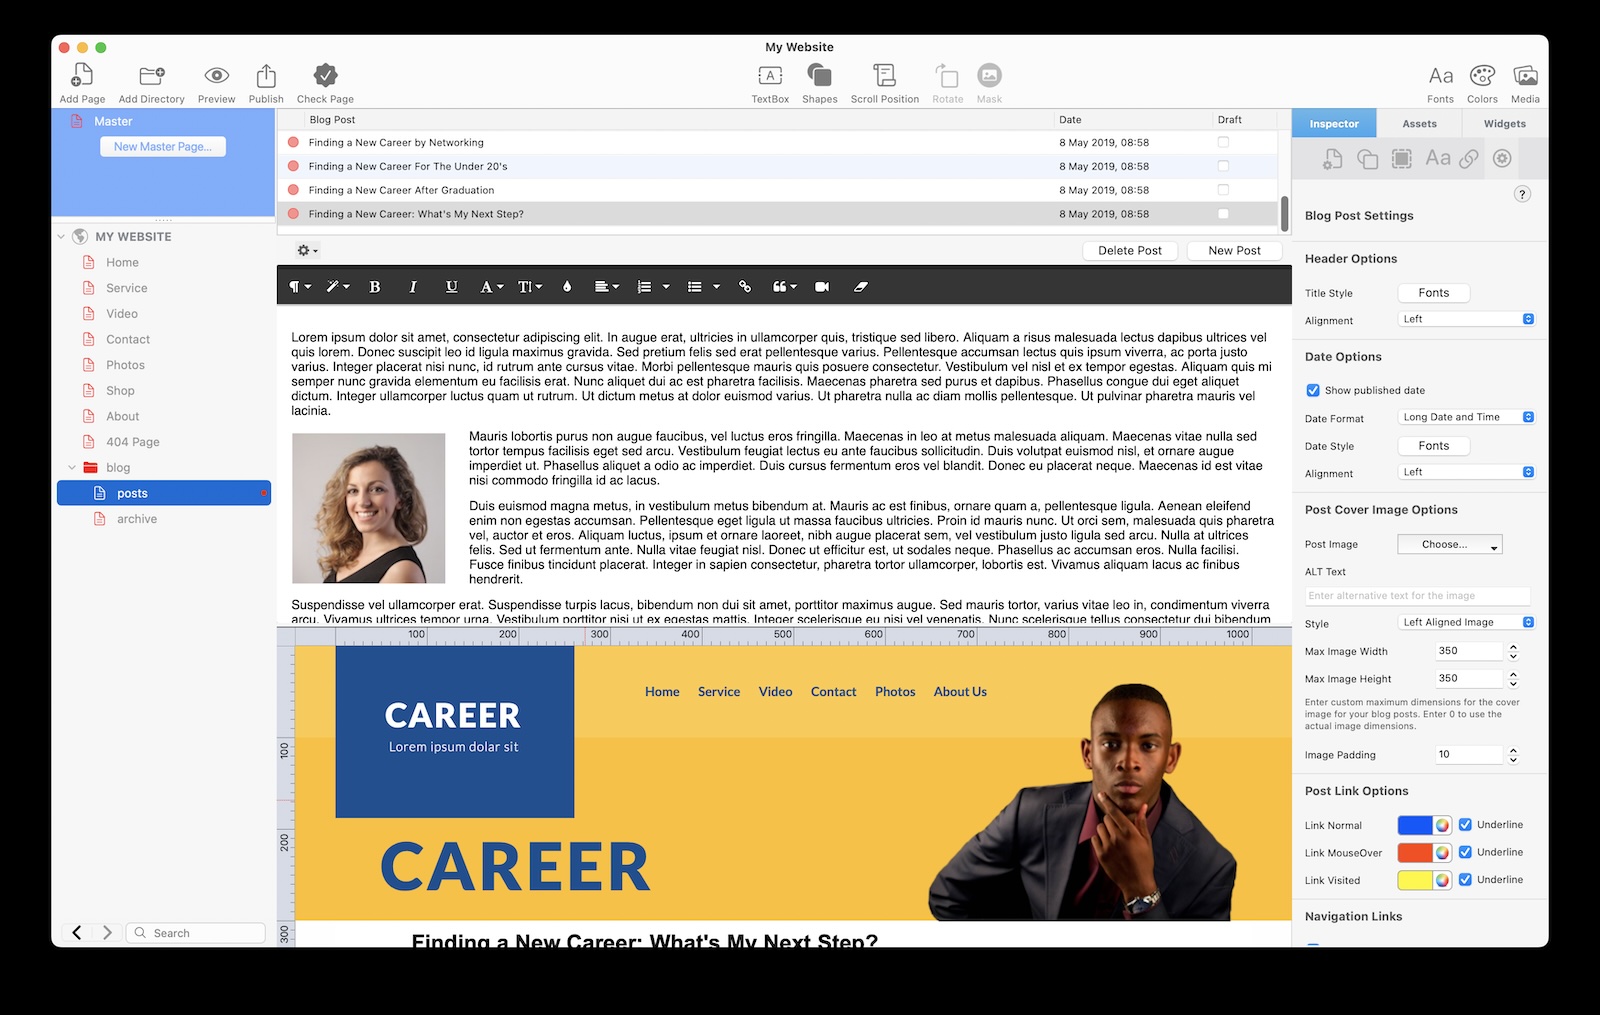
In our last blog post, we looked at getting started with blogging in EverWeb and whether you should choose to blog or not. We finished off the last post by creating a blog. In this post, we will take a deep dive in to EverWeb’s blog Post page!
Exploring The Blog Posts List
As you may already have discovered, the Posts page is the page where you will probably spend most of your time when blogging. The page is divided up in to a number of sections. When you view the page you will see that there are three horizontal sections and the Blog Post Settings pane on the right hand side.
The first horizontal section is the Blog Posts List section where you create and manage your blog posts. The blog posts that you create can be easily ordered by Blog Post, Date or Draft status. Just by clicking on these Titles at the top of the section.
By default, when you create a blog in EverWeb one post will also be created, called ‘New Blog Post’. To change the title of the post, simply double click on the post’s title, make the changes you want and hit the Enter key when finished.
Also by default, EverWeb enters the current date and the when you create a post. You can easily change this to another date/time if you need to. Again, double click on the date of the post whose date/time you want to change. A calendar will pop up allowing you to set the date and time as required. Additionally, you can also set the date/time to the website’s next publish date/time by checking the ‘Use Website Publish Date’ field.
Typically when blogging you will probably have some posts in development for publishing at a later date. In this case you probably will want to set the post to Draft so that it does not get published inadvertently until you are ready to do so.
At the bottom of the section is a Settings Cog on the left hand side and ‘Add Post’ and ‘Delete Post’ buttons on the right. The Settings Cog has three options: The first is Post Options which is where you can add a Short Summary of the blog post as well as Keywords for the post which is useful for your SEO.
The second option is Import which allows you to import blogs from iWeb or WordPress. If you want to import photo galleries from these two products, use the File-> Import menu. Additionally you can also import photo galleries from Sandvox using the File-> Import menu option.
The last option lets you choose whether you want he blog post editor to be in Dark Mode or not. Just toggle the option as required.
Exploring The Blog Post Editor Window
The second section of the blog posts page is the Blog Post Editor Window. This is where you enter your blog post’s text and images. Simply add your text and use the Blog Post Editor’s Toolbar to stylise as you want. If you want to add images to the post, just drag and drop them in to the post. Use the image’s Toolbar to choose whether you want the image to stand on its own or be integrated with your text. You can also use the image’s Toolbar to add Alt Text to your image.
If you are using EverWeb 4.0 or higher, you can also add paragraph styles to your text. Just select he text you want to use a paragraph style with then choose the style from the Blog Post Editor Toolbar.
When you create your blog post text and add images, you will see them in the Blog Preview window below the Blog Post Editor Window. This is the third section of the Posts page.
Exploring the Blog Preview Window
The final section of the Posts page is the Blog Post Preview. This section is similar to a Master Page. If you add objects in to this area, they will appear on all the pages of your blog so be careful what you add! This section is useful as it shows you a live preview of how your post will look. Typically, you will add objects in to the header and footer areas of this section, leaving the middle empty for your post’s contents. If you are not comfortable using the Blog Preview as a Master Page, you can always add a Master Page to the Posts page using the Inspector Window’s Page Settings tab. Just set the Master Page you want to use in the Master Page field dropdown menu.
Post Page Widget Settings
The last section of the Posts page is the Widget Settings that run down the right hand side. Here you can set multiple options that will affect all of your blog posts. This is the section where you define the style of your blog posts. In addition, you can also add a Comments Section if you want to engage with your audience. EverWeb supports both Disqus and Facebook Comments.
For more details on the blog Posts page , please checkout our other videos, or take a look at our blogging videos in the EverWeb Video Training Library!
If you have any comments, or feedback on EverWeb’s blogging feature, please let us know in the Comments Section below. We’re here to help!