Archive for the 'SEO Tutorials' Category

Better SEO with EverWeb’s New Language Localization Feature

Thursday, August 3rd, 2017

Language Localization with EverWeb for Better SEO


EverWeb 2.4’s new Language Localization feature improves your website’s SEO for better search engine ranking results by using language localization to better serve visitors searching the web with more relevant search results.

You can apply language localization in EverWeb in three ways:

  1. Globally, to your whole website;
  2. Globally with specific pages overridden to use specific local language settings;
  3. Only specific pages localized. No global language localization set.

To illustrate how these settings are applied we will use an example of  a farming company based in the United Kingdom which has set up their own website in EverWeb. At present, the website is designed to serve only customers in the United Kingdom. As such, we can set the language in EverWeb at the global, website level only so that search engine results are focused more towards serving potential UK customers only.


Setting Language Localization for the Whole Website

To set the language localization for the website as a whole:

  1. First go to the Site Publishing Settings in the Project file, using the File-> Edit Publishing Settings menu or by clicking on the name of the website in the Web Page List.
  2. In the Head/Footer section is an option for ‘Language’. Click on the drop down where you will see a whole host of languages. In this example, scroll down to ‘English’, or just press ‘E’ on your keyboard to take you to the start of the section of languages beginning with ‘E’.
  3. As there are many countries where English is spoken it is important for SEO to select the setting that best suits your situation. In this example, as my website serves only customers in the United Kingdom, ‘English (United Kingdom)’ is the most suitable option. If my website was designed to serve only customers in the US, I would select ‘English (United States)’.
  4. To apply the Language localization setting, publish the website. It is recommended to publish the whole website using the File -> Publish Entire Site menu option.
  5. If your website is not tied to a particular geographic location, e.g. you have a global website shopping website, you can still specify a language localization at the global level e.g. if my farming company only sells products via the Internet, I could set the Language setting in Site Publishing Settings to just ‘English’ without any country specified.


Overriding the Global Language

Imagine that the farming company has grown and now sells its products two other countries: The Netherlands and New Zealand. To accommodate this growth, extra web pages have been created in the Project file in the Dutch language to target the market in The Netherlands. To help better search engine ranking results in the Dutch market, I can apply EverWeb’s Language localization setting specifically to better serve the Dutch market:

  1. First select one of the pages used for the Dutch market and make sure that the Page tab is selected in the Inspector Window.
  2. Next go to the ‘Language’ drop down in the Page Details section.
  3. Select ‘Dutch (The Netherlands)’.
  4. This setting will now override the global Language setting of English (United Kingdom) that we set up earlier so that search engine results will better target the Dutch market.
  5. Publish the website to apply the changes.

For my customers in New Zealand, the written language is still English, but if I make pages specifically for my New Zealand customers, I can ‘language localize’ these pages by selecting ‘English (New Zealand)’ on a page by page basis in the same way I have sone for my Dutch customers.


Language Localization For Specific Pages Only

EverWeb’s Language Localization feature can be set just on a page by page basis without a ‘global’ language localization being specified in Site Publishing Settings. There may be specific instances where you may want to use this option. Generally, though, you will usually use the one of the first two options described above.


Watch The Video Walkthrough

If you would like to see EverWeb’s Language Localization feature in action, check out our Language Localization for Better SEO video on our YouTube channel.


As always we would love to hear from you if you have any comments, suggestions or feedback. Please let us know in the Comments section below!


EverWeb on Social Media

You can also find EverWeb on the following social media platforms:

Facebook

Google+

Flipboard

YouTube

Twitter handle @ragesw

SEO News Round Up

Friday, July 1st, 2016

One of the most important aspects of website development is Search Engine Optimisation (SEO.) It’s an essential element to incorporate in your web pages as it may affect your website ranking in search engine results pages (SERPs.) When creating your website in EverWeb you should add ‘Keywords’ to your web pages so they are optimized for search engine spiders. If you have not added Keywords to your website, or have not thought about SEO yet, take a look at the ‘SEO for EverWeb Video Course‘ which explains all you need to know about SEO and how to implement it in EverWeb.


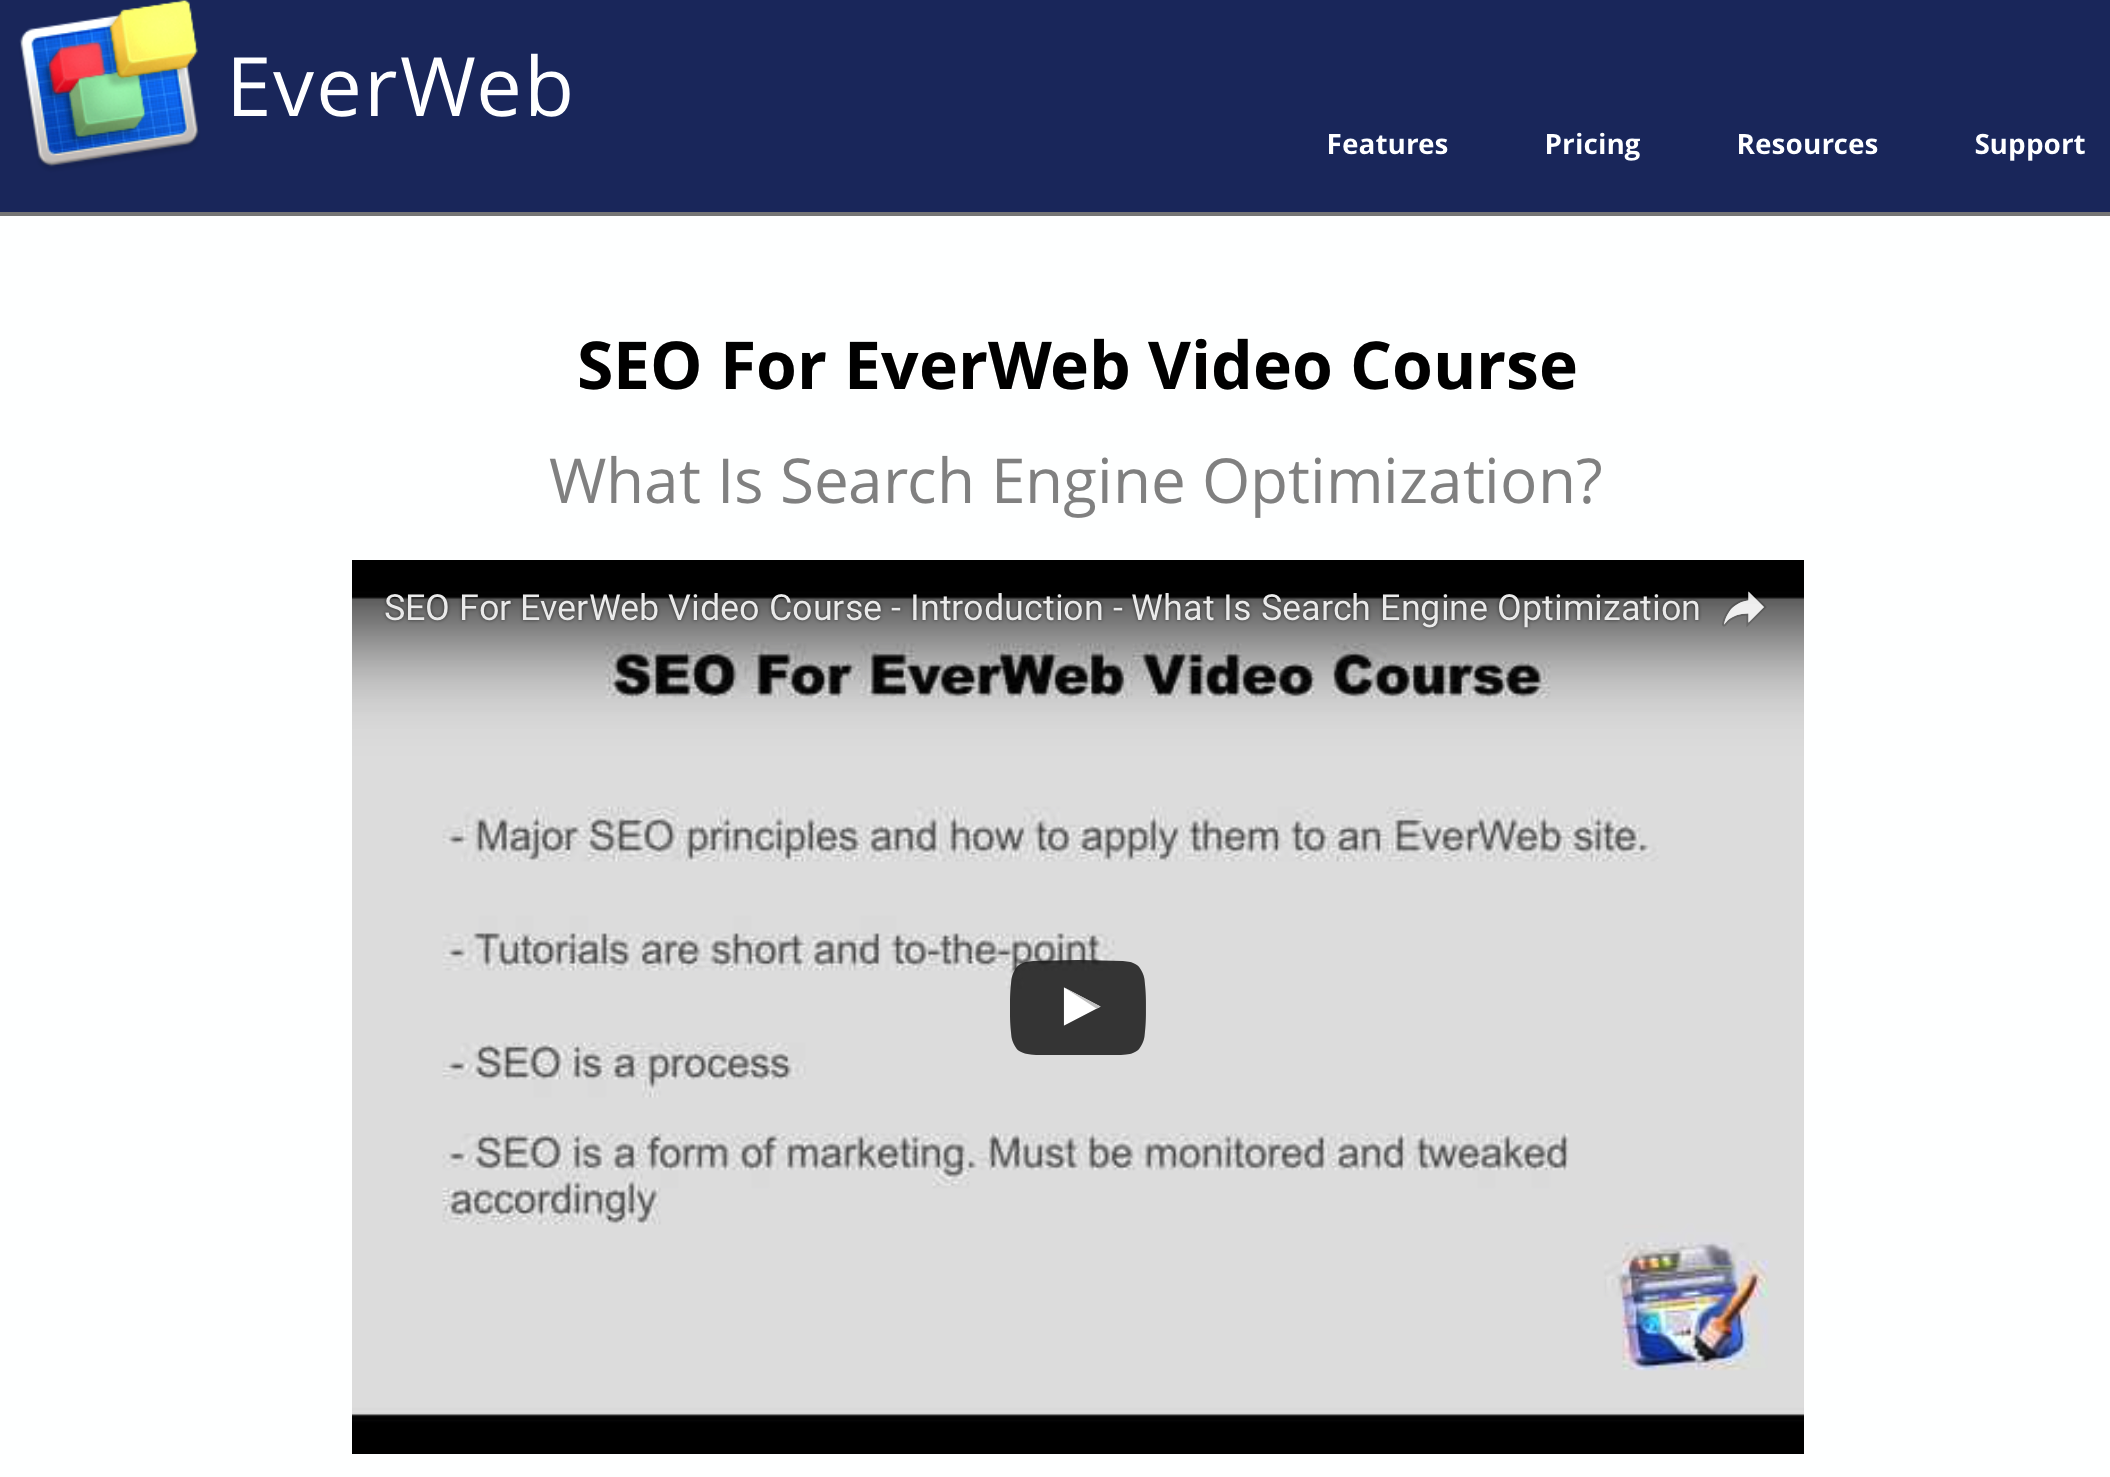
EverWeb SEO Course

The SEO for EverWeb Video Course is the perfect start to learning about how to apply SEO in EverWeb.


SEO itself is not a static concept, it’s dynamic and constantly changing as our patterns of Internet usage change and technology develops. In this Blog we’re feature some recent SEO articles below to help you stay up to date with SEO to keep your website tuned to keep it’s SERP ranking optimized.


Don’t Avoid Linking To External Websites

Do you include links to external websites in your own website? There’s a tendency to exclude external links from websites as developers and website owners believe that such links take visitors away from their own site. Google’s Gary Illyes has a different view on external links:

“The internet is built upon links, links are essential for the internet.”

Read more and see the video in ‘Google’s Gary Illyes: I’m Angry News Sites Don’t Link Out, It’s Stupid‘.


What happens if the focus of your website changes over time?

When developing your website you should include SEO as part of the development process. However, do you review your website’s SEO when you update or change it’s content? And what happens if you decide to change the focus of your website at a later date? Will this change your ranking? Find out more in ‘How Google Handles a Site When It Changes Topic Focus


Google Launches Mobile Friendly Update Algorithm

Google’s ‘Mobile First’ strategy for SEO gained a boost in May when it completed the launch of it’s mobile friendly ranking algorithm. It’s a good reminder that mobile’s importance is growing fast and that all websites should have a mobile version, with SEO included!


Related Topics

SEO in EverWeb

SEO for EverWeb Video Course

And don’t forget our YouTube Channel where there’s more content about EverWeb and SEO.

How To Use EverWeb’s SEO Features

Friday, August 21st, 2015

One of the most important features of EverWeb is its Search Engine Optimisation (SEO) capabilities. However, you won’t find ‘SEO’ on any menu or listed in any dialog box. So why is SEO so important for your website and where do you find and effectively use EverWeb’s SEO features?

To answer such questions we need to first explore the nature of SEO. Much has been written about SEO as the ‘Holy Grail’ that every website developer must find. In reality, it boils down to the following things that you should know:

1. SEO is the term used to describe the way in which you make your website as visible as possible to Internet search engines such as Google, Bing, Safari etc.

2. SEO is important. With over 1 billion websites out there, SEO is the best way to get your website as high up in search engine results as possible.

3. SEO uses ‘Keywords’ to help search engines find your website pages through specific pieces of software called ‘Spiders’ .

4. Using the right type of Keywords is important so that search engines find your website more easily. If you use generic words for your Keywords e.g. ‘computer’, your website will never be found. The Keyword in this example is too general. A quick Google search finds 2,250,000,000 results!

5. SEO does not guarantee anything. However, it can be a great help in improving your website’s visibility if used properly.

6. SEO should be used on any pages that you want to draw attention to. Again focus on what is unique to your website. ‘About’ and ‘Contact’ pages will be too generic to be of much use for SEO.

7. SEO should be used on both your ‘mobile’ and ‘desktop’ web pages. Mobile is a priority for Google and it should be for you too!

8. There is no magic to SEO, you just need to know how it works so that you can get the best possible search result listing.


EverWeb and SEO

The use of good Keywords is, therefore, important in optimising your website for search engines. The question is, where do I put my keywords and what words should I use? let’s start with the Where…

The first thing to note is that you may want to use SEO on different pages of your website as different pages have different purposes. You will want your Keywords to be tailored to what the purpose of the page is.

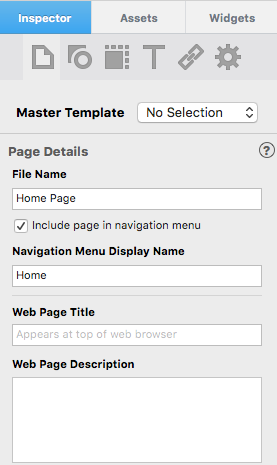
In EverWeb you can enter Keywords in to the following fields in the Page Inspector (see screenshot below):

1. File Name: You can use the file name of your page to act as a Keyword.

2. Navigation Menu Display Name: This field is good to use for SEO as it provides links to other pages. This is something that search engines look for

3. Web Page Title: This is the text that you see at the top of the browser window. It’s great if you can add in some Keywords in to the Title, but remember that you should not sacrifice your visitor’s experience just for the sake of SEO.

4. Web Page Description: The page description is not a field used in SEO but you can use keywords in the description. Again remember your visitor experience when writing your description.

Inspector SEO

You should also use SEO with any Image files you are using. Search engines look at image file names as well as text Keywords. Therefore, it’s important that your image files have an appropriately descriptive name. If not then rename the image files before importing them into EverWeb. If you have already imported your image files in to EverWeb, rename them via the Assets tab.

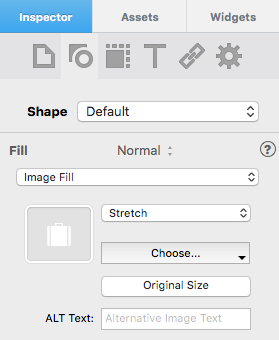
In addition to using descriptive file names for your images, your SEO may be helped by adding Alt Text to your image files in EverWeb. Use the ‘Alt Text’ field in the Shape Options tab to add in a sort description of your image (see screenshot below).

Shape Options SEO


Which Keywords Should You Use?

This is where you need to have a Keyword strategy and do your research before using adding in Keywords. As discussed above, if you used ‘computer’ as a keyword you would have no chance of standing out from the crowd. Instead think of Keywords that are specific and focused on what your clients are going to be looking for. As an example, if you are a company selling shoes, think about any specialist type, or brands, of shoe that you sell, for instance, clogs. The word ‘clog’ is a more specific and better Keyword than using the word ‘shoe’. The more specific and focused your Keywords, so much the better!

Use just a few Keywords in the fields mentioned above. Remember that having too many Keywords may lessen the focus of your SEO, and may also undermine your visitor experience. Having a website just littered with Keywords without meaningful text is not very appealing.

The good news is that help is available for finding the Keywords that are best for you to use. Google provides the ‘Google Keyword Planner’ just for this very purpose as part of Google Analytics. See https://adwords.google.com/KeywordPlanner for more information.

In answering the original question posed at the start, SEO is baked in to EverWeb in many different places. It underpins EverWeb, so be sure to remember to fill in the appropriate fields with a few well chosen Keywords when you are building your web pages. Having an appropriate, sensible SEO strategy that balances visitor experience against your search engine ranking will help you get more hits on your web site, and hopefully more online business!


What Next?

We have only been able to give you an overview of SEO in this Blog. There is much more to discover so why not begin by exploring the ‘SEO for EverWeb Video Course’.

Do’s And Don’ts Of Back Links – Improving SEO

Thursday, December 20th, 2012

A recent hot topic of discussion involves ‘back links’ and how they might affect your website’s rankings. Most of you who are familiar with search engine optimization (SEO) know that back links are an important part of your SEO efforts. Search engines, especially Google, use back links to influence how sites get ranked in their results.

A recent popular video of ours talks about a Google change that may penalize a website for having low quality back links. That video teaches users how to check the links pointing to their site by using SEIntelligence’s back link checker.

This Google change can be somewhat confusing for some users. Determining what constitutes a low quality back link is up for interpretation. Should users stop trying to get back links, or should users do things differently when trying to get back links? These types of questions and more will be addressed in this Do’s and Don’ts of back links.

Don’t

  1. Don’t use software, or pay someone else to use software to automatically get your site a large amount of back links. These methods are unethical techniques and can result in your site being subjected to Google’s new update, which could lead to a decrease in rankings.
  2. Don’t focus on one key term for every anchor text used. Anchor text is the text in the clickable link that users can click on to be taken to the linked page. A variety of anchor text is a more natural way for a site to obtain links.
  3. Don’t focus on the quantity of links. High quality links can go much further than obtaining many links from low quality sources. It can also look a bit suspicious if one day you have 25 back links and the next day you have 25,000. Google has ways of recognizing these things. These methods can result in a site’s rankings to drop.

Do

  1. Do continue contributing on forums and other social networking sites (including Facebook, Twitter, blog comments etc.). If you have something valuable to add to any conversation, including a link to your site, continue participating and placing your link. While some forums may be considered low quality by some search engine’s standards, it is still a good idea to communicate with your community and drive traffic to your site. Your rankings will not be harmed by this.
  2. Continue communicating with other web masters who might benefit from a link swap with you. If both of your sites have something good to offer, then it is always a good idea to continue exchanging links. Just be careful not to exchange links with sites that might not be helpful for you. Do research on a site before agreeing to link to it.
  3. Try to spread your links across several domains. In other words, don’t just keep getting links from the same website.
  4. Continue writing high quality articles with keywords linking back to your site. Just make sure that the site(s) you are posting the articles to are high quality sites. The same rule applies for press releases.

To summarize, the important thing to keep in mind is to always use common sense when determining if a linking technique might harm your site. If it sounds too good to be true, it most likely is. Focus on making your website have great content and the links will naturally roll in.


How To Pin An Image In Pinterest

Monday, November 5th, 2012

Pinterest is a site that showcases popular images posted by users. Images are linked back to the original site that they were posted from. This can be utilized as a marketing tool if you have nice images displaying your products that you have for sale on your site. This short video will show you how to ‘pin’ your images so that other Pinterest users can see them.

VIDEO TRANSCRIPT:

Pinterest is another great way to promote your businesses products, and hopefully catch the attention of users browsing the site. Think of Pinterest as a bulletin board where users pin images to. Users can then click on the image and be taken to the website where the image was pinned from.

Images with many repins will be the ones you see on the main bulletin board at pinterest.com

So how can you pin some images from your website? First, click on the Join Pinterest button. You can sign up with your Facebook account, twitter account, or using your email address. Any of the three options will do. I’m going to fast forward through the sign up process as that is pretty basic, and just skip ahead to the part about pinning.

So once you have signed up and are logged in, go to pinterest.com/about/goodies

You should land on a page that looks similar to this. Locate the Pin It button, and drag and drop this button onto your bookmarks bar. So if you are using Safari, the process should look just like this.

Now, head over to your website and locate an image that you want to pin. Once you are on the page with that image, click on the Pin It button. You will then be shown all of the images on the page. Click on the image that you want to pin. A popup window should appear. If this is your first time pinning an image, you will need to create a board for it. The board is basically creating a new bulletin board for this image to be pinned on, since it cannot automatically be pinned on the main board at pinterest.com. For my example, my business is called Jeremy’s Golf Shop, so that is what I will name this board. Then, all you need to do is click Pin It, and you’re done.

You can now pin more images if you want. You can add them to the same board that you just created, or create a new one if you want. You are not limited to pinning images just from your site. You can pin images from any website.

This can be a good marketing tool for users who sell items such as clothing or jewellery, or almost any product that would catch the eye of someone browsing through Pinterest.

For more helpful tips and tricks, please subscribe.

SEO Frequently Asked Question – Title tag and Description Updating In Google

Thursday, October 4th, 2012

We get a lot of questions from our customs at RAGE, many of which are quite similar. The video below identifies one of those questions and provides a clear answer. If you have any questions you think others may want to know the answer to, feel free to leave them in the comments section below. Also, be sure to subscribe to our YouTube channel so you don’t miss out on any of our great helpful tips and tricks videos.

VIDEO TRANSCRIPT:

This question comes from Shannon in Florida.

I recently learned that the title tag is what shows up as a site’s title in Google, as well as the meta description is what sometimes shows up right beneath the site title. Since I was not happy with what my results looked like in Google, I decided to change both the title tag and the meta description using SEIntelligence, but when I search for my site in Google, the old title and old description still appear. Why is this happening?

This is a very common question that we get from many users. The most important thing to keep in mind is that while your website changes appear as soon as you publish them, Google’s search results do not operate in real time. What this means essentially is that you just need to wait a bit so that Google can update their search results. How long does this update take? In some cases, it can be as quick as just a few days, but in most cases, allow for at least 3 weeks before seeing the changes appear in Google.

For more helpful tips and tricks, be sure to subscribe.

How to remove your web.me.com (MobileMe) address from Google

Saturday, March 17th, 2012

After switching from MobileMe to a real web hosting service many users are finding that their web.me.com website is still appearing in Google, and often higher than their new website.

This happens because your web.me.com website has been around longer and your new website has the exact same content. Google is not likely to show two websites with the exact same content so you need to make sure you do this as quickly as possible once you move to a real web hosting service.

1) The first thing you are going to want to do is create an XML Sitemap for your new website. You can do this very easily with Sitemap Automator. Follow the instructions for publishing and verifying your website with Google Webmaster Tools (Hint: We have video tutorials on the above page that explains how to do this step by step.)

2) Delete the content from your web.me.com website. You can do this by mounting your iDisk in the Finder (or longing in to your iDisk at http://www.me.com) and going to the Web/Sites/ directory. Delete the contents in this directory.

2a) Advanced: Instead of deleting your content in step 2, you can also use a meta refresh with a refresh rate of 0 to redirect traffic from your web.me.com website to your new website. If you have set up your new website with our Web Hosting services we can help you with this. Otherwise you will need to contact your web hosting company.

3) The changes will not be reflected immediately. If you did step 2 above and you do a search for your website the web.me.com address will still appear in search results for about a week but will go to a non-existing page. If you did step 2a above your web.me.com page will still appear in search engines but will redirect to your new website. Eventually your new site will start to rank higher than your web.me.com page and your web.me.com page will be removed from Google’s search results.

4) Bonus: If you want to completely remove your web.me.com website from Google and other search engines as quickly as possible you need to create a robots.txt files that disallows search engines from indexing your website. To do this create a plain text file called robots.txt and enter the following code exactly as shown below in it;


User-agent: *
Disallow: /

Then put this robots.txt file on your iDisk in the Web/Sites/ directory. Again, if you are using our web hosting services we can do this for you. Otherwise you will need to contact your current web hosting provider.

That’s it for moving your iWeb website from MobileMe to a real web hosting service. Don’t worry, even though Apple has discontinued MobileMe, iWeb will continue to work for a long time as long as you have it installed on your computer. If you are looking to optimize your iWeb site for Google and other search engines, take a look at our iWeb search engine optimization training courses.

SEIntelligence : Website Content

Wednesday, November 16th, 2011

Your website content is so important for making a well rounded search engine optimized website. Watch the tutorial below to learn how to use the ‘Content’ tab on SEIntellgience.

Video Transcript:

Website content is an extremely important aspect for making a well rounded search engine friendly website. Without content, a website stands little chance of ranking high in search results.

On the content tab, you’ll be able to see the code for your page. If you don’t like looking at code or don’t know how to read it, then don’t worry about it. Just look at the suggestions below.

Read the recommendations and make the applicable changes to your site. Please note that these changes are not made here in SEIntelligence, but rather in your website builder or HTML editor.

Just a quick note for users who are using drag and drop editors such as iWeb, or web based builders such as WordPress. Some of the recommendations you will not be doing. For example. this recommendation states to add an address tag to each page. You would not do this recommendation as your website builder does not allow for it.

SEIntelligence : Alt Text

Tuesday, November 15th, 2011

SEIntelligence also makes it incredibly easy to add alternative text, or alt text, to your website images. Watch the following video to learn more about alt text, and how you can easily implement it on your website through SEIntelligence.

Video Transcript:

A picture may say a thousand words, but to search engines it doesn’t say much. Because of this, and a few other reasons, the alt attribute exists. On the Images tab, you will see the Alt Text and Image columns. Under the image column, you will see the file name of your images. If you click on each of them, you should be able to see previews for your images.

So why do we create alt text. As stated earlier, search engines are not really able to see an image the same way a human is able to. For search engines, the alt text can be a helpful way to understand what an image is. The alt text is also helpful when an image does not show up in a browser. This might happen when the image doesn’t load properly, or the user is using a non-visual web browser. In it’s place, the alt text will typically appear.

To add, or change your alt text, click in the alt text area and type your alt text. Your alt text is almost like a brief sentence, or a few words describing your image. Avoid using one word descriptions, but also avoid writing excessively long sentences.

Be brief, and to the point, while trying to include high quality key-terms that users would actually search.

For example, this image shows a set of men’s left handed golf clubs. This is exactly what I will type in. It contains good keywords, and describes the image perfectly. It wouldn’t be enough if I typed in golf clubs as that doesn’t really describe the photo well. It would be too much if I typed in left handed golf clubs that are nice and shiny and super expensive to buy.

When you type your alt text, it can be exactly like you see here. Almost like you are writing a sentence. No hyphens or commas are needed to separate the words.

SEO For iWeb : Header Tags

Thursday, November 10th, 2011

Adding header tags to an iWeb site has never been easier. Follow the instructions carefully in this video tutorial to learn how you can properly add header tags to your iWeb website.

Video Transcript:

Being introduced for the first time ever, iWeb users will now be able to add header tags to their websites, without having to hand code it in the HTML. Header tags are another way for you to demonstrate to search engines which keywords are important on your page.

So what is a header tag, and how do we make one?

Basically, a header tag is a block of text that can be compared to a title, or a headline for a larger body of text. Think of a newspaper article. There is a headline which indicates what the entire article is about. Then there is a subheading which gives a bit more insight into the article.

Our websites are similar to the structure of a newspaper article. A headline can contain our primary key term for each page, and an optional subheading can contain our secondary key term for each page.

In HTML, there are six headers that you can use. Those headers are h1 through h6. I am only going to demonstrate adding an h1 header since that is what most of you will be doing. If you want to add an h2 as well, then feel free to do so. h1 and h2 are the most popular headers, so use those if you have room on your site. Trying to add all headers to your site is not generally a good idea, unless your site is structured in a way that makes sense to do so. Also, the rule of thumb is to only have one h1 per page.

So to do this in iWeb, simply click on the Text Box button, and type in this code you see here.

The area where I wrote ‘This is my header tag’ is where you should type in your header tag. The HTML here should look identical to mine. But the text part should contain your header tag which could be anything you want it to be. I recommend putting the main key-term you are targeting for this specific page.

Before we move on to the next step, I want to point out that you can also change the font of this text like you normally would with any text, by highlighting the text and clicking on the Fonts button.

Now when you publish your site to a local folder, and load the site in iWeb SEO Tool, you must check the box to Convert header tags in text boxes to HTML code, and then press the Apply To Entire Site button. What this will do is strip the HTML code from the site, so that only the actual text is being shown. Remember, your header tag should be visible on your site. If you can’t see it, or if you still see the HTML code, it means you did not do this process correctly, and you will need to try again.

Some of you can expect to run into some issues when adding header tags. For example, you will notice that the header tag does not always end up in the same place online as it did in iWeb. This is normal. You may need to play around with it a bit until you find the right spot. To make things easier on yourself, try not to place the header too close other items on your page. This will leave you with a bit of a buffer for when the header ends up in a slightly different location.

Also, if your site has a black background, you most likely won’t be able to see your header. If that is the case, just send us an e-mail read this knowledgebase article on how to alter the font color.