Archive for the 'Social Media Optimization' Category

Choosing the Right Blog Commenting Engine in EverWeb

Thursday, March 3rd, 2022

When setting up your blog in EverWeb, you might want to include a comments section so that your visitors can comment on, or discuss, your posts in a public forum. A comments section is a great way to engage more directly with your website visitors and customers, helping you garner feedback on your current products and services. You blog can also help you poll visitors about ideas that you may have for future products or services, in an easy, cost effective way. If you are not running a business, the comments section in your blog may just be a place for active, lively debate and discussion!

Choosing Your Comment Engine

EverWeb offers you two Comment Engine choices: Disqus (www.disqus.com) or Facebook Comments (www.developers.facebook.com). Both of these Comment ‘Engines’ offer similar features to each other although there are some important differentiators that may persuade you to choose one comment engine over the other. Typically the comment engine that you choose will be determined mainly by the audience that you want to target with your blog.

Note that you will first need to create your user identity in the comment engine of your choice before being able to use this. In Disqus, this is known as a ‘Shortname’ whilst in FaceBook Comments this is known as an ‘App ID’.

You can find a step by step guide on setting up your Disqus or FaceBook Comments comments engine in the EverWeb User Manual, which you can find from the Help-> EverWeb PDF Manual menu option.

Below is a summary of the main features or each Comment Engine and its perceived advantages and disadvantages to help you decide which is best for you to implement.

Disqus

Disqus was founded in 2007 and has more than 35 million users worldwide. Disqus’ main features include…

  1. Real Time Discussions
  2. You can login using Facebook, Twitter, Google, Yahoo!, Microsoft and others
  3. Threaded Comments
  4. Comments can be imported and exported
  5. Comments are easy to edit
  6. Discovery feature to find further website content
  7. Comment Moderation can be done using Email

The advantages for using Disqus are..

  1. Real time commenting and alerts
  2. Easy to use interface

FaceBook Comments

The FaceBook Comments engine leverages off of FaceBook itself to link comments to users public FaceBook profile. Facebook Comments features include…

  1. If you are logged in to Facebook you can comment immediately
  2. You can login via Facebook, Yahoo! or Microsoft
  3. Threaded Comments
  4. Like and Reply options are included
  5. Analytics are free
  6. Comments ordered by the number of Likes
  7. It includes a good Anti-Spam tool

The advantages of using FaceBook Comments are…

  1. Visitors publishing comments on their public Facebook Profile
  2. Where you have a large number of website visitors using Facebook

Making Your Choice…

Facebook Comments will probably be your choice of Comment Engine if you have a large number of website visitors using Facebook and for visitors who want their comments published in their public Facebook profile.

if you are looking for ease of use, realtime commenting,longer term engagement and SEO features, Disqus will likely be your preferred Comment Engine.

Adding Your Comment Engine to Your EverWeb Blog

Once you have chosen your Comment Engine and have either your App ID or your Shortname, you can activate your Comments Section in your EverWeb made blog.

Simply go to the Posts page in your EverWeb project file, then scroll down to the bottom of the Widget Settings pane. The last section is ‘Comment Options’. Select either Disqus or FaceBook Comments from the dropdown menu then enter in either your ‘Shortname’ or ‘App ID’.

More About Blogging in EverWeb

You can find more information about blogging in EverWeb in the EverWeb User Manual via the Help-> EverWeb PDF Manual menu option. There are also a number of videos relating to blogging on our YouTube channel.

If you have any questions about blogging, or anything else, in EverWeb, please let us know in the Comments Section below!

EverWeb on Social Media

You can also find EverWeb on the following social media platforms:

Facebook

Flipboard

YouTube

X

Instagram

Using ALT Text in EverWeb

Thursday, October 14th, 2021

You may have noticed when using EverWeb, that there are quite a few places where you see the words ‘Alt Text’ displayed in the Inspector Window. You may also see that some widgets also include ‘Alt Text’ in their options. But what is Alt Text, what does it do, should you be using it in your site and if so, how can you get the best out of using it? Let’s find out…

What Is Alt Text?

Alt Text stands for Alternative Text. It is the ‘alternative’ to using an image. Alt Text replaces an image when the image itself cannot be loaded and viewed on screen. In addition, the other original intention of Alt Text was for it to be used to help visually impaired people who used special equipment that would read the contents of the screen back to them.

Alt Text and SEO

Adding Alt Text to an image in your EverWeb Project can also benefit to your site’s SEO as Alt Text allows search engines to better crawl and rank your website. All in all, adding Alt Text to the images in your website will make for a positive experience for your potential and existing visitors.

Adding Alt Text To An Image

There are a few places in EverWeb where you add Alt Text to your images. If you have standalone images anywhere on your page, just select the image you want then go to the Shape Options tab. In the ‘Fill’ section you will see there is an Alt Text field. Just enter in the text that you want to use. It’s that simple. If you use an image more than once in your site from the Assets List in the Assets Tab, you will need to add Alt Text to the image each time you use it. If you copy the image whilst it is on the Editor Window, using Copy and Paste, the Alt Text attribute will be preserved.

Remember that when adding Alt Text that it should be a brief description of what the image is, in less than 125 characters. A brief description is important because of the points made earlier in this post about the Alt Text being used for the visually impaired and also its role in replacing the image if it cannot be loaded in to the browser.

Many of EverWeb’s widgets also contain Alt Text fields e.g. the FlexBox and Text Section widgets. For the Image Gallery widgets, you can use a Caption to inform the visitor of what the image is if it cannot be displayed on screen.

Using Alt Text To Its Best Advantage

When you add a Alt Text description to an image, remember two things: First, be descriptive and do not use just a collection of keywords as your description, and second, bring out the detail and specifics of the image wherever you can e.g. if you have an image of a boat you might want to say, ‘The new 30 meter yacht, Princeton, launching from Dover Harbour, England.’ A third point is to remember the context of the photo in your site. In the example just sited, the context is easy as there is reference to both an event and a place. If your image is a generic one, for example, from a stock photo site, you should add Alt Text for the image that applies context to it within the page. As an example, I may want to use a stock photo with the word ‘SEO’ in it on my page. For the image’s Alt Text I could add some context relevant to my site by using this description: ‘EverWeb’s SEO Video Course is available on YouTube.’

Images in Your Project File

When using images in your Project file, it is always a good idea to name the image file descriptively before you grand and drop the file in to your EverWeb Project. This method is the best way for website crawlers to discover your image and use it when ranking your site. If you have already imported your image with a non-descriptive file name, you can still rename it in EverWeb. Just double click on the image in the Assets List and rename the file. In terms of SEO, this is OK, but is second best to renaming the file before importing it into EverWeb.

Alt Text is a great way to add accessibility to your site, it creates a more positive experience for your visitors and it can help boost your SEO. Use it only on the images that are important to your site. As with everything SEO, you do not need to add Alt Text to images that do not need it. Focus on what is important in terms of your site’s SEO.

More information on EverWeb and SEO can be found on the EverWeb website.

EverWeb on Social Media

You can also find EverWeb on the following social media platforms:

Facebook

Flipboard

YouTube

X

Instagram

EverWeb, Open Graph Tags and SEO

Thursday, September 9th, 2021

If Search Engine Optimization is important to you, then EverWeb’s SEO Power Up could be a great addition to your EverWeb purchase. SEO Power Up Addon extends the range of EverWeb’s already built in capabilities by submitting your website to search engines from Google, Bing, Yahoo and Alexa.

EverWeb SEO Power Up also contains a variety of features so that you can more specifically optimize your website’s pages to get the best advantage when search engines crawl your site. You can change the priority of the page and the frequency in which the page is crawled by search engines.

Whilst EverWeb’s new add on debuted in version 3.4, it’s been improved in EverWeb 3.5 with the addition of Open Graph Tags.

What are Open Graph Tags?

The Open Graph Tag Protocol was originally developed by Facebook. Open Graph Tags are code snippets that determine how URL’s will be displayed in Social Media. What the Open Graph Tag does is to create the best feature rich preview of the URL possible.

How Does The Open Graph Tag Work?

The Open Graph Tag will look at the data and information that comes with the URL and will build a preview based on this e.g. the page title, page description and so on. Whilst apps generally try to create the best preview possible on their own, the Open Graphs Tag helps to provide richer previews so that your content stands out more in Social Media.

What are the Advantages of the Open Graph Tag?

The advantages of Open Graph Tags are that they:

  1. Create the best feature rich previews for shared media links.
  2. Help your content to stand out amongst other content.
  3. EverWeb’s SEO Power Up addon adds Open Graph tags automatically.
  4. Facebook, LinkedIn, Pinterest and Twitter are some examples of apps that take advantage of Open Graph Tags.

What Do I Need To Do in EverWeb?

As Open Graph Tags are part of the EverWeb SEO Power Up addon, there’s nothing you need to do as EverWeb will apply the tags to URLs automatically for your website. If you share URL’s on Social Media, they will be automatically used if the app takes advantage of the Open Graph Tags Protocol.

What About Open Graph Tags and SEO?

Open Graph Tags are meta tags and so will have an indirect influence and impact on your SEO. The advantage of Open Graph Tags is that they should improve the performance of your links in Social Media, which is a plus in itself. You may like to think of the Open Graph Tag as an optimization for the URL link when used in Social Media.

As always, we aim to make life easier for you when developing your website! And now with Open Graph Tags in EverWeb SEO Power Up, you get better, richer Social Media previews for your website URL’s without having to do anything!

EverWeb on Social Media

You can also find EverWeb on the following social media platforms:

Facebook

Flipboard

YouTube

X

Instagram

EverWeb 3.5: Apple Silicon Ready, Website Search, Blog Post Summaries and More!

Saturday, July 10th, 2021

We’re excited to introduce EverWeb 3.5 which is all about Website Search! Two great new widgets give you fully customizable website search options and three ways of displaying the search results. That’s not all though as we have added reverse wrap to the Responsive Row widget, Short Summaries and keywords to blog posts for better SEO and Open Graph tags have been added to the SEO PowerUp addon for better social media interaction.

Last, but not least, EverWeb 3.5 has been developed as a macOS Universal Binary, so will run natively on Apple Silicon Macs without the need to use Rosetta 2 as well as running on Intel Macs as always!

All this and more in EverWeb 3.5! Check out EverWeb’s new features in the video at the top of the page and below for a complete list of its new and enhanced features as well as the usual fix list.

Which Version of EverWeb is For You?

EverWeb is available in the following versions:

  • If you are running an Intel Mac running OS X 10.10, macOS Yosemite, El Capitan, Sierra, High Sierra, Mojave, Catalina or Big Sur, EverWeb version 3.5 is available for you.
  • If you are running an Apple Silicon Mac running macOS Big Sur, EverWeb version 3.5 is available for you as a Universal Binary. EverWeb will run natively without the need to use Rosetta 2.
  • If you are running OS X 10.7 – 10.9 (Lion, Mountain Lion, Mavericks) EverWeb version 3.1 is available for you.
  • If you are running OS X 10.6 EverWeb version 2.5.2 is available for you.

When updating to the latest version of EverWeb, the update process will automatically download the correct version of EverWeb for your operating system.

EverWeb 3.5 Includes…

  • [NEW] EverWeb 3.5 can be run on Apple Silicon Macs as a Universal Binary using macOS 11 Big Sur.
  • [NEW] Search Website feature allows your visitors to search your website’s pages.
  • [NEW] Website search results can be displayed in a dropdown list, a popup window or on a dedicated page.
  • [NEW] Search Field widget allows you to set up a search bar and search results.
  • [NEW] Search Results widget allows you to display results in one of the pages in your website.
  • [NEW] Site Search section in the Page Settings tab of the Inspector window allows you to include or exclude the page in website searches.
  • [NEW] The Responsive Row widget now includes a Reverse Wrap option.
  • [NEW] You can now duplicate Form Controls in the Contact Form Advanced widget.
  • [NEW] YouTube widget now includes a mute sound option.
  • [NEW] Open Graph Tags are automatically included when you publish your site.
  • [NEW] Short Summaries for blog posts allow you to enter descriptive summaries about your posts.
  • [NEW] You can enter Keywords in your blog posts.
  • [NEW] The Blog Post Editor Toolbar now includes options for ordered lists to be either Default, Lower Alpha, Lower Greek, Lower Roman, Upper Alpha or Upper Roman.
  • [NEW] You can add Hex codes for colors in the Blog Post Editor Toolbar’s Color Picker.
  • [NEW] The Blog Post Editor Toolbar now includes options for unordered lists to be either Default, Circle, Disc or Square.
  • [NEW] A ‘Duplicate’ button has been added to the Contact Form Advanced widget’s Form Controls section.
  • [NEW] A ‘Test SMTP Details’ button has been added to the Contact Form Advanced widget.
  • [NEW] Option to only use local Jquery and not try to connect to Google servers has been added to Site Publishing Settings.
  • [IMPROVED] If you add or remove pages that are included in Navigation Menu widget only the pages with the Navigation Menu widget will have to be republished.
  • [IMPROVED] Improvements to loading HTML previews in HTML viewers for widgets that use plugins.
  • [IMPROVED] RSS Feed widget improvements for when images can’t be found in a feed. The widget will still properly preview.
  • [IMPROVED] Improved language localizations.
  • [FIX] Fixed an issue with shapes that use picture frames not exporting properly.
  • [FIX] Arrange-> Align-> Left and Arrange-> Align-> Bottom now work correctly.
  • [FIX] Shapes using Picture Frames could not have a colored background but now can.
  • [FIX] In the Assets List, secondary clicking on multiple assets and selecting ‘Add to Folder…’ would incorrectly add an external file to the images section of the Assets List if an external file was selected while some image files were also selected.
  • [FIX] Select color button now copies colors properly with the right click->Copy function.
  • [FIX] Assets that are used in blog posts can now be found properly.
  • [FIX] Render error icon for widgets when they cannot be generated due to compilation errors.
  • [FIX] Fix for exception on mouseover in Navigation Menu widget.
  • [FIX] Shadows now work for widgets and when exporting responsive css.

How To Update To EverWeb 3.5

You can easily update EverWeb by either:

  1. Launching EverWeb then going to the EverWeb menu at the top of the screen and selecting ‘Check for Update’ or by
  2. Downloading EverWeb from the EverWeb website.

After downloading EverWeb, double click on the EVERWEB.DMG file. A window will open. Drag the EverWeb icon on to the Applications folder icon. Once the file has been copied, you can close the installation window, delete the .DMG file and eject the EverWeb disk on the desktop by dragging it to the Trashcan.

Remember, you won’t lose any previous data when updating as your website project files are stored elsewhere on your computer.

The update is free for EverWeb + Hosting users and EverWeb Standalone users who are within their 1 year of free upgrades and support period.

You can easily check your EverWeb Standalone free update period from EverWeb’s Preferences window or from your client area.

If you have passed your one year of free EverWeb updates, you can purchase 1 more year of upgrades and support from your client area.

You can easily re-download earlier versions of EverWeb from your client area if you are not ready to purchase an additional year of updates and support.

Login to your client area and go to the ‘Manage Product’ page. On the left of this page, select ‘Downloads’ and choose the version of EverWeb that you need.

More Information About EverWeb

For more information about the new version of EverWeb, please check out the following resources:

  • The EverWeb website which has up to the moment information in it’s new blogging section
  • New EverWeb videos on YouTube
  • The EverWeb User Manual in EverWeb’s Help-> User Manual menu
  • The EverWeb Discussion Forum

If you can’t find what you need, or have any other questions, comments or feedback please let us know. We’re happy to help.

EverWeb on Social Media

You can also find EverWeb on the following social media platforms:

Facebook

Flipboard

YouTube

Twitter

Instagram

EverWeb Website Tips for Business During COVID-19

Friday, March 20th, 2020

The spread of COVID-19 across the world has left the world reeling. Many people are now working from home as a result of the necessary restrictions that have been put in place by governments across the world. For many small businesses and self employed entrepreneurs, the financial consequences are possibly devastating.

There are many challenges ahead. How can you make best use of your time at home and keep your business viable?

These simple questions may have complicated answers, but with more people staying at home, the Internet is being frequented more than ever! So now may be the perfect time to develop, or update, your website project to get the word out to the world that your business is alive and kicking!

Team EverWeb Is Here For You!

As always Team EverWeb is here for you! Our 24 x 7 x 365 (ok, 366 this year!) remains in place to help if you need it. Please remember that to use our technical support you will need a current EverWeb support and product update license.

Alternatively, there is also the EverWeb Discussion Forum that you can use if you have any questions, or if you need to know how to do something specific in EverWeb, or have feature requests for the product.

In addition, there is also the EverWeb YouTube channel with hundreds of video tutorials and this blog, as well as those by third parties, such as All About iWeb, which should help you find what you need!

So, how can you make your website the most visible it can be on the Internet for your customers to see and interact with or to purchase from? Here are some tips to get you started…

Invest in Your Website’s SEO!

If you have not tuned your website for Search Engine Optimization, now may be the time to do so! You use SEO to help improve your Search Engine Ranking Page results. The better your SEO, the better chance of your website being higher up the page when potential customers are searching the Internet for goods and services.

The SEO for EverWeb Video Course takes you though the whole process so that your website is as optimized as it can be! There’s no magic involved in SEO and it does not cost any money to implement it either! Just some of your own time.

Your E-Commerce Store Needs You!

If your website includes an online store, now may be a good time to refresh its content and look. If you have a PayPal account, EverWeb’s PayPal widget takes the strain away from adding products to your site. You can now directly add in product images and descriptions from within the widget. You can also use your own button images, or styled text buttons, to get the perfect look for your website.

Remember that your customers do not need to have a PayPal account to be able to pay through PayPal. It may be worth mentioning this in your website that PayPal is just the payment provider, and that the customer does not have to have a PayPal account to purchase goods and services from you.

Although EverWeb supports PayPal, there are other E-Commerce stores and platforms that are also supported, such as E-Junkie, ECWID and Shopify. If there is an E-Commerce platform that you need supporting, please let us know in the Comments Section below.

Keeping Your Customers Updated!

Customer contact is especially important at this time for a number of reasons. First, you want your customers to know that you are still in business, second that your business is taking precautions over the Corona virus, and third, you can effectively update your clients on the products and services that you offer. Your products and services may be subject to change due to the current business trading environment, so alerting your customers as to what is available (and when), and to any possible alternatives, is a proactive step to take.

Maintaining contact with your clients is also important so that your business is not overwhelmed by customers asking questions. You may need to consider altering your home page, or adding a specific page or blog to your site to keep your customers up todate.

The Power of Contact Forms!

EverWeb’s Contact Form Advanced widget is the perfect way to for customers to contact you. The widget is highly customizable so that your contact form blends in perfectly with your website design. If you are using EverWeb 3.0 or higher, you can also purchase our Contact Forms Enhanced addon. This is the perfect companion to the Contact Form Advanced widget in that it allows you to store all contact form submission data in one safe, secure place in your EverWeb Client Area. The database of contact form submissions can be downloaded on a per form basis which will allow you to create an email address list. You could then use this list in e.g. MailChimp to email out to your clients your latest business news and updates.

Keep Your Social Media Options Optimal!

Keeping the communication between your business and your customers is paramount at this time. Remember to include the social media widgets and buttons that are relevant to your business in your website. Social media is a great way to communicate quickly and effectively. EverWeb includes FaceBook Like, FaceBook Page Timeline, Twitter, LinkedIn, Vimeo and YouTube widgets in the product with third party widgets also available for other social media platforms. There are also a range of social media buttons that you can use as well from EverWeb’s Insert menu.

If you have any of tips that you think might help other EverWeb users during these difficult times, please use the Comments Section below! Thanks!

Safe safe and well.

Team EverWeb

EverWeb on Social Media

You can also find EverWeb on the following social media platforms:

Facebook

Flipboard

YouTube

Twitter

Instagram

EverWeb and the Ending of Google+

Sunday, March 24th, 2019

If you are a Google+ user, you should already have been notified by Google that its social media platform, Google+, will be shutting down imminently.

If you have any data in Google+ that you want to keep, Google advises that you should download and save it by March 31st, 2019. The shuttering of Google+ will commence as of April 2nd 2019.

Google has already taken steps to wind up its social media service as you can no longer create new Google+ profiles, pages, communities or events. Google+ comments have also been removed. After April 2nd, Google will begin to remove content from Google+ which will take time to complete, so if you have content, it may still be there for a while.

Any sites that use Google+ buttons for login purposes will also cease to function over the coming weeks. In some instances, the Google+ button will be replaced with an ordinary Google button instead.

If your EverWeb created website includes any Google+ widgets, buttons or other links, now is a good time to remove them and republish your website. If you have deeply integrated into Google+, you have probably found alternatives and informed your Google+ community already. EverWeb’s Responsive Image Gallery widget

It is, of course, recommended that you no longer use the Google+ widget or button in your website. Also remember that it is only Google+ that is going away so your regular Google account will not be affected. G Suite users will also have new and updated options.

If you have any comments or questions about this post, please let us know in the Comments Section below.

Easily Create ‘Sticky’ Buttons in EverWeb

Thursday, July 16th, 2015

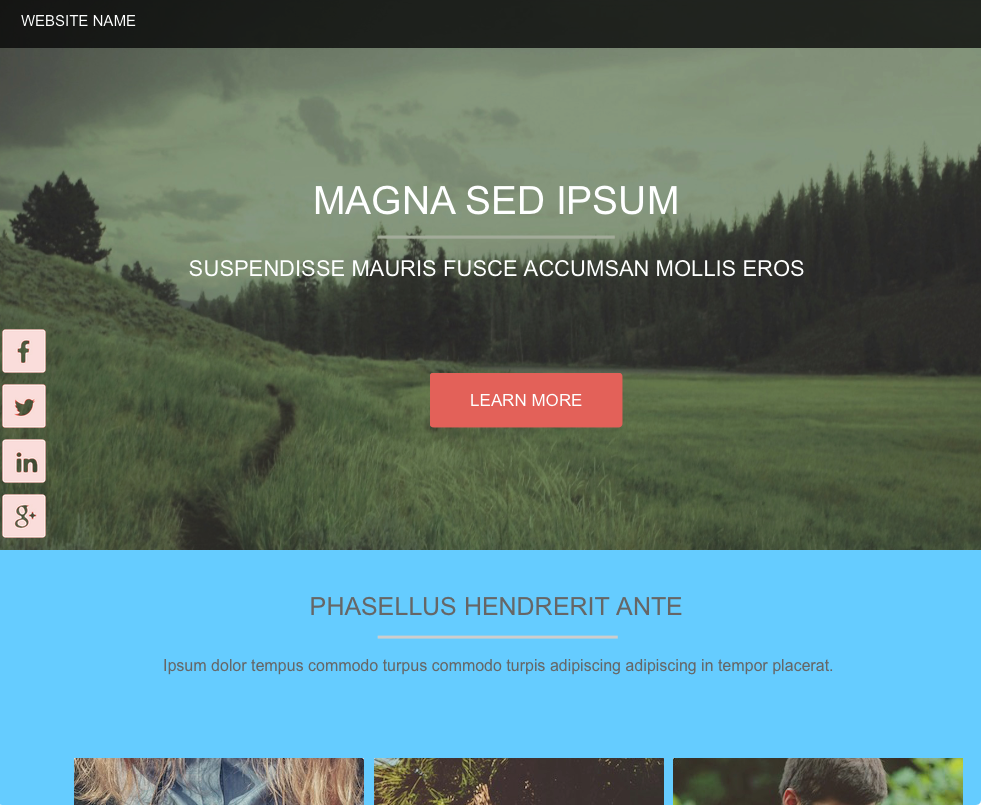
Many websites today have social media buttons pinned to the side of the page so that they are always clickable as you scroll up and down the screen.

This is a great feature for your website and is easy to do with EverWeb 1.8. To achieve the effect need to use the new ‘Fixed Position’ feature in the Metrics Inspector. ‘Fixed Position’ lets you lock the position of an object on its x-axis. This means that as you scroll up and down your page (i.e. along the y-axis), the object remains fixed in place.

Just follow the simple steps below to easily have social media buttons on the vertical and always visible.

  1. First add  the social media buttons that you want to your page, e.g. Facebook, LinkedIn, Pinterest, Email, Google Plus etc. Using the ‘Insert > Button menu to add buttons to your page or use drag and drop your buttons from the Widget Inspector on to your page. When placing buttons line them up vertically close to the left or right hand edge of the page.
  2. When you add each button, make sure that you tick the box ‘Fixed Position’ on the Metrics Inspector. This will lock your button in place on the horizontal x-axis (see screenshot below.)

    screenshot_11

    To fix the social media button in place, first select it, then checkmark the box ‘Fixed Position’ in the Metrics Inspector, as shown in the example above.

  3. Remember to make sure that your Social Media buttons are properly aligned and distributed.
    Select all of the buttons that you have placed on the page. Next use the ’Arrange > Align Objects > Left’ menu so the buttons appear flush to the left, and use ‘Arrange > Distribute Objects > Vertically’ to evenly space the buttons.
  4. If you are adding buttons to a Master Page, you may need to use ‘Always on Top’. Objects on Master Pages lie underneath those on your normal web page. If you find your buttons are not visible use ‘Always on Top’ so that they appear above all other objects on your page.
  5. The last  step is to use Preview to see how your design looks and to test out your ‘Sticky’ buttons before publishing (see screenshots below.) Always remember to test your buttons. Once you have published your website, don’t forget to test each button to make sure that your links work properly!

screenshot_12

Use Preview to see how your ‘Sticky’ buttons work.

screenshot_13

As you scroll up and down your web page, the social media buttons remain in place as the page content slides under the buttons.

How To Verify Your Website With Pinterest Using Sitemap Automator

Wednesday, March 27th, 2013

Video Transcript:

In this tutorial, I am going to show you how you can verify your website with Pinterest, using Sitemap Automator.

One thing I want everyone to keep in mind is that sites such as Pinterest are constantly changing their user interfaces, so if you are watching this video and some things you see here are not matching up with what you see in your web browser, don’t worry, the same principles will apply even if things are in different locations.

So the first thing you will need to do is sign up for a Pinterest account. We’re going to skip over that part as that is something you will be able to do on your own.

Once logged in, click on your username in the top right corner, and select settings. Next, scroll down a bit to where it says Website. Make sure your website URL has been entered, and the spelling is correct. Then click on Verify Website.

Step one says to Download the verification file. Click on the download link to download the file. Make sure you only download this file one time. Some users tend to download it multiple times by accident. When doing this, you will end up with multiple files of the same name in the Downloads folder, and the file will get renamed causing this process to not work. So I will just repeat, do not download this verification file more than once.

Next, launch Sitemap Automator. Click on File and select Publish Verification File.

Click on the Select Verification File button to locate your verification file. Highlight the verification file and then click on the Open button. Quickly just double check to make sure that your verification file name matches up the file name on the Pinterest page.

Now we can proceed by clicking on the Publish to FTP button. Next, enter all your FTP login information. Just to make sure our login information is correct, let’s click on the Browse button. No error message appears and I am able to see some files and folders for my server, so I will proceed by closing this window and clicking on the Upload button.

Once the upload is complete, I will return to that Pinterest page and click on the Click here to complete the process button. My verification file has been accepted and I can see here that my site has been vitrified with Pinterest.

How To Add A Pinterest Pin It Button To An iWeb Site

Friday, November 9th, 2012

A short while ago, we posted a video about Pinterest and how it is yet another social media platform that businesses can and should be utilizing. The below tutorial will show you how you can add a Pinterest ‘Pin It’ button to your site made in iWeb. The more ‘re-pins’ your images have, the more likely they are to be seen by more people. More people seeing your image could result in more traffic to your website, and hopefully more sales.

VIDEO TRANSCRIPT:

In this video, I’m going to show you how to add a Pinterest Pint It button to your iWeb site. If you are not familiar with Pinterest, please see our video tutorial outlining what Pinterest is and how to use it.

To add a Pinterest ‘Pin It’ button to your website in iWeb, visit your website and locate the image that you want to have the Pin It button for. Locate the URL of the image. You can usually find this by doing a secondary click on the image and then selecting Copy Image Address.

Open up a new tab in your web browser and visit pinterest.com/about/goodies. Scroll down a bit until you see Pin It Buttons for Web Sites.

Paste the URL that you just copied into the second text box. Right above the text box it should read URL of the image to pin. Now just quickly go back to your site, and copy the URL of the page that contains that image. Then paste that URL in the first text box which reads URL of the page to pin. You can paste the page’s URL first, and then the image’s URL, it doesn’t matter, but they must go into their respective boxes. Before we do anything else, I want you to take a look at the drop down menu next to Pin Count. You have three options to choose from here, so select the option you like best.

Next, you can put in a description of what is being pinned if you’d like. You will notice that some code has appeared at the bottom after we pasted our second URL. Highlight the code in the first box, just like I am doing, and copy it.

Now open your site in iWeb to the page that contains the same image that you are pinning. Drag and HTML Snippet onto the page, and paste the code. You should notice a box appear, but that box should be empty. Expand this box a bit so that the Pin It button is a bit larger.

If you selected one of the options for showing the pin count, head back to the Pinterest page we were just on, and copy the code located in the second box. Now go back to iWeb, and in that very same HTML Snippet we pasted the Pin It button in, paste this code at the very end. If you missed what I just did, just rewind and watch this step again.

You can add as many Pin It buttons to your site as you want. Just repeat the exact same process we just did. You will not be able to see the Pin It button visible in iWeb, but once you publish the site, you will be able to see it when you visit your page online.

How To Pin An Image In Pinterest

Monday, November 5th, 2012

Pinterest is a site that showcases popular images posted by users. Images are linked back to the original site that they were posted from. This can be utilized as a marketing tool if you have nice images displaying your products that you have for sale on your site. This short video will show you how to ‘pin’ your images so that other Pinterest users can see them.

VIDEO TRANSCRIPT:

Pinterest is another great way to promote your businesses products, and hopefully catch the attention of users browsing the site. Think of Pinterest as a bulletin board where users pin images to. Users can then click on the image and be taken to the website where the image was pinned from.

Images with many repins will be the ones you see on the main bulletin board at pinterest.com

So how can you pin some images from your website? First, click on the Join Pinterest button. You can sign up with your Facebook account, twitter account, or using your email address. Any of the three options will do. I’m going to fast forward through the sign up process as that is pretty basic, and just skip ahead to the part about pinning.

So once you have signed up and are logged in, go to pinterest.com/about/goodies

You should land on a page that looks similar to this. Locate the Pin It button, and drag and drop this button onto your bookmarks bar. So if you are using Safari, the process should look just like this.

Now, head over to your website and locate an image that you want to pin. Once you are on the page with that image, click on the Pin It button. You will then be shown all of the images on the page. Click on the image that you want to pin. A popup window should appear. If this is your first time pinning an image, you will need to create a board for it. The board is basically creating a new bulletin board for this image to be pinned on, since it cannot automatically be pinned on the main board at pinterest.com. For my example, my business is called Jeremy’s Golf Shop, so that is what I will name this board. Then, all you need to do is click Pin It, and you’re done.

You can now pin more images if you want. You can add them to the same board that you just created, or create a new one if you want. You are not limited to pinning images just from your site. You can pin images from any website.

This can be a good marketing tool for users who sell items such as clothing or jewellery, or almost any product that would catch the eye of someone browsing through Pinterest.

For more helpful tips and tricks, please subscribe.