What’s New in EverWeb 3.8: New UI, Contact Form Features, Assets List Features, Instant Preview and More!
Thursday, August 11th, 2022We are super excited to announce the release of EverWeb 3.8 with a revamped UI, a new mass mailing feature for Contact Forms Enhanced Addon, a New Asset List feature to help you group image assets page by page, Instant Preview, new Blogging features and much more! You can find the full list of new and improved features below as well as the usual bug fixes!
Which Version of EverWeb is For You?
EverWeb is available in the following versions:
- If you are running an Intel Mac running OS X 10.10, macOS Yosemite, El Capitan, Sierra, High Sierra, Mojave, Catalina, Big Sur or Monterey EverWeb version 3.8 is available for you.
- If you are running an Apple Silicon Mac running macOS Monterey or Big Sur, EverWeb version 3.8 is available for you as a Universal Binary. EverWeb will run natively without the need to use Rosetta 2.
- If you are running OS X 10.7 – 10.9 (Lion, Mountain Lion, Mavericks) EverWeb version 2.9.1 is available for you.
- If you are running OS X 10.6 EverWeb version 2.5.2 is available for you.
When updating to the latest version of EverWeb, the update process will automatically download the correct version of EverWeb for your operating system.
EverWeb 3.8 Includes…
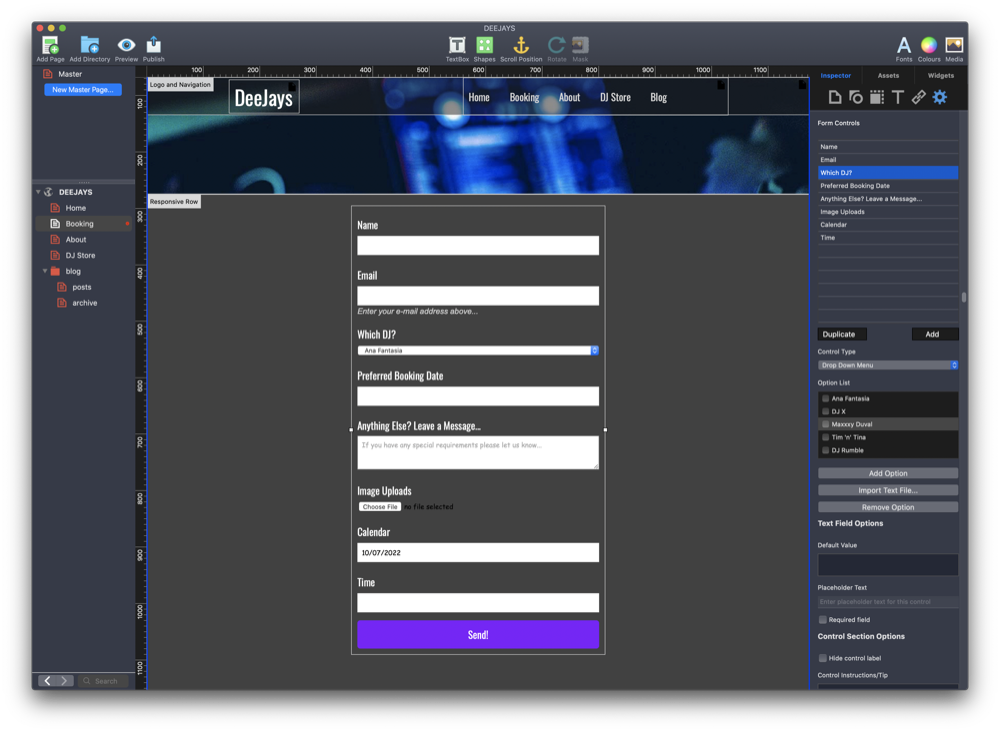
[NEW] Contact Form Advanced option ‘Mail Sending’ lets you select ‘EverWeb’ for email sending. You won’t have to use SMTP details and it will work with any web host and any email.
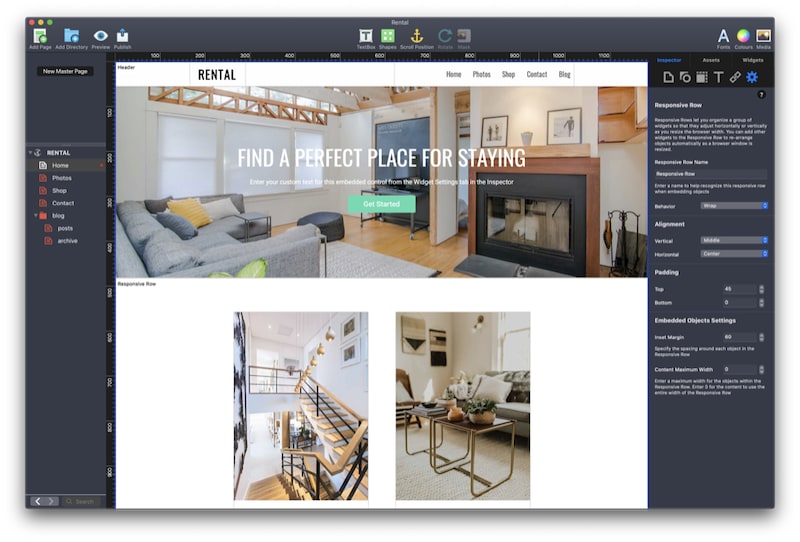
[NEW] The Assets list now has an option to select all assets on the current page. You can then click the new folder button and EverWeb will put all the selected widgets into that folder.
[NEW] Instant Preview: If you use the ‘Preview on Server’ option in Preferences->General->Use Preview Server, EverWeb does not have to regenerate all pages. Previews will be instant now.
[NEW] Updated UI for the Projects Window-> a down arrows replaces the up-down arrow for users running macOS older than macOS Big Sur.
[NEW] Redesigned Toolbar icons if you use macOS Big Sur or later.
[NEW] New UI when updating widget previews in the Design Canvas.
[NEW]New option in the Assets List to ‘Select all Assets’ on the current page.
[NEW] The Blog Post Header and Date fields can now be left, center, or right aligned.
[NEW] Image padding is available for the blog post cover image.
[NEW] More expanded inline Help messages.
[IMPROVED] Dragging and dropping from Photos will attempt to get the caption used for the photo.
[IMPROVED] Using Preview on Server option in Preferences will make it so you don’t have to regenerate the entire site when publishing, it will only generate the current page.
[IMPROVED] The Image Gallery Widget has a new navigation icon in the top right corner of the widget, on macOS Big Sur or later, to move the widget around the page.
[IMPROVED] Big improvement to widget generation time on M1 Macs.
[FIX] Fix for frame image settings when previewing.
[FIX] Fixed frames issue in the Responsive Row Widget.
[FIX] Fixed crash with some widgets on M1 MacsNew Contact Form Advanced option ‘Mail Sending’ that lets you select ‘EverWeb’ for email sending. You won’t have to use SMTP details and it will work with any web host and any email.
[FIX] Fixed problem with some links with anchors in them.
[FIX] Fixed FlexBox widget linking options.
[FIX] Fixed a problem with mobile pages and Instant Previews.
[FIX] If SEO PowerUp has expired but the Optimize for Search engines option is still selected, the user will be notified.
How To Update To EverWeb 3.8
You can easily update EverWeb by either:
- Launching EverWeb then going to the EverWeb menu at the top of the screen and selecting ‘Check for Update’ or by
- Downloading EverWeb from the EverWeb website.
After downloading EverWeb, double click on the EVERWEB.DMG file. A window will open. Drag the EverWeb icon on to the Applications folder icon. Once the file has been copied, you can close the installation window, delete the .DMG file and eject the EverWeb disk on the desktop by dragging it to the Trashcan.
Remember, you won’t lose any previous data when updating as your website project files are stored elsewhere on your computer.
The update is free for EverWeb + Hosting users and EverWeb Standalone users who are within their 1 year of free upgrades and support period.
You can easily check your EverWeb Standalone free update period from EverWeb’s Preferences window or from your client area.
If you have passed your one year of free EverWeb updates, you can purchase 1 more year of upgrades and support from your client area.
You can easily re-download earlier versions of EverWeb from your client area if you are not ready to purchase an additional year of updates and support.
Login to your client area and go to the ‘Manage Product’ page. On the left of this page, select ‘Downloads’ and choose the version of EverWeb that you need.
More Information About EverWeb
For more information about the new version of EverWeb, please check out the following resources:
- The EverWeb website which has up to the moment information in it’s blogging section
- New EverWeb videos on YouTube
- The EverWeb User Manual in EverWeb’s Help-> User Manual menu
- The EverWeb Discussion Forum
If you can’t find what you need, or have any other questions, comments or feedback please let us know. We’re happy to help.
EverWeb on Social Media
You can also find EverWeb on the following social media platforms: