Archive for the 'SEIntelligence' Category

Do’s And Don’ts Of Back Links – Improving SEO

Thursday, December 20th, 2012

A recent hot topic of discussion involves ‘back links’ and how they might affect your website’s rankings. Most of you who are familiar with search engine optimization (SEO) know that back links are an important part of your SEO efforts. Search engines, especially Google, use back links to influence how sites get ranked in their results.

A recent popular video of ours talks about a Google change that may penalize a website for having low quality back links. That video teaches users how to check the links pointing to their site by using SEIntelligence’s back link checker.

This Google change can be somewhat confusing for some users. Determining what constitutes a low quality back link is up for interpretation. Should users stop trying to get back links, or should users do things differently when trying to get back links? These types of questions and more will be addressed in this Do’s and Don’ts of back links.

Don’t

  1. Don’t use software, or pay someone else to use software to automatically get your site a large amount of back links. These methods are unethical techniques and can result in your site being subjected to Google’s new update, which could lead to a decrease in rankings.
  2. Don’t focus on one key term for every anchor text used. Anchor text is the text in the clickable link that users can click on to be taken to the linked page. A variety of anchor text is a more natural way for a site to obtain links.
  3. Don’t focus on the quantity of links. High quality links can go much further than obtaining many links from low quality sources. It can also look a bit suspicious if one day you have 25 back links and the next day you have 25,000. Google has ways of recognizing these things. These methods can result in a site’s rankings to drop.

Do

  1. Do continue contributing on forums and other social networking sites (including Facebook, Twitter, blog comments etc.). If you have something valuable to add to any conversation, including a link to your site, continue participating and placing your link. While some forums may be considered low quality by some search engine’s standards, it is still a good idea to communicate with your community and drive traffic to your site. Your rankings will not be harmed by this.
  2. Continue communicating with other web masters who might benefit from a link swap with you. If both of your sites have something good to offer, then it is always a good idea to continue exchanging links. Just be careful not to exchange links with sites that might not be helpful for you. Do research on a site before agreeing to link to it.
  3. Try to spread your links across several domains. In other words, don’t just keep getting links from the same website.
  4. Continue writing high quality articles with keywords linking back to your site. Just make sure that the site(s) you are posting the articles to are high quality sites. The same rule applies for press releases.

To summarize, the important thing to keep in mind is to always use common sense when determining if a linking technique might harm your site. If it sounds too good to be true, it most likely is. Focus on making your website have great content and the links will naturally roll in.

 

Using SEIntelligence On A RapidWeaver Website – Part 1

Friday, November 16th, 2012

SEIntelligence’s user base consists of many RapidWeaver users. While making SEIntelligence’s recommended changes within SEIntelligence is always an option, we recommend RapidWeaver users to make the changes within the RapidWeaver application.

The reason for this is because over time, as you update your website, you will be able to publish your site straight from RapidWeaver, rather than add an extra step of re-loading your site in SEIntelligence, and then publishing from SEIntelligence.

You will still use SEIntelligence to analyze your website and learn how to make it more search engine efficient, but the changes will be made in RapidWeaver. The video below illustrates the easy process to accomplish this task. Stay tuned for Part 2 of this tutorial, which will cover the Site Settings section of SEIntelligence, and how to modify those for a RapidWeaver built website.

VIDEO TRANSCRIPT:

If you are a RapidWeaver user, here is how to most efficiently use SEIntelligence on your website.

The first thing you need to do, is make sure the pages on your site have keywords listed in the meta keywords section. To do this, select the page on the left hand side, and then click on the Page Info page. Then click on the Header tab. Next, click the Plus button for the Meta tags box. Under the Name category, type in keywords. Under the Content category, type in the key-terms that you want to be associated with this particular page. Key-terms, can be as many words in length as you want. Just remember to separate each of the key-terms with commas. Repeat this process for the rest of the pages on your site.

Your next step is to export your website from RapidWeaver to a location on your hard drive. For simplicity, I like to export the website directly to my desktop, so I suggest you do the same.

When the site has been exported is on your hard drive, launch SEIntelligence and choose the first option which is to optimize website for search engines.

Select the first option which says Open local website folder. Type in your website’s domain without http or www, and then select the Choose button. Highlight your website folder and click Open. Then click on the Next button.

Your website will now load in SEIntelligence. Now, we’ll perform the competitive analysis so that we can compare our website’s to the website’s we compete with. We’ll do this one page at a time, so click on one of your pages in the left hand side. You should notice your keywords appear in the keywords column.

Next, click on the Get Competitors button. When the search is complete, you will see the results in this section here.

Just below these results, you will see the recommendations and suggestions for your website. SEIntelligence does have the ability for users to make these changes right from within the application, however, for a RapidWeaver use, what we suggest is to read over the suggestions, and then make the changes to your site in RapidWeaver itself. If you are not sure how or where to make these changes in RapidWeaver, make sure to check out our free SEO For RapidWeaver video course. In that video course, you will find where to make all of these changes. So for example, if you wanted to know how to change your title tags, you would click on this video called “Title tags: the most important optimization technique”

When you are all done making your changes to your site in RapidWeaver, what you can then do is once again, export your website from RapidWeaver to that very same location as when you first exported the site.

Now you can re-launch SEIntelligence, and select your website from the Existing Projects column to load the newly exported site.

Now, once again, click on the page name, and then select Get Competitors. Once again, search for your competitors. When the search is complete, read over the recommendations at the bottom to ensure that you have made that changes correctly. If your changes have been made correctly, you will see messages with happy faces beside them. Repeat this process until you are satisfied with your website’s optimizations.

SEIntelligence 2.7 Adds More Back links, Retina Support

Tuesday, November 6th, 2012

We’ve just updated SEIntelligence to version 2.7 and added a bunch of great new additions. We updated the user interface an also added support for retina Macs.

In addition, SEIntelligence can now get more back links for your website and your competitors. It also supports HTML 5 now.

SEIntelligence is the most powerful, native SEO software for Mac OS X. It uses statistical analysis to compare your website to the current top ranking websites in all major search engines. It will tell you exactly what you need to change on your site to rank higher and get more website visitors.

In addition to comparing your website to your top competitors, it also includes a powerful back link checker. It can find every websites linking to both your site and your competitors. It gets important details about these backlinks such as Google PageRank, Facebook Likes, Google+ Likes, and much more.

SEIntelligence works great with any website builder including; iWeb, RapidWeaver, Sandvox, Flux, Dreamweaver and even works with content management systems like WordPress, Drupal, Joomla and more.

Download the demo version of SEIntelligence today to try it out. This update is free for registered users.

SEIntelligence Back Link Checker : Google’s Penguin Algorithm Update

Friday, September 14th, 2012

If you are keeping up with the world of SEO, you are probably aware of Google’s recent algorithm change known as ‘Penguin’ change which has affected the rankings of many websites. The update targeted websites whose back-links were not considered ‘natural’.

As we have mentioned in many of our tutorials, back-links should come naturally. Natural back-links typically occur when a website has something unique or interesting to offer, causing users to talk about it and place links to it in various places on the internet. Google’s ‘Penguin’ update now better determines the links that point to your website that Google finds to be unnatural.

So how do you tell if you have any of these unnatural back-links, and what can you do to correct it?

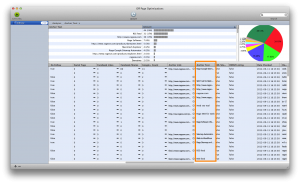
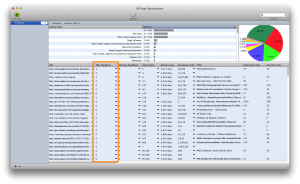
The first thing to do is a back-link check to see a nice list of the websites linking to your site. This can easily be done in SEIntelligence. Here is a screenshot of the results for 200 back-links to one particular page.

One of the things I want you to take note of is the Page Rank for that particular page that is linking to this site. For those of you not familiar with Page Rank, it is a score given to a web-page by Google. The score ranges from one to ten with ten being the highest. Pages obtain page rank when other websites link to them. For example, let’s say Page A on Site A has a page rank of 6. If Page A on Site A links to Page A on Site B, it is essentially giving a ‘vote’ to Page A on Site B. This in turn will give Page A on Site B some page rank. This is because Page A on Site B is a trusted source, and that trusted source is essentially saying that this page is good enough (or bad enough) to link to.

What you want to do, is make sure that the pages pointing to your site are from trusted sources. Page Rank is a great way to tell this. If all the pages linking to your page have zero page rank, it might look a bit suspicious, so just make sure you are getting links from a variety of pages, including pages with high page rank. Don’t just consider the Domain’s page rank, but pay close attention to the URL Page Rank as highlighted in the screenshot.

Another area of focus that users should pay attention to is the anchor text used by sites linking to your site. The anchor text is the exact text used in a link for users to click on to be taken to the linked-to website.

What you want to look out for is having the anchor text be the same for a large majority of the links pointing to your site. When the anchor text is the same, it might indicate that the user has added these links manually, which is not considered to be a natural way of link building. As a result, it could lead to loss of rankings.

So be sure to check out SEIntelligence and do a back-link check on your website. Ensure the sites linking to your site are considered ‘important’ with higher page ranks. Don’t forget to make sure that there is a good variety of anchor text from the websites linking to your site.


SEIntelligence 2.6.1 Released: Improved Website Downloading Features

Friday, June 22nd, 2012

SEIntelligence 2.6.1 is now available. This versions improves website downloading features including the ability to download https websites and downloading individual pages once you have updated them online.

SEIntelligence is the professional search engine optimization software giving you step by step instructions on how to properly optimize your website for top search engine rankings.

SEIntelligence also includes a powerful back link scanner which will find all websites that link to your website and your competitor’s websites. Combined with its powerful analytical tools, SEIntelligence will help you determine where you need to improve your off page optimizations strategies.

You can download the demo of SEIntelligence and try it out for yourself.

SEIntelligence 2.5 Adds Support for Google Plus

Thursday, February 23rd, 2012

We have just released SEIntelligence 2.5, a major upgrade to our most popular SEO tool. SEIntelligence makes it extremely easy to optimize your website for all major search engines by providing step by step instructions on what you need to change in order to rank higher.

SEIntelligence also provides a detailed report on incoming links to your website and your competitor’s websites. In addition to providing important SEO metrics it also social networking metrics including Facebook Likes, Delicious Tags and now even Google Pluses.

SEIntelligence 2.5, a free update for registered users, provides even more incoming links for any website and adds supports for Google Plus. Now you can see how many times any website has been added to a user’s Google Plus account. SEIntelligence 2.5 also fixes some important bugs and adds additional local search engines to help get your top competitors.

Download the SEIntelligence demo for free to try it out.

SEIntelligence For iWeb SEO Tool Users

Wednesday, February 22nd, 2012

SEIntelligence, our powerful all-in-one search engine optimization application is much more powerful than iWeb SEO Tool, and can be the difference maker for a user trying to rank higher in search engines. With direct instructions on how to optimize your website, SEIntelligence makes it easy for any user to optimize their website. In the tutorial below, we will give you a quick tour of SEIntelligence and show you how it works and how it can help you. As noted in the video, SEIntelligence would replace iWeb SEO Tool, so you would not need to use both iWeb SEO Tool and SEIntelligence, just SEIntelligence.

Video Transcript:

A lot of you are using iWeb SEO Tool to optimize your iWeb site for search engines, but I wanted to show you our newest and most powerful way of optimizing an iWeb site. Some of you have probably already heard of it, but for those who haven’t, SEIntelligence is our latest SEO application, that is much more powerful than iWeb SEO Tool and works great with iWeb sites.

So for this video I just wanted to give you a quick tour of SEIntelligence and show you what you can expect to do with this powerful application.

SEIntelligence will allow me to load my website into the application. In this case, I already have a site loaded in, so I will just click on this existing profile and my iWeb site will load here in SEIntelligence.

You will notice that as I click on one of my website pages with a .html extension, the meta keywords will show up right here. These meta keywords are the keywords that I choose to target for my website. Based on these keywords, I am going to perform a competitive analysis, which will show me the top 10 ranking websites for a particular keyword that I am choosing. So in this case, I am going to search for Men’s Drivers in Google.

When the results appear, I will see the top 10 ranking websites, along with a lot of information about those websites.

What SEIntelligence is now doing, is analyzing my website, and comparing it to these top 10 websites, and providing me with feedback based on this analysis.

For example, if we click on the Title tab, we can see the suggestions SEIntelligence is giving me for my title based on what I currently have, and what the top 10 ranking websites are doing. Now I can change my title tag and when I click the Apply button, these suggestions will change based on what I just typed in.

You can repeat this for all of the tabs at the top. Then you can publish your website straight from SEIntelligence to your server.

So that is my quick introduction to SEIntelligence. It’s an extremely powerful SEO application and many users are extremely pleased with the results they have achieved by utilizing it. SEIntelligence would replace iWeb SEO Tool, so you would only need to optimize your site in SEIntelligence and not both iWeb SEO Tool and SEIntelligence.

SEIntelligence also comes with free video tutorials to teach you how to use the application properly so I encourage everyone to take advantage of them.

SEIntelligence : Adding Google Analytics and Statcounter.com Codes

Thursday, January 19th, 2012

SEIntelligence allows you to add analytical codes such as Statcounter.com and Google Analytics using the Site Settings feature. The tutorial below will show you where you need to go to get these codes and where in the Site Settings section to paste them.

Video Transcript:

A great feature of SEIntelligence is the ability to add codes such as Google Analytics and Statcounter to a website. This is done by clicking on the Site Settings button, followed by the Header & Footer Code tab. You would then paste the code, or codes into the header code box, or the footer code box.

So which codes do we recommend you paste into these boxes, and where do you obtain them from?

We recommend placing a Google Analytics code in the header code box, and a Statcounter code in the footer code box. Let’s go get those codes.

Go to google.com/analytics. You will need to have an Analytics account, so if you do not already have one, click on the SIgn Up Now button. Otherwise, click on the button to continue.

Now I’m not going to go through the process of obtaining the code by filling out the short forms as Google changes their interface quite often. So to avoid confusion, I am just going to get to the last step which has the code generated for me. Generating the code will be pretty easy for you. If you get lost, just look for a button that says New Account as that will usually lead you to the form for generating the code.

So when you see the code, highlight the entire code and copy it. Then go to the Site Settings window in SEIntelligence, and paste it in the Header code/Google Analytics box that we mentioned earlier in the video. Then click the Apply to Entire Site button, which will stick the code on every page of your site.

Now, go to statcoutner.com and either sign up for an account, or login with your existing account if you have one.

Once logged in, you should see a link that says Add Project. Click on that link. Fill out the information that is required. When you get to a section that asks you about a counter or a button, select the option for Invisible Tracking. This will make it so that the code generated does not include a hit coutner that would appear on your website.

You can select your preference for being emailed reports, and then click on the Add Project button. On the next page, click on the link for Default Installation Guide. Now highlight the code in in the Standard tab, and copy it. Now go back to SEIntelligence, and paste this code in the footer code box, and click on the Apply To Entire Site button.

When you publish your site, these codes will have been added. Keep in mind that it may take a few days to begin seeing anything in your Google Analytics account, but you should be able to see activity in Statcounter right away.

SEIntelligence : Re-Opening Your Website In SEIntelligence After Updating In iWeb

Thursday, December 1st, 2011

After you have made your optimizations in SEIntelligence, you may eventually go back to your website to make an update. Follow the instructions in this video tutorial to learn how to properly re-load your website back into SEIntelligence without losing the work that you previously did. The previous work I am referring to is the optimizations you made in SEIntelligence the last time you clicked the Apply or Apply All button.

Video Transcript:

When you decide you need to make an update to your website, you will need to save that website and load it in SEIntelligence once again, in order to re-apply the optimizations you previously made.

Here I have my site in iWeb that I have just made some updates to. Now, I’m going to publish the site to a local folder again. It’s important to know that I am publishing the site to the exact same location on my hard drive as it was when I originally loaded it into SEIntelligence. That location was my desktop, and I did not delete that folder off my desktop either. I have also kept the Site Name the exact same. All of this is very important if you want to ensure that your tags are not erased.

I’ll just repeat that for emphasis. Do not delete the website folder from your hard drive. Publish any changes made in iWeb back to that exact same folder. Do not change the Site Name, or the name of this folder. The site name and the folder name will have the exact same name.

After you have published the site back to the same folder, you can now open it in SEIntelligence. To do so, click on the corresponding existing profile for that website. When you do, you should see a popup window like this appear. This will indicate to you which pages on your site have been modified. All the pages will be select, and clicking the Apply Saved Tags will re-apply the optimizations that you made that last time in SEIntelligence.

Now, you can either make any changes you would like, or publish your site back to your FTP server.

Remember to do this each and every time you update your site in iWeb.

SEIntelligence : Applying Your Changes & Publishing The Site

Thursday, December 1st, 2011

If you are making your optimizations from within SEIntelligence, this video tutorial will quickly show you how to apply those changes, and publish your website.

Video Transcript:

So now we’ve made all of the changes to our site. Our next step is to apply these changes if you haven’t’ already. Simply click on the Apply All button and all of your web pages will be updated.

Now that all the changes have been applied, it is time to publish the site. Click on the Publish button in the top right corner, and enter in your FTP details. If you are not sure what these details are, you can e-mail your web host to find out. It is very important that you know your Directory Path otherwise you will not see your changes applied to your site. After you input your server address, username, and password, it is a good idea to press the Browse button just to make sure you have everything entered correctly. You can also Browse to select the correct Directory Path. When you have everything inputted correctly, I highly recommend creating a profile for this information. You can do this by clicking the Plus sign and entering a name for your profile or account.

When you’re ready, click on the Upload button to begin publishing your site.