EverWeb’s Preview Server

January 18th, 2018


Preview Server was introduced in EverWeb version 2.5, enhancing EverWeb’s Preview feature by presenting an exact local preview of what you would see if you  published your website. In EverWeb version 2.6, Preview Server can now be used to preview your website from any device connected to your own WiFi network e.g. an iPhone, iPad, desktop or laptop computer.


About Preview Server

By default, Preview Server feature is ‘On’. You can see this when you use Preview.  If you look at the URL in your browser’s search box, you will see something similar to the web ‘address’ below:

http://127.0.0.1:13434/31A0255CBF744FC48068FD6A18BB6618/index.html

The web ‘address’ is used to establish an IP (Internet Protocol) connection to the same computer being used by the end-user. The first part of the IP address, ‘127.0.0.1’, is known as the ‘localhost’ or ‘loopback address’. This is followed by the filename of your Project. What is displayed is actually the real filename of your Project file as it is stored on disk. To make things easy, you name your website Project file in EverWeb with an ‘alias’, which by default is  ‘NEW WEBSITE’. The ‘alias’ is associated with the real filename that is stored on disk. The final section, ‘index.html’ refers to the web page that you are previewing.

When you Preview your webpage on your computer, it will use the ‘local host’ (technically written as ‘localhost’) address. The preview will now be accessible to other devices on your local WiFi network.


Preview Server Preferences

To access Preview Server’s Preferences use the EverWeb-> Preferences-> General tab menu option. In Preferences you can turn off the Preview Server by un-ticking the ‘Use Preview Server’ box. If you turn Preview Server off, the information for ‘Local URLs’ and ‘Remote URLs’ both become N/A as you are no longer using your WiFi network for preview.

You may want to turn Preview Server ‘Off’ if you are having problems with Preview Server working properly with your browser. For example, there are some known issues with the way in which Google Chrome interacts with local WiFi networks. When Preview Server is ‘Off’, the URL in the search bar reverts to something like the example below which is how EverWeb previews in versions prior to EverWeb 2.5:

file:///var/folders/2y/h6w0rl0n6kd5vcdltlgqryv80000gn/T/TemporaryItems/EverWeb/31A0255CBF744FC48068FD6A18BB6618/index.html


Using Preview Server on Your WiFi Network

To see a preview from your local host computer (i.e. the computer where you use EverWeb) on another device on your WiFi Network:

  1. Make sure that all devices on your WiFi network are connected and working properly.
  2. In EverWeb, go to the EverWeb-> Preferences-> General tab and make sure that  the ‘Use Preview Server’ box is ticked.
  3. Make a note of one of the ‘Remote URLs’ e.g. ‘http://192.168.178.40:13434/’. The Remote URL address refers to your ‘private use’ network, typically your home or office network.
  4. If you have Apple’s Universal Clipboard available, copy the ‘Remote URL’ to the clipboard instead of manually noting.
  5. Go to another device on your WiFi network and enter, or paste in, the ‘Remote URL’ address that you noted (or copied to the clipboard) in the above step into your browser’s search box.
  6. After entering or pasting in the URL, the Preview will be accessed from the local WiFi network and you will see an Index page of choices. In the example below  there are three folders that represent three different previews. In the example there are multiple computers using EverWeb on the local WiFi Network, with each person working on their own project file (see screenshot below).
  7. Each folder is named after the EverWeb Project file that a preview has been generated for. If you are working on just one project on one computer you will only see one folder named after your Project.
  8. Click on the Project file name whose preview you want to see.
  9. The Preview is generated.


The IP address in the Search Bar may look something like this:

http://192.168.178.40:13434/31A0255CBF744FC48068FD6A18BB6618/


As you can see, instead of using the localhost address (used when previewing the project locally on the computer where EverWeb is installed), this time the address begins with 192.168 indicating that the private network is being used instead.


Preview Server is great when you want to access previews from different devices on your local WiFi, and we are hoping to be adding more functionality to this feature in the future!


EverWeb on Social Media

You can also find EverWeb on the following social media platforms:

Facebook

Google+

Flipboard

YouTube

Twitter handle @ragesw

Creating Buttons in EverWeb

January 4th, 2018

Easily Create Buttons in EverWeb


One of the common objects used in website design is the humble button.  Typically the primary function of a button is to trigger an action of some sort. This ‘trigger’ could be a hyperlink to another page, a place somewhere else on your current page or to an external website. Buttons can also used to initiate downloads, payment processes, send emails and so on.

Some of EverWeb’s widgets use buttons e.g. the Contact Form, Contact Form Advanced and also the PayPal widget which also let’s you create your own buttons if you don’t want to use the default ones PayPal offers.


Creating Your Own Button

If you want to create buttons for your own website, you can easily and quickly do in EverWeb. There are a few simple steps required as outlined below. In our example we will be recreating a button from the Modern Theme Template which is a new Theme Template coming in EverWeb version 2.6. If you download and install the Modern Theme Template, EverWeb will ask you if you want to install the ‘Work Sans’ font during the installation process. You can also install the Work Sans font directly via the Google Fonts website.

Let’s create a button in EverWeb…


Create and Style Text in a TextBox

  1. First create a TextBox by clicking on the Textbox button in the Toolbar. Replace the default text with “Show me more”.
  2. Make sure that the text you have just added is highlighted, then click on the Fonts button in the Toolbar.
  3. Change the default text font (Arial) to ‘Work Sans’ from the Fonts Panel.
  4. Change the font weight to Extra Bold.
  5. The font size should also be changed from the default 12 to 18 point.
  6. The font color should be changed black to white and again this can be done directly in the Fonts Panel.
  7. Once finished, close the Fonts Panel and resize the shape so all of the text appears on one line.
  8. Now the text will need to be centered within the text box so with the text highlighted go to the Text Inspector.
  9. Change the Horizontal alignment from left aligned to Center alignment.
  10. Changethe Vertical alignment to middle from top.
  11. You will notice that the text is still not in the centre of the box as After Paragraph is set to 15 by default. Change this setting to zero.
  12. The text should be centered but if it is not check to make sure that the Inset Margin setting is zero.
  13. The text is now centered.


Creating and Styling the Button

Now that the text we want has been created, styled and centered within the TextBox, the next stage is to create the button to go around the text.

  1. Next go to the Shape Options and change the Shape from default to rounded rectangle. This creates the shape of the button.
  2. Set the fill type to Gradient fill as this is the type of fill used on the original button.
  3. Change the colors to match those in the example. The top color swatch should be ‘Tomato’ color and the bottom color swatch should be ‘Tangerine’. This will give you an approximate color match with the original button.
  4. Next add a line border using the Stroke options. Create a white coloured border with a 3px width.
  5. Adjust the button size until you have the look you want.
  6. Use the blue dot in the rounded rectangle shape to alter the roundness of the button’s cornersas required or use the shape’s widget settings.


Adding an Animation To The Button

When using the Home page of the Modern Theme Template, you will see that the button, and the headline text, has been animated.  To animate the button:

  1. Select the button.
  2. Go to the Shape Options button in the Inspector Window.
  3. Tick the checkbox to the right of the text ‘Animations’ to activate the settings.
  4. Set the animation type to Fade from Bottom.
  5. Set the duration of the animation to 1.0 second.
  6. Set the animation delay to 0.2 seconds.


Hyperlinking the Button

The last step in setting up our button is to add a hyperlink to the scroll down the page. The Home page of the Modern Theme Template includes a scroll position line (in blue) which the button can be hyperlinked to. When pressing the button, the page will scroll down to the scroll position line. Scroll Posiotn is available in EverWeb version 2.6. If you are using an earlier version of EverWeb, you could replace the instructions below with e.g. hyperlinking to a different page in your website.

  1. If you want to insert your own scroll position line, click on the Scroll Position button in the Toolbar or use the Insert-> Scroll Position menu option. Drag and drop the turquoise line to where you want it on the page. You may also want to name the Scroll Position using the Widget Settings.
  2. Next, click on the button text, then go to the Hyperlinks Inspector.
  3. Tick to ‘Enable the Hyperlink’.
  4. Set the ‘Link To’ option as the page that you are currently on.
  5. Set the ‘Position’ field to the Scroll Position you want, wither the one that is already on the page, or to the one that you have created.
  6. If you are using a version of EverWeb prior to version 2.6, replace steps 4 and 5 as follows: Set ‘Link To’ as the page you want to hyperlink. The Position


You have now finished setting up your button! Preview to test that your button looks and works as you expect before publishing to the Internet. Creating buttons in EverWeb is easier and you can add your own flair and style in your own design. You can even animate your button to bring extra attention to it!


If you have a question about this blog post, please let us know in the Comments Section. We’re always happy to help!


EverWeb on Social Media

You can also find EverWeb on the following social media platforms:

Facebook

Google+

Flipboard

YouTube

Twitter handle @ragesw

Adding Scroll Position to Your Blog Posts

December 21st, 2017

Using Scroll Position in Blog Posts


The new Scroll Position feature introduced in EverWeb 2.6 is a great way to hyperlink to anywhere in your website, from any position. In addition to using Scroll Position on regular web pages, you can also use it to link to specific places in your blog post pages. Here’s how to do it…


Before You Start…

  1. Make sure that you are using EverWeb version 2.6 or higher and
  2. You have created a blog with one or more posts in it.
  3. If you are not familiar with Scroll Position yet, please read the EverWeb’s NEW Scroll Position Feature blog post first.


Overview

In this example, we are going to set up some hyperlinks on the Home page of the ‘Woody’ Theme Template that will link to different paragraph titles of different blog posts using Scroll Position. The Woody Theme Template is new in EverWeb version 2.6.


The Blog Posts

The blog in ‘Woody’ website project file contains two blog posts. One post is called ‘Sanding & Finishing’ and has two paragraphs, one titled ‘Sanding’ and one titled ‘Finishing’. The second blog post is called ‘Polishing’ and has only one paragraph titled ‘Polishing’. In this example, we want to hyperlink each paragraph title to its corresponding button on the Home page.


The Website Home Page

There are three sections in the Home page with salmon colored buttons containing the text ‘READ MORE’. When clicking on the ‘READ MORE’ text for the ‘Sanding’ section, the hyperlink will go to the ‘Sanding’ paragraph title of the ‘Sanding & Finishing’ blog post. For the ‘Finishing’ section on the Home page, clicking its button will hyperlink to the ‘Finishing’ paragraph title, again in the ‘Sanding & Finishing’ blog post. Finally, the button for the Polishing section will hyperlink to the ‘Polishing’ paragraph title of the ‘Polishing’ blog post.


Setting Up ‘Sanding’ and ‘Finishing’ Scroll Positions

Let’s start with creating a hyperlink from the Sanding section on the Home page to the Sanding paragraph title in the ‘Sanding & Finishing’ blog post.

  1. Go to the blog Posts page of the project
  2. Select the ‘Sanding & Finishing’ blog post.
  3. Note that the Blog Post Preview Window is where Scroll Positions are added, edited and deleted for blog posts.
  4. Add a Scroll Position to the the top of the Sanding paragraph title by clicking on the Scroll Position button in the Toolbar or by using the Insert-> Scroll Position menu option.
  5. Drag and drop the Scroll Position to the just above the title of the ‘Sanding’ paragraph.
  6. With the Scroll Position still selected, go to the Widget Settings and give the Scroll Position a ‘Unique Name’, in this case  ‘Sanding’.
  7. Add another Scroll Position, this time for the Finishing paragraph.
  8. Drag and drop the Scroll Position at the just above the title of of the Finishing paragraph. Again, give it a Unique Name, in this case ‘Finishing’.

You now have two Scroll Positions set up in the Blog Post Preview Window.


Setting Up The ‘Polishing’ Scroll Position

With the two Scroll Positions set up for the ‘Sanding & Finishing’ blog post, now we need to add the last Scroll Position for the ‘Polishing’ blog post.

  1. Select the Polishing blog post.
  2. Important! The Scroll Positions we set up for the ‘Sanding & Finishing’ blog post are still visible in the Blog Post Preview Window. This is because the Blog Post Preview Window acts like a Master Page. Anything placed on the Preview Window appears, and is available, to all the other posts in the blog. This is also the reason why we gave each Scroll Position a Unique Name so it is easy to determine which Scroll Position relates to which blog post.
  3. Add a new Scroll Position and drag and drop it to the top of the ‘Polishing’ paragraph title.
  4. Name the Scroll Position as ‘Polishing’.

You have now set up all the Scroll Positions you will be using for the three buttons on the Home page.


Hyperlinking the Buttons on the Home Page

  1. Go to the Home page to set up the three Hyperlinks.
  2. First click on “READ MORE” text for ‘Sanding’ section.
  3. Go to the Hyperlinks Inspector and tick the ‘Enable as Hyperlink’.
  4. Set the ‘Link To’ dropdown as ‘One of My Pages’.
  5. Set the ‘Page’ as the ‘Sanding & Finishing’ blog post page.
  6. The ‘Position’ dropdown shows the Scroll Positions that have been set up. Select ‘Sanding’, which is the Unique Name we set up earlier. The first hyperlink has now been set up.
  7. Next, select ‘READ MORE’ text for the ‘Finishing’ section and ‘Enable as Hyperlink’ in the Hyperlinks Inspector.
  8. Again, set the ‘Link To’ dropdown as ‘One of My Pages’ and the ‘Page’ dropdown to the ‘Sanding & Finishing’ blog post page.
  9. The ‘Position’ dropdown should be set to the ‘Finishing’ Scroll Position. The second hyperlink has now been set up.
  10. Lastly, select the ‘READ MORE’ text for the ‘Polishing’ section of the Home page.
  11. Again ‘Enable as Hyperlink’ in the Hyperlinks Inspector and set the ‘Link To’ as ‘One of My Pages’.
  12. This time, set the ‘Page’ dropdown as the ‘Polishing’ blog post page.
  13. Set the ‘Position’ dropdown as the ‘Polishing’ Scroll Position. The last hyperlink has now been set up.


Preview and Publish!

Once the hyperlinks have been set up, test the links using Preview. Click on the ‘READ MORE’ text for each button you have hyperlinked to see how the Scroll Position works.


Using Scroll Position in blog posts is very useful for focusing your visitors on hyperlinked objects and text. When using this Scroll Position for blog posts, remember that the Blog Post Preview Window shows every blog post’s Scroll Positions on the Preview Page at the same time. As such. using a Unique Name for each Scroll Position is usually a good idea so you can keep track of each Scroll Position. It’s also worth remembering to be careful when moving or deleting Scroll Position lines in the Blog Post Window as you don’t want to inadvertently move or delete a blog post’s Scroll Position!


Video Walkthrough

There’s also a video walkthrough of this blog post, Scroll Position and Blog Posts which takes you through the whole process of linking buttons on your Home page to specific sections of your blog posts.


If you have any questions about this post, please do let us know in the Comments Section below, we’re happy to help!


EverWeb on Social Media

You can also find EverWeb on the following social media platforms:

Facebook

Google+

Flipboard

YouTube

Twitter handle @ragesw


EverWeb’s NEW Scroll Position Feature

December 7th, 2017

EverWeb Scroll Position Feature


EverWeb version 2.6 introduces a great new feature, Scroll Position, which allows you to hyperlink an object such as a button, text or image to any location on any page in your website. For example, you could set up three buttons on a page, each button taking you to a different paragraph on the same page, or set up a ‘Back to Top’ text link at the bottom of your page to smooth scroll back to the top of the page. There are many case uses for this feature!


Using Scroll Position

There are two ways to set the Scroll Position, either by the Scroll Position button in the Toolbar, or by using the Insert -> Scroll Position menu option.

When you add a Scroll Position, a horizontal turquoise line is added to the page across the Editor Window. The currently selected Scroll Position line appears turquoise, otherwise the lines appear dark blue. Notice that the Scroll Position line does not have any selection handles as it is a different type of object to those that do have selection handles.

Once you have added a Scroll Position you will want to move it to where you want it on the page e.g. at the top of a paragraph. To do this, simply click and drag the line up and down the page as required. Release the mouse button when finished with positioning.


Naming Scroll Position Lines

If you are using more than one Scroll Position on your page, it is a good idea to name each Scroll Position. This makes things easier when hyperlinking the Scroll Position to an object. Each Scroll Position is identified by the number of pixels it is down from the top of the page, so adding a user friendly name will help save time especially if you have many Scroll Positions on your page. To name a Scroll Position, first make sure it is selected, then go to the Widget Settings in the Inspector Window. Enter the name you want.  You can change the name later if you want.


Hyperlinking To The Scroll Position

Once you have the Scroll Position in the place you want it  you will need to link it to an object. For example, you may have set up a button at the top of the page that when pressed takes you to a Scroll Position further down the page, such as a specific paragraph. To do this:

  1. Click on the text label inside the button at the top of the page.
  2. Next go to the Hyperlinks Inspector.
  3. Tick the checkbox to ‘Enable as Hyperlink’.
  4. Make sure that the ‘Link To’ drop down is set as ‘One of My Pages’.
  5. In the drop down for ‘Page’ select the page that you are currently on as this is where your Scroll Position is.
  6. For ‘Position’ click on the drop down arrows and change ‘Top of Page’ to your Scroll Position location.
  7. The button and the Scroll Position are now linked.


When you have set up the link, Preview to test the button. When you press the button, the page should smooth scroll to the Scroll Position.


Relocating and Removing Scroll Position Lines

To relocate a Scroll Position to another location, simply click on the Scroll Position line and drag it to its new location. If you need to delete a Scroll Position line, click on the line so that it changes from dark blue to turquoise then press the delete (backspace) key on the keyboard.


Video Walkthrough

To watch a video walkthrough of this blog post check out our “EverWeb’s Scroll Position Feature” YouTube video.


If you have any questions about this post, please do let us know in the Comments Section below, we’re happy to help!


EverWeb on Social Media

You can also find EverWeb on the following social media platforms:

Facebook

Google+

Flipboard

YouTube

Twitter handle @ragesw

Introducing EverWeb Version 2.6: Lightning Publishing, Scroll Position and Much More!

November 30th, 2017

We’re pleased to announce the immediate availability of EverWeb version 2.6 which features up to 5x faster publishing and the new Scroll Position feature. We have updated and improved lots of features as well as some updating of EverWeb’s User Interface graphics. This release is packed full of improvements so check out the full list of what’s new and updated below. You will also find instructions on how to update your version of EverWeb to version 2.6 as well…


EverWeb 2.6 is available in two versions:

  • OS X 10.7 – 10.8 (32-Bit): Snow Leopard, Lion, Mountain Lion, Mavericks
  • OS X 10.9 and higher (64-Bit): Mavericks, Yosemite, El Capitan,  Sierra, High Sierra

EverWeb version 2.5.1 will remain the current version for users of OS X version 10.6 for now.

When updating to EverWeb version 2.6, the update process will automatically download the correct version of EverWeb for your macOS.


EverWeb version 2.6 Includes…

[NEW] Fast Publishing for EverWeb+Hosting, FTP and FTP over SSH. In EverWeb’s Preferences you can specify how many files can be uploaded at once.

[NEW] Scroll Position lets you insert an anchor position and from Inspector->Hyperlinks you can select one when you select ‘Link to one of my pages’

[NEW] 20 new Theme Templates have been added, many using scroll position and some with themed blog pages.

[NEW] Type Ahead for Theme Templates. When adding a page, if you know the Theme Template your want, just start typing the name of the Theme and EverWeb will take you to the Theme as you type.

[NEW] Server Preview Preferences. You can view previews on any local device on your local network. Use EverWeb-> Preferences-> General to turn Server Preview on or off as desired.

[NEW] New Widget icon ‘covers’ for all inbuilt widgets.

[NEW] New Insert Button icons which can also be scaled as reqiured.

[NEW] New Instagram button.

[NEW] PayPal widget now lets you specify height/width of custom buttons so you can add retina buttons.

[NEW] PayPal widget now uses updated style default ‘Buy’ buttons.

[NEW] PayPal widget now includes a ‘Donate’ option.

[NEW] Animations now work with shadows.

[NEW] Scroll Position Anchor icon added to the Toolbar.

[NEW] Insert -> Scroll Position menu option.

[NEW] A ‘New’ label is included in the Theme Template Chooser when new Theme Templates have been added.

[NEW] URL of published website will be shown if you are overwriting one when publishing. Only for the English version of EverWeb at present.

[IMPROVED] Working with a project file with full width images should be faster when resizing the window or the design canvas.

[IMPROVED] Previewing a website will only export the image for the screen type e.g. only a retina image on retina Macs is exported.

[IMPROVED] Page shadow background uses CSS now so it looks better when you specify a top margin.

[IMPROVED] Shadows are exported as CSS unless you are using a PNG or shape that is anything other than a rectangle.

[IMPROVED] Renaming pages or directories no longer creates a new XML file in the project file, preventing project files from growing very large, very quickly.

[FIX] When duplicating directories with sub pages, the sub pages are now also duplicated.

[FIX] The FaceBook Page Timeline widget now respects the ‘Show Timeline’, ‘Messages’ and ‘Events’ checkboxes.

[FIX] Full width scale to fill images should be exported properly with the scale to fill effect in the browser. The images are exported at the highest possible size.


How To Update To EverWeb version 2.6

You can easily update to EverWeb version 2.6 by

  1. Launching EverWeb then going to the EverWeb menu at the top of the screen and selecting ‘Check for Update’ or by
  2. Downloading EverWeb from the EverWeb website.

Remember, you won’t lose any previous data when updating since your website project files are stored elsewhere on your computer.

EverWeb version 2.6 is free for EverWeb + Hosting users and EverWeb Standalone users who are within their 1 year of free upgrades and support period.

You can easily check your EverWeb Standalone free upgrade period from EverWeb’s Preferences window or your client area.

If you have passed your one year of free EverWeb upgrades, you can purchase 1 more year of upgrades and support from your client area.

You can easily re-download earlier versions of EverWeb from your client area if you are not ready to purchase an additional year of upgrades and support.

Login to your client area and go to the ‘Manage Product’ page. On the left of this page, select ‘Downloads’ and choose the version of Everweb that you need, either the OS X 10.6 version,or OS X 10.7 and later, version.


More Information About EverWeb version 2.6

If you need more information about EverWeb version 2.6 please check out the following resources:

  • The updated EverWeb website which has up to the moment information in it’s new blogging section
  • New EverWeb videos on YouTube
  • The updated EverWeb User Manual under EverWeb’s Help menu
  • The EverWeb Discussion Forum


If you can’t find what you need, or have any other questions, comments or feedback please let us know. We’re happy to help.


EverWeb version 2.6 Video Walkthrough

Click on the link for a video walkthrough of some of the important new features of EverWeb 2.6.


EverWeb on Social Media

You can also find EverWeb on the following social media platforms:

Facebook

Google+

Flipboard

YouTube

Twitter handle @ragesw

EverWeb 4th Anniversary Review: A Year of Big Features!

November 16th, 2017

EverWeb's 4th Anniversary


This week four years ago we launched EverWeb version 1.0 to the world. It’s been a great journey so far and we couldn’t have done it without your help, support, loyalty and feedback! Thank You!

Since our last anniversary, we’ve been busier than ever, adding many new features and refinements to EverWeb that you, the EverWeb community, asked for. Here are just some of the highlights from our third year…


Blogging

Undoubtedly the most requested feature for inclusion in EverWeb, blogging debuted in November 2016. EverWeb’s fully fledged blogging environment retains the look and feel that iWeb users are familiar with whilst adding some great features: A choice of Comment Engine (Facebook Comments or Disqus), easy  iWeb and WordPress blog post importing, an RSS Subscribe button, Master Page support and much more… Check out the full details in our Introducing EverWeb version 2.0: Blogging Comes to EverWeb feature.


Animations

Our new Animation Engine put style, and  fun, into your website pages when EverWeb version 2.2 was released back in April. Over 16 great animation effects were introduced in a typically easy to use EverWeb way through the Shapes tab. Animations are great way to draw your visitors attention to where you want them to focus on your page. Find out more on how to use this feature in our Create Great Animation Effects with EverWeb! feature.


Site Shield Addon & End To End Data Encryption

This is one of EverWeb’s most important feature additions ever. If you have an EverWeb+Hosting account,  Site Shield Addon is a great way of end to end encrypting your website. Great for privacy, great for security. For your visitors, financial transaction and personal data becomes more secure with Site Shield Addon. There’s also the bonus of better Search Engine Page Rankings as Google and other search engine providers rank secure (HTTPS) websites higher in their search results than non-secure websites. For your website visitors, the lock symbol in the search bar alone adds reassurance when visiting your site!

If you have 10GB or higher EverWeb+Hosting account, Site Shield Addon is free. For those with a 2GB, you can easily purchase Site Shield Addon through your EverWeb Client Area.


Faster Publishing

With every version of EverWeb we always aim to improve the speed and performance of the product, especially important if you are publishing large Projects. We’ve also regulary optimize the code that’s generated so your website will load faster for your users and be more responsive too. Look out for more news about faster publishing in the near future with the upcoming EverWeb version 2.6!


64-Bit EverWeb

EverWeb became a 64 -Bit product with the release of version 2.5. This is an important step, warranted by Apple’s drive to 64-Bit computing, both on macOS and iOS, over the last year. The move to 64-Bit also helps us take advantage of technology so that we can give you larger EverWeb Project files, better performance and more amazing features in the future.

Importantly, we haven’t forgotten our users whose Macs are not 64-Bit capable. There’s 32-Bit version of EverWeb just for you.


SEO Improvements with Language Localization

In addition to the Site Shield Addon in EverWeb version 2.4, we also introduced a new option for Language Localization. This option improves your website’s SEO for better search engine ranking results by using language localization to better serve visitors searching the web with more relevant search results.

Language localization can be applied in EverWeb either globally to your whole website, globally but with specific pages overridden to use specific local language settings or just on an ad-hoc page by page basis.

Language Localization is a great way to improve your website’s SEO and is great for multilingual websites or websites that target different geographic markets.


Keyboard Shortcuts, Widgets and More…

There are many more ways in which we’ve improved EverWeb over the year: Shortcut keys to help improve your workflow, new and updated widgets, an improved Preview function,  better RSS functionality, distance to object and much more!


What’s Next…

It’s been an exciting twelve months, but we’re not finished yet! EverWeb version 2.6 is on the horizon and packs lots of new and updated features to enjoy. We also have lots of exciting things planned for the next twelve months so stay tuned as there’s a lot of great stuff to look forward to!

This is also a great time for us to get your feedback on EverWeb! What do you want us to add to the product, change or improve? What can we do better and how can we better serve you? Let us know in the Comments section below, we are here to help and look forward as always to your feedback!


EverWeb on Social Media

You can also find EverWeb on the following social media platforms:

Facebook

Google+

Flipboard

YouTube

Twitter handle @ragesw

EverWeb’s Facebook Page Timeline Widget

November 2nd, 2017

EverWeb Facebook Page Timeline Widget


For many people Facebook integration in their website is important for either business, hobby or personal projects. EverWeb has always included a Facebook button in the Insert menu so that you can quickly add a button on your web page to link directly to your Facebook page. EverWeb’s Facebook Like widget debuted in version 1.3 allowing you to Like, Recommend and Share your Facebook page directly from your website.

Now with the recently released EverWeb version 2.5 there’s the new Facebook Page Timeline widget. This widget lets you easily display your Facebook Page Timeline directly on your webpage. The widget is highly customisable so that your timeline displays exactly the way in which you want. Now your visitors can view your timeline without having to leave your website.


Using Facebook Page Timeline Widget

To use the Facebook Page Timeline widget:

  1. Make sure that you have EverWeb version 2.5, or higher, installed on your computer.
  2. Next, go to the web page in your EverWeb project file where you want to insert the widget.
  3. From the Widgets tab, drag and drop the widget on to the Editor window.
  4. Size and position the widget where you want it located. Remember that you may have to resize and/or reposition the widget later depending on the options you select or deselect from the Widget Settings.
  5. In the Widget Settings, the first thing to do is insert the URL of your Facebook page in to the ‘Webpage Address’ field. The easiest way to do this is to go directly to your Facebook page in your browser, then copy the URL from the browser search bar to the clipboard.
  6. In the ‘Web Address’ field of the Facebook Page Timeline widget, click on the existing text to highlight it, then paste in your Facebook URL. Finish by pressing enter which will update the widget on the page.
  7. Once you have placed the URL in the ‘Webpage Address’ field, the widget will automatically update. You can now check, or uncheck, the different Widget Settings options to achieve the look that you want.


Facebook Page Timeline Widget Settings

By default, all the Widget Settings options are checked except the ‘Hide Cover Photo’ option. If you uncheck this option, the background image behind your page name disappears. leaving the background white instead.

The ‘Use Smaller Header’ option displays the smaller header, the Like Page button and the number of likes the page has. If you deselect the option, you will see a larger header, the Like Page button and also the Facebook ‘Share’ button. The number of ‘Likes’ the page has is not displayed in this instance.

Choose the options that you want to make the widget as you wish. Resize the widget vertically Ito display more or less of the timeline to appear on the page. Your visitors will be able to scroll the timeline regardless of how much of it you choose to display on the page.

Once you have finished customizing the widget, publish your site!


Video Walkthrough

To watch a video walkthrough of this blog post, check out our EverWeb’s Facebook Page Timeline Widget YouTube video.

If you have any questions about this post, please let us know in the Comments Section below, we’re happy to help!


EverWeb on Social Media

You can also find EverWeb on the following social media platforms:

Facebook

Google+

Flipboard

YouTube

Twitter handle @ragesw


EverWeb’s Live Photo Widget

October 19th, 2017

EverWeb Live Photo Widget


EverWeb version 2.5 introduced a couple of great new widgets: The Facebook Page Timeline widget and the Live Photo widget. We will review the Facebook Timeline widget in the future, but for now lets take an in depth look at the Live Photo widget.

As you may know, you can create a Live Photo if you have an iPhone 6s, or later, or a 2017 or later iPad. Live Photo works by recording 1.5 seconds of audio and video before and after the photo is taken creating a ‘live’ image. When you touch the image on your iPhone, the recorded snippet plays.


Creating a Live Photo

To create a Live Photo;

  1. Open your iOS camera app.
  2. Check that your camera app is set to Photo mode.
  3. Tap the circle-in-a-circle icon to toggle Live Photo on and off. By default Live Photo is set ‘On’.
  4. With the icon set ‘On’, any photo you now take will be a Live Photo.


Adding a Live Photo to Your Web Page

Once you have created a Live Photo you can add it to your web page in EverWeb using the following steps:

  1. Make sure that you synch the photo(s) you want from your iPhone, or iPad, with the Photos app on your Mac.
  2. Next select the photo you want to use from the Photos app on your Mac.
  3. In the Photos app select File -> Export Unmodified Original.
  4. This will produce two files, an image file with a .JPG extension and a video file which has a .MOV extension.
  5. Once you have produced these two files you can use them in EverWeb.
  6. First make sure that you have EverWeb version 2.5, or higher, installed if you have not done so already.
  7. Open your website Project and go to the page where you want the Live Photo to be placed.
  8. From the Widgets tab, drag and drop the Live Photo widget on to your page.
  9. With the Live Photo widget selected, use the Widget Settings to add the exported JPG file as the Image file and the exported .MOV file as the Video file.
  10. Once you have added these two files, just hit the Preview button to test your page before publishing.
  11. To see the Live Photo in action, mouse over the ‘Live’ button in the top right hand corner of the image.


Video Walkthrough

To watch a video walkthrough of this blog post check out our EverWeb’s Live Photo Widget YouTube video.


If you have any questions about this post, please do let us know in the Comments Section below, we’re happy to help!


EverWeb on Social Media

You can also find EverWeb on the following social media platforms:

Facebook

Google+

Flipboard

YouTube

Twitter handle @ragesw

Introducing EverWeb version 2.5 with 64-Bit Support

October 10th, 2017

EverWeb 2.5 with 64-Bit Support


We’re pleased to announce the immediate availability of EverWeb version 2.5 which now supports 64-Bit computing. Apple recently announced that the recent release of macOS High Sierra would be the last OS version to support 32 bit applications ‘without compromise‘. As Apple moves towards being a 64-Bit only environment it is important that applications, such as EverWeb, move as well so they function properly under future releases of macOS.  In everyday use, you may notice some performance improvements in EverWeb as well as being able. to create larger EverWeb project files than you could before.


EverWeb 2.5 is available in two versions:


OS X 10.6 – 10.8 (32-Bit): Snow Leopard, Lion, Mountain Lion, Mavericks

OS X 10.9 and higher (64-Bit): Mavericks, Yosemite, El Capitan,  Sierra, High Sierra


When updating to EverWeb version 2.5, the update process will automatically download the correct version of EverWeb for you.

In addition to 64-Bit support, EverWeb 2.5 includes the following new and enhanced features…


EverWeb version 2.5 Includes…

[NEW] EverWeb is now 64-Bit which means it can handle even larger websites and perform faster in almost all aspects.

[NEW] Enhanced Preview provides an exact local preview of what you will expect when you publish your website. Widgets that had issues when previewing now preview correctly.

[NEW] RSS caching makes RSS feeds work faster and more reliably on all web hosting platforms and work 100% with EverWeb + Hosting.

[NEW] Facebook Page Timeline widget.

[NEW] Live Photos widget lets you add Live Photos from you iPhone to your website.

[NEW] Rename menu in File menu lets you rename your website, blog posts, pages and assets.

[NEW] Website URL field when Publishing to Folder

[NEW] Control+Click can be used on objects in the Editor Window

[NEW] Revised EverWeb User Manual

[FIX] Character spacing field in the Inspector tab now works properly

[FIX] Opacity settings and animation settings work properly when used together on a shape

[FIX] Fixed a crash that could happen when working on multiple projects

[FIX] Spelling mistake in the German version of EverWeb

[FIX] Fixed a bug with animations and the latest version of Chrome

[FIX] Email messages from the Advanced Contact Form are encoded properly for non-latin based languages so Chinese, Japanese, Russian etc… messages will display properly.

[FIX] Email messages from Advanced Contact Form are less likely to be flagged as spam

[FIX] Fixed an issue with FTP publishing when not using FTP over SSL/TLS to publish

[FIX] Fonts used in Contact Form Advanced Widget now display correctly when previewed or published with Firefox


How To Update To EverWeb version 2.5

You can easily update to EverWeb version 2.5 by

  1. Launching EverWeb then going to the EverWeb menu at the top of the screen and selecting ‘Check for Update’ or by
  2. Downloading EverWeb from the EverWeb website.

Remember, you won’t lose any previous data when updating since your website project files are stored elsewhere on your computer.

EverWeb version 2.5 is free for EverWeb + Hosting users and EverWeb Standalone users who are within their 1 year of free upgrades and support period.

You can easily check your EverWeb Standalone free upgrade period from EverWeb’s Preferences window or your client area.

If you have passed your one year of free EverWeb upgrades, you can purchase 1 more year of upgrades and support from your client area.

You can easily re-download earlier versions of EverWeb from your client area if you are not ready to purchase an additional year of upgrades and support.

Login to your client area and go to the ‘Manage Product’ page. On the left of this page, select ‘Downloads’ and choose the version of Everweb that you need, either the OS X 10.6 version,or OS X 10.7 and later, version.


More Information About EverWeb version 2.5

If you need more information about EverWeb version 2.5 please check out the following resources:

  • The updated EverWeb website which has up to the moment information in it’s new blogging section
  • New EverWeb videos on YouTube
  • The updated EverWeb User Manual under EverWeb’s Help menu
  • The EverWeb Discussion Forum


If you can’t find what you need, or have any other questions, comments or feedback please let us know. We’re happy to help.


EverWeb on Social Media

You can also find EverWeb on the following social media platforms:

Facebook

Google+

Flipboard

YouTube

Twitter handle @ragesw

Setting Up EverWeb Project File Defaults

September 28th, 2017

EverWeb Project File Defaults


When starting a new EverWeb website project, you will be keen to get started right away. At the same time, you will also want your website development time to be spent spent efficiently. Taking a few moments to set up some project file defaults will save you time and effort and there will be less chance of needing to change or fix things later. Setting defaults also helps you instantly create a consistent look and feel to  your website right from the beginning.


Setting The Project File Name

Once you have created your project file, the first thing you probably want to do is to name it. Double click on the default project name ‘NEW WEBSITE’ in the Web Page List. The text will highlight, so you can overtype the text with the name you want. Press Enter to finish. The space character is allowed in the project file name but non-web safe characters such as  ‘&’, ‘@’ and ‘*’ are not. EverWeb will prompt you if it finds any non-web safe characters to enter valid characters.

In EverWeb version 2.5, or higher, you can also change the Project file name from the File-> Rename Website menu option.

Clicking on the project file name is also a shortcut for accessing the project’s Site Publishing Settings. We will come back to this  later on.


Are You Signed In To Your EverWeb Account?

Next go to the EverWeb -> Preferences… menu and to check that you are signed in to your EverWeb account. This is important to check as you need to be signed in to publish your website.

On the Accounts tab, the ‘Email’ and ‘Password’ fields are usually already filled in for you. Your account details are also filled in  e.g. ‘EverWeb + Hosting (10GB) and the ‘Next Due Date’ for your account’s renewal displayed.

If you see the ‘Sign In’ button, you are not yet signed in. In this case click the ‘Sign In’ button. If you don’t have an EverWeb account yet, click on the ‘Create Account’ text and follow the instructions.


Setting Alignment Guides and the Hyperlink Indicator

Whilst still in the Preferences dialog, go to the General tab to customize the display of the object alignment guides. It is recommended to have both options checked as the guides help when you move, or align, objects in the Editor Window.

When creating hyperlinks on your page, EverWeb, by default, displays a white arrow within a blue circle symbol. in the top right hand corner of the hyperlinked object. If you do not want to see this, toggle the Hyperlinks Indicator ‘Off’.


Setting AutoSave and Backup On!

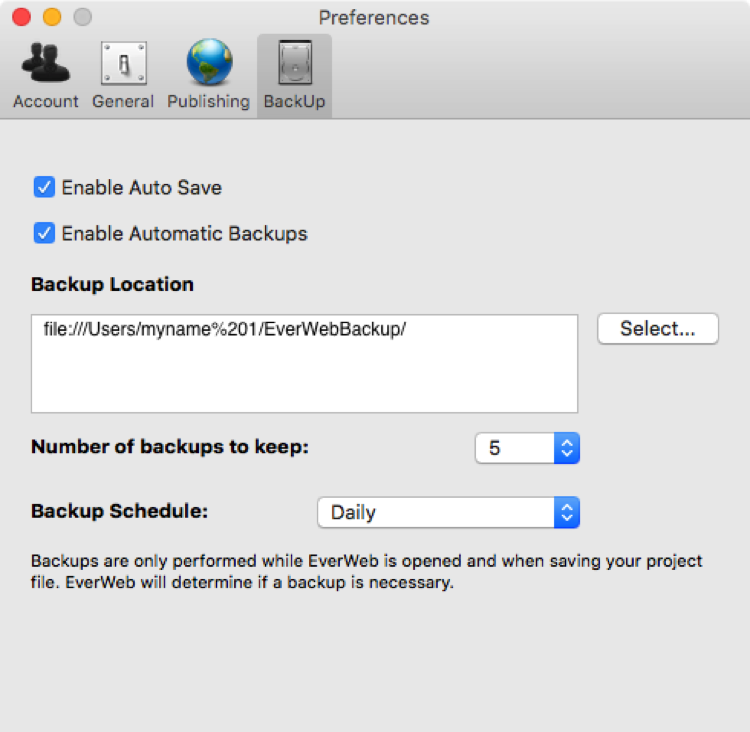
The last Preferences tab is the Backup tab. We strongly recommend that you set up a backup scheme for your EverWeb Project file in EverWeb in addition to any computer backup process you already have in place.

It is also recommended to set ‘Enable Autosave’ On as this will incrementally save your work so e.g. if you have a power outage, you will only probably lose the last few changes you have made since the last autosave.


Setting Up Site Publishing Settings

Once you have set your Preferences, close the Preferences dialog box. You will be returned to the Site Publishing Settings.

Use Site Publishing Settings to set your ‘Publishing To’ location as either EverWeb, if you host with us, or FTP Server if you host with your own hosting provider. Complete the details as required. If you use ‘FTP Server’ and do not know the settings to use, please consult with your hosting provider who should be able to provide them.

If you have an EverWeb+Hosting account, you can add in email addresses to your website in Site Publishing Settings. Scroll down the page and enter the email addresses you want, in the ‘Email Addresses’ section. For more information on setting up email addresses, please check out our Setting Up Email Addresses in EverWeb YouTube video.

When finished, click on the page name that you added when you first created the project file. You will find this directly under the website name in the Web Page List.


Setting Up Default Styles

The last defaults to set up are the Default Styles. Use the Format -> Default Styles menu option to the change the body text, hyperlinks and shapes defaults. If you have planned your website in advance, you will know which fonts, color schemes etc. to use as default. If you have not planned ahead, now is a good time to think about how you want your website to look. Setting up these defaults will save you time and effort, and will save you from having to change styling options retrospectively later on.

When setting Default Styles the changes you make only apply to new objects that you add to the Editor Window. The styling of any existing objects has to be changed manually.


Setting Up Other Defaults

You may be wondering how to set up page defaults so that you do not have to input items such as page and browser background,  content width, header and footer height etc. every time you create a new page. Using Master Pages is the perfect way to create a default template page.


Video Walkthrough

To watch a video walkthrough of this blog post check out our ‘Setting EverWeb Project Defaults‘ YouTube video.


Setting up defaults when you create a new EverWeb Project makes your website much quicker, easier and less prone to errors and frustration. Setting up defaults only takes a few minutes. The next step, using Master Pages, gives you complete control of your web page environment and again, is a great time and effort saver!


If you have any questions or comments, please do let us know. We are here to help!


EverWeb on Social Media

You can also find EverWeb on the following social media platforms:

Facebook

Google+

Flipboard

YouTube

Twitter handle @ragesw