
Embedding JotForm Contact Forms in EverWeb
May 18th, 2017
EverWeb makes it easy to embed a JotForm contact form into your web pages. JotForm is a free to use, third party online contact form builder that does not require any coding. Like EverWeb, JotForm has great drag and drop capabilities, templates and even widgets so that you can create and customize the contact forms you want quickly and easily.
In the example below, students are going to be voting for a new Student Union president. Voting is via a contact form that is embedded in a web page. In this example the contact form has already been created in JotForm.
- To start, click on the ‘Add Page’ button from the Toolbar in the EverWeb project file that you want the contact form to be embedded in.
- Select the Theme Template you want to use e.g. the ‘University’ Theme Template.
- Next choose the page style you want e.g. the ‘Blank’ page style, then click the ‘Select’ button.
- Make sure that you have enough space to embed the form on your page. You can adjust the page layout later, but it is a good idea to get an approximate look for your page before you embed the JotForm.
- With the page layout prepared in EverWeb, go to the JotForm website and log in to your account if you have not done so already.
- Select the JotForm contact form that you want to embed in to EverWeb.
- Click on the ‘Publish’ button in the menu.
- Select ‘Embed’ from the left hand side and then click on the ‘Copy Code’ button which will copy the embed code to the clipboard so it can be pasted in to EverWeb.
- Now go back in EverWeb and click on the ‘Widgets’ Tab.
- Select the ‘HTML Snippet’ widget and drag and drop it on to the page in the space that you created earlier for the JotForm contact form.
- Click in the ‘HTML Code’ box and paste the code in from JotForm.
- Press ‘Apply’ to finish. You should see your Jotform form embedded in your EverWeb page.
- Optionally, you may want to make the embedded JotForm full width. If this is the case, keep the HTML Snippet widget selected, go to the Metrics Inspector and check ‘Full Width’.
- Finally, reformat the page layout as required so that the embedded form is in the correct place on the page.
- ‘Preview’ or ‘Publish’ the form so that you can test that it works correctly. In this example, Use Preview to check out the layout and form content. Only click on the ‘Submit’ button when you ‘Publish’ your website and not when using Preview as it will not work correctly if you do so. When you have published the website, rest the JotForm to make sure that the email sent is received properly by your email program.
Matching Up Colors
If you need to match up the colors in your JotForm contact form with those in your EverWeb page there are two ways you can do this:
Using the Eye Dropper in EverWeb
- Begin by selecting the object in EverWeb that needs to have its color changed
- Next Click on the Shape Options tab in the Inspector Window
- Click on the color swatch in the Fill section. The Color Picker appears on screen
- In the bottom left hand corner of the Color Picker you will notice there is an Eye Dropper. Click on this.
- Your mouse pointer will change in to a large magnifier. Move the magnifier over the object whose color you want it to match with and then click
- Your selected object will change color and match the object you clicked on.
Using Digital Color Meter
Digital Color Meter comes with macOS. Use a Spotlight search (Cmd+Spacebar) and enter the words ‘Digital Color Meter’. As you type, the whole phrase gets autofilled by the search. Just press enter when this happens to open the application. When using Digital Color Meter, remember to set ‘Display in Generic RGB’ from the drop down menu. Once you have done this, mouse over the color you want to select. Make a note of the R, G and B (Red, Green and Blue) values that are shown in the Digital Color Meter.
When you have the color values, go back to EverWeb and select the object that you want to be the same color as in JotForm, for example, a rectangular shape. Go to the Shape Objects tab and click on the color swatch in the Fill section. This will call up the Color Picker. Select the second tab from the left in the Color Picker and enter in the R, G, B values in the corresponding Red, Green, Blue values boxes.
YouTube Video Link
There’s also a YouTube video available of this blog so check out Embedding a JotForm in EverWeb for the audio-visual walkthrough.
EverWeb on Social Media
You can also find EverWeb on the following social media platforms:
Twitter handle @ragesw
Sitemap Automator 3.5 Available for macOS and Windows
May 9th, 2017Sitemap Automator, the XML sitemap generator for macOS and Windows has been updated to version 3.5.
This new version comes with better support for HTTPS secure websites, support for macOS Sierra, Windows 10 and improvements to scanning websites and uploading your XML Sitemaps.
Sitemaps are an important aspect for search engine optimizations as they tell Google and other search engines how to scan and display your website in their search engine results.
Plus, with Google’s search console you can get important feedback directly from Google as to why your website may not be ranking properly. You can find out if there are any problems on your website, who links to your website, what pages rank the highest and even get suggestions to improve your search engine rankings.
Sitemap Automator is free for registered users and there is a free trial for all non license holders to try it out.
You can download Sitemap Automator from the Sitemap Automator downloads page.
Using Font Awesome Icons with EverWeb
May 4th, 2017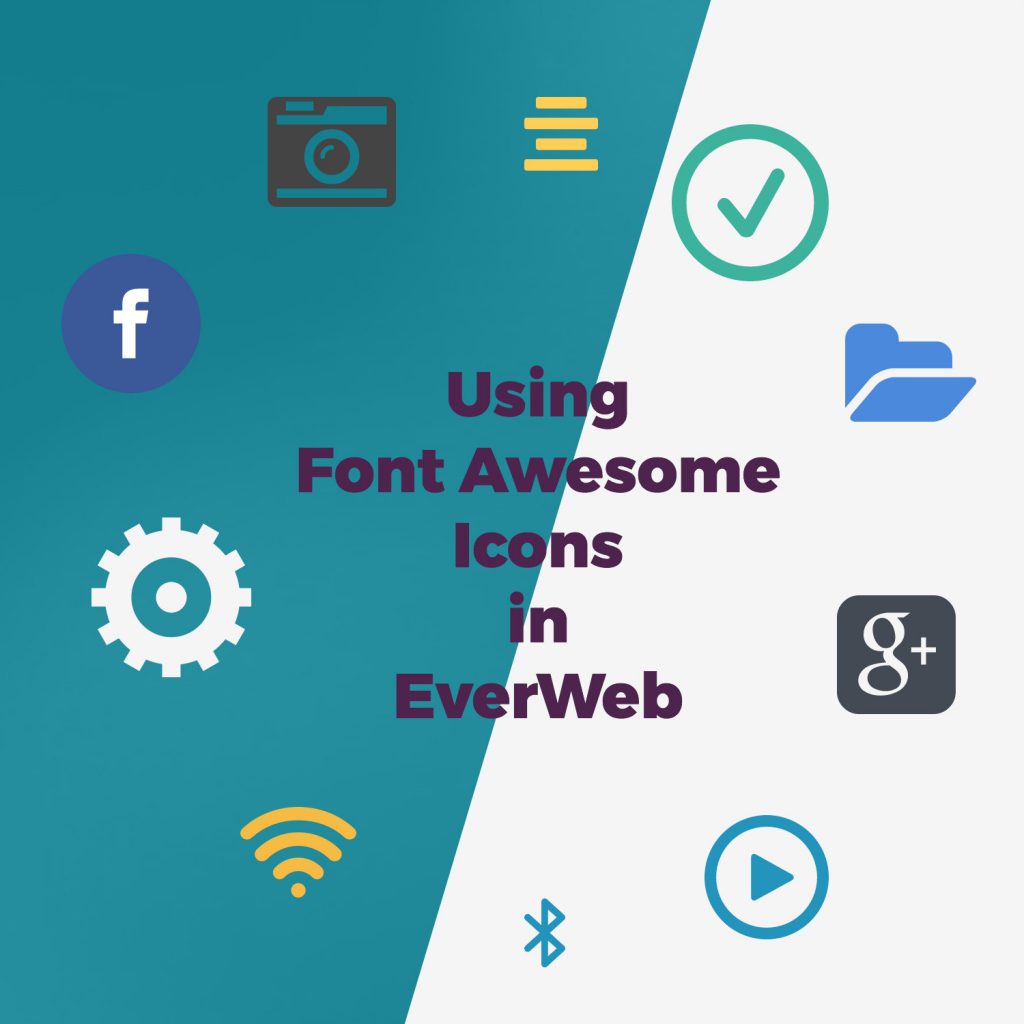
If you have not heard of Font Awesome, it’s a collection of over 600 scaleable icons that you can include in your web pages and it’s absolutely free! In addition, Font Awesome’s icons do not need to be downloaded and they can be updated by those who supply them. For example, Google updated its Google+ icon about a year ago and later updated its Font Awesome icon. The updated icon is automatically used in your web pages so you do not have to update. or republish. your website. The icons can be customized so that you can combine icons together, change the icon’s color and other effects. Last but not least, using Font Awesome’s icons is a great way to ‘dip you toes’ into the ‘waters’ of HTML.
Getting Started With Font Awesome
To start using Font Awesome icons is very simple and only takes a few steps:
- Go to the Font Awesome website and click on the ‘Getting Started’ menu.
- Sign up by entering your email address and clicking on the ‘Send my Font Awesome embed code’ button.
- Check your email. If you have not received an email, check your junk mail folder just in case.
- Copy the CDN (Content Delivery Network) embed code from the email to the clipboard.
Adding Your Font Awesome Embed Code in EverWeb
The CDN embed code is going to be added to your EverWeb Project file. Font Awesome uses the CDN, or Content Delivery Network, as a simple, fast and efficient way of loading and rendering icons on your page. Now that you have copied the CDN embed code, you can use it in EverWeb:
- Open your Project file in EverWeb
- Go to the ‘Site Publishing Settings’ either by clicking on the website name in the Web Page List or by using the File-> Edit Publishing Settings menu.
- Go to the Header/Footer Code section. In the Header Code section, paste in the CDN embed code.
You are now all set up to use Font Awesome icons in your Project. As you have added the code to the Project’s Header code section, the embed code is now available on all of your Project’s pages so you place add icons anywhere in your website.
Using Font Awesome Icons in EverWeb
Now that everything is set up you can start to use Font Awesome icons. Each Font Awesome icon has its own name e,g. the Instagram icon is called ‘fa-instagram’, an icon representing a desktop pc is called ‘fa-desktop’ and so on.’fa’ is used as a prefix to identify the icon as a Font Awesome icon. All available icons and their names are listed on Font Awesome’s Icons page which is sorted by category and completely searchable.
To get started, it’s a good idea to try out some examples from Font Awesome’s ‘Examples’ menu. You will find a great camera example in the ‘Larger Icons’ section which shows you how to scale the icon to different sizes, a ‘Stacked Icons’ section that shows you how you can place icons on top of one another and so forth. Even if you have never had any experience in HTML it is easy to get started using the code relating to each icon.
To add an icon to your page in EverWeb do the following:
- Start with an example from Font Awesome’s icon page e.g. the camera in the ‘Larger Icons’ section.
- Copy the code that relates to the icon on the left hand side e.g. for the largest camera icon displayed, copy the code on the right of it to the clipboard e.g.
<i class="fa fa-camera-retro fa-5x"></i> fa-5x - Next, in EverWeb, drag and drop the HTML Snippet widget on to the page.
- Paste the code you have copied from the clipboard in to the the ‘HTML Code box’ of the widget and press ‘Apply’ to implement the code.
- The widget will update in the Editor Window. In this example above, the camera icon and the name of the icon (fa-5x) are displayed.
If you do not want the text that is displayed, just delete the text ‘fa-5x’ from the end of the line of code and press the ‘Apply’ button again to update the widget.
Next you may want to start using other icons e.g. to use a Facebook icon with the same size as the camera example, you could use the code
<i class="fa fa-facebook fa-5x"></i>
in the HTMLSnippet widget. Use the examples in Font Awesome’s website to experiment more, especially if you are new to coding. Use the examples to stack icons, create lists of icons, animate icons and so on. There is plenty to discover! You will usually see the results of your work immediately in EverWeb as the HTML Snippet widget updates when you press the ‘Apply’ button.
More Help and Resources
The main source of help is the Font Awesome website itself. It has many examples and a blog where you can find out more information, hints and tips on using these icons.
As Font Awesome involves some coding, the W3Schools website may also be of use as it has a specific section dedicated to Font Awesome as well as further examples and information on how to start with HTML if you are interested.
Enjoy discovering Font Awesome in EverWeb!
EverWeb on Social Media
You can also find EverWeb on the following social media platforms:
Twitter handle @ragesw
Introducing EverWeb version 2.3: Speed & Performance
April 25th, 2017
We are pleased to announce the immediate availability of EverWeb 2.3. The new release includes some internal optimizations to EverWeb’s generated HTML and CSS code. This means your websites will load faster for your visitors, will upload faster and, in general, operate much more efficiently.
We have also included an important fix for a ‘Dropped Connection’ error when uploading websites to FTP or to your EverWeb account.
With EverWeb 2.3 you should see speed improvements in your websites from these optimizations.
EverWeb version 2.3 Includes…
- A variety of code optimizations implemented to make websites load and publish faster.
- Fix for using mouse over and mouse down effects for a regular rectangle shape which now works properly when returning to its original state.
- Fixes an issue so that uploading to FTP or EverWeb account no longer produce a ‘Dropped Connection’ error.
How To Update To EverWeb version 2.3
You can easily update to EverWeb version 2.3 by
- Launching EverWeb then going to the EverWeb menu at the top of the screen and selecting ‘Check for Update’ or by
- Downloading EverWeb from the EverWeb website.
Remember, you won’t lose any previous data when updating since your website project files are stored elsewhere on your computer.
EverWeb version 2.3 is free for EverWeb + Hosting users and EverWeb Standalone users who are within their 1 year of free upgrades and support period.
You can easily check your EverWeb Standalone free upgrade period from EverWeb’s Preferences window or your client area.
If you have passed your one year of free EverWeb upgrades, you can purchase 1 more year of upgrades and support from your client area.
You can easily re-download earlier versions of EverWeb from your client area if you are not ready to purchase an additional year of upgrades and support.
Login to your client area and go to the ‘Manage Product’ page. On the left of this page, select ‘Downloads’ and choose the version of Everweb that you need, either the OS X 10.6 version,or OS X 10.7 and later, version.
More Information About EverWeb version 2.3
If you need more information about EverWeb version 2.3
- The updated EverWeb website which has up to the moment information in it’s new blogging section
- New EverWeb videos on YouTube
- The updated EverWeb User Manual under EverWeb’s Help menu
- The EverWeb Discussion Forum
If you can’t find what you need, or have any other questions, comments or feedback please let us know. We’re happy to help.
EverWeb on Social Media
You can also find EverWeb on the following social media platforms:
Twitter handle @ragesw
Create Great Animation Effects with EverWeb!
April 20th, 2017
The recently released EverWeb 2.2 added an all new animation engine to the product, giving you 16 different types of animation effects to choose from. Animation effects can really bring your website to life and you can get really creative in the process! Let’s look at how to create an animation and when it is good to use, or not use, an effect in your website.
How to Create an Animation Effect
Creating an animation effect in EverWeb is easy…
- Start by selecting an object to animate. This can be a Text Box, Shape or Image. You can even animate widgets with the exception of the RSS Feed and Image Gallery widgets. The widgets used to display the blog main, archive and blog post contents are also excluded.
- Next, go to the Shape Options Tab and tick the box next to the ‘Animation’ section to access the available options.
- Begin by choosing an Animation effect from the first drop down menu.
- Use the second drop down menu for additional options for the animation effect you chose in the first drop down menu. If you selected ‘Other’ in the first drop down menu, you will see a list of additional animation effects displayed in the second drop down.
- You can see a preview of the effect in the Preview box at the bottom of the Animation section.
- Once you have selected the animation you want, use ‘Duration’ to specify how long the animation is to last (in seconds.)
- Use ‘Delay’ to time when you want the animation to start, for example, if you have more than one animation effect in use, you may want to set a delay to stagger the effects them instead of them all being animated at the same time.
- Use ‘Repeat’ to trigger the animation effect again for the amount of times you specify.
- To see the animation effect in action, select Preview or Publish from the Toolbar.
When To Use Animation Effects
Using animation effects is a great way to bring your web pages to life, but there are also some caveats. Often sites that use animation tend to be look gimmicky. Here is our guide to when animation effects should be used:
Less is more: It’s best to use animation effects sparingly. Too many effects will just confuse your audience as they will not know where to focus their attention in the frenzy of effects on the page! Using fewer effects also makes the effects more fun and less gimmicky.
Focus: The main reason for using an animation is to bring your visitor’s attention to a particular part, or feature, of your page. For example, if you are selling concert tickets you may want to animate a ‘Buy Now’ button using a Flash or Pulse effect to lead your visitor to where you want them to be. Equate focus to ‘Call To Action’.
Timing: Your animation effects should be timed properly, not too fast and not too slow e.g. if you are animating a heart shape you will want it to beat (using the Pulse effect) at the right speed! Use ‘Duration’ to set the length of the animation and ‘Repeat’ to loop the animation. Always test your animations to make sure the timings are correct. You may find that you are adjusting your timings by 1/10ths of a second to get the effect spot on!
Suitability: When animating objects make sure that the effect used is suitable for the audience you are targeting. Remember that animation is a component of your page design and should be a natural ‘fit’ in your design. For example, if you web site is for a legal firm, you probably will want subtle effects rather than ‘comedy’ effects!
Telling a Story: The great thing about animation effects is that they can help you tell a story.e.g. a photographer may want showcase his/her work first before you see anything else on the page (such as navigation menus, text etc.) In this example, start with a blank page. To achieve this, first add all of the objects you want on to the page. Next, set a ‘Delay’ for all of the objects as this will delay them from being revealed. The last object you want revealed will have the longest delay, the first object you want revealed will have the shortest delay.
Next, you may want to use ‘Flip’ or ‘Fade’ effects to dramatically display the photographer’s images. Use a short Delay to quickly reveal each image for maximum effect. Next, you may want to fade in text boxes to explain the images using a delay long enough for the reveal of the images to have completed. Finally, the page is completed by adding a navigation menu, social media buttons etc. again using the ‘Delay’ property and the ‘Fade’ effects.
Testing: Always use Preview to see how your effects will look and if you need to adjust the Duration, Delay and/or Repeat. Remember that if you want to replay the animation effect in your browser just hit your browser’s refresh button unless you have changed the effect and need to Preview it again.
Planning and Testing
Animation can produce some amazing and fun effects. They can also add subtlety and style to your pages. The over-arching theme to remember, though, when using animation is planning and testing. Think about what you want to animate, why you want to animate and how you want to animate. Plan out the steps you need to achieve this. In the examples given above, typically you design you page first add the animation afterwards. In the photographer example, the page gets deconstructed so we want to work back from a complete web page to a blank looking page using animation to do so. Planning is essential when creating complex animations or storytelling style effects.
And as always, Test, Test, Test! Creating great effects can be sabotaged by poor timing or by delays that are either too long or too short. If you can test out your animations on others to see if your timings are correct! And don’t forget to test on mobile devices as well to see if what is effective on a desktop is also effective on a mobile phone.
Enjoy the animation effects in EverWeb 2.2 and please let us know if you have a question, or want to share any tips or effects work with us in the Comments section below!
EverWeb on Social Media
You can also find EverWeb on the following social media platforms:
Twitter handle @ragesw
Introducing EverWeb version 2.2 with New Animation Effects!
April 7th, 2017
We’re thrilled to announce that EverWeb version 2.2 is now available to download. The new release features a new animation framework with 16 different animation effects can be used in your website!
There is also a new ‘distance between objects’ feature, updated Audio and Image Slider widgets and much more as well as the usual maintenance and stability fixes. See below for the full list of what’s new in EverWeb version 2.2.
EverWeb version 2.2 Includes…
- [NEW] Animation Framework featuring 16 different animation effects.
- [NEW] Distance between objects indicator lets you see how far an object is under the mouse cursor from the selected object if you hold the Option key down
- [NEW] Image Slider widget now includes ‘Dark navigation arrows’ and centered thumbnails options
- [NEW] Updated Audio widget with looping, play audio on page load, mute and default sound level controls
- [IMPROVED] EverWeb works much better with large projects and uses much less memory
- [FIX] Copy and pasting styled text from Chrome into EverWeb
- [FIX] Blank paragraphs not retaining their font styling
- [FIX] Minor fixes to the blog archive widget
- [FIX] Delete key operation fixes
- [FIX] Projects resize and refresh properly between retina and non-retina displays
- [FIX] The least number of posts that can be displayed on blog main is now set to 1
- [FIX] When transferring a Project with a blog to another computer, the image links are maintained
- [FIX] Fixed Blog post image with spaces in its name not being exported properly
- [FIX] Fixed a memory leak on macOS Sierra that would cause EverWeb to slow down after using it for a while and publishing your website
- [FIX] Fixed Contact Form Advanced to use correct form address
- [FIX] Images for regular, color filled rectangles are no longer generated on publish, making publishing faster.
- [FIX] Header/Footer Code fields would replace a double dash. OS X Automatic text changes are no longer applied in these fields
- [FIX] Fixed error message when adding the blank template and EverWeb is in the Downloads folder instead of the Applications folder
How To Update To EverWeb version 2.2
You can easily update to EverWeb version 2.2 by
- Launching EverWeb then going to the EverWeb menu at the top of the screen and selecting ‘Check for Update’ or by
- Downloading EverWeb from the EverWeb website.
Remember, you won’t lose any previous data when updating since your website project files are stored elsewhere on your computer.
EverWeb version 2.2 is free for EverWeb + Hosting users and EverWeb Standalone users who are within their 1 year of free upgrades and support period.
You can easily check your EverWeb Standalone free upgrade period from EverWeb’s Preferences window or your client area.
If you have passed your one year of free EverWeb upgrades, you can purchase 1 more year of upgrades and support from your client area.
You can easily re-download earlier versions of EverWeb from your client area if you are not ready to purchase an additional year of upgrades and support.
Login to your client area and go to the ‘Manage Product’ page. On the left of this page, select ‘Downloads’ and choose the version of Everweb that you need, either the OS X 10.6 version,or OS X 10.7 and later, version.
More Information About EverWeb version 2.2
If you need more information about EverWeb version 2.2
- The updated EverWeb website which has up to the moment information in it’s new blogging section
- New EverWeb videos on YouTube
- The updated EverWeb User Manual under EverWeb’s Help menu
- The EverWeb Discussion Forum
If you can’t find what you need, or have any other questions, comments or feedback please let us know. We’re happy to help.
EverWeb on Social Media
You can also find EverWeb on the following social media platforms:
Twitter handle @ragesw
Selling Digital Goods with EverWeb
March 30th, 2017
Creating an online store for your website in EverWeb is easy using the built in PayPal widget and an active PayPal account. If you are about to set up a web store, remember that the process may take a couple of days to complete as setting up a PayPal account will require validation processes which take time to complete.
An online store selling physical goods is relatively straightforward to set up, but what if you want to sell digital goods through your website?
This blog explores how to use PayPal and EverWeb to sell your digital goods online as it is relatively simple and straightforward to do.
Setting Up PayPal
It’s assumed that you have already set up your PayPal account and it is active. One additional step is required when you want to sell digital goods via PayPal:
- First log in to your PayPal account
- Go to your Profile and select ‘Profile and Settings’
- On the ‘My Profile’ page select ‘My Selling Tools’
- From the list, choose to ‘Update’ your ‘Website Preferences’
- Set ‘Auto Return’ to ON
- Enter your website URL e.g. http://mywebsite.com as the Return URL
- Scroll down to the bottom of the page and Save your changes.
PayPal is now set up so that when a visitor clicks on the ‘Buy’ button in your website, they will be taken through the payment process in PayPal, then returned to your website at the completion of the transaction.
Setting Up EverWeb for Selling Digital Goods
After setting up PayPal, you can proceed to set up your online store in EverWeb. A number of steps need to be completed to get your digital store up and running effectively:
- Create a ‘Storefront’ page
- Create a ‘Thank You’ page
- Create a ‘Cancel’ page
- Add your digital products to your Storefront page
- Use the hints and tips below as required.
Creating a Storefront Page
Creating a Storefront page may seem to be the first logical step, but we are going to do this last as it easier to pull everything together at the end using the Storefront page. As such we start by creating the ‘Thank You’ page…
Creating a ‘Thank You’ Page
- The ‘Thank You’ page tells your customer that the transaction has completed successfully.
- Add a button, or text, to the page which the customer will click on to initiate the download of the digital product upon completion of purchase.
- To initiate the download of the digital product, use the Hyperlink Inspector. Link to ‘A File’ and select the relevant digital product. It is advisable to zip the file before adding it to EverWeb. The smaller the file size, the faster it will download. It will also take up less server space too! The file will be added to your Asset List in EverWeb.
- A separate ‘Thank You’ page is needed for each product you are selling as the download link is for one digital product only.
- Add the following code to the Head Code section of the Header/Footer Code section of the Page Settings of all of your Thank You pages. This code helps stop the URL linked to the download file from being tracked.
<META NAME="ROBOTS" CONTENT="NOINDEX, NOFOLLOW">
Creating a ‘Cancel’ Page
As well as a ‘Thank You’ page, a ‘Cancel’ page should be created. If your customer cancels their purchase before completion, EverWeb can redirect them appropriately to the ‘Cancel’ page where you can direct the customer on how to proceed further.
Adding Products to Your Storefront
After creating the ‘Thank You’ and ‘Cancel’ pages, create your Storefront page. Format the page as desired.
- Add the product name and description for each digital product you want to sell on your Storefront page. If possible, an image of the product is also a good idea.
- Drag and drop the PayPal widget on to the page and place it appropriately next to the digital product name and description for each product you are selling.
- Customize each PayPal widget for the digital products you are selling. This will add a ‘Buy Now’ button to the page.
- When using the PayPal widget, make sure to enter in an ‘Item ID’ as it is required by PayPal. If you do not include an ‘Item ID’, the purchase will not work properly.
- In the section at the bottom of the widget, select the ‘Thank You Page’ that links to the page that downloads the relevant digital file. Each product you sell will link to its own unique thank you page.
- In the field for ‘Cancelled Page’, link to your Cancel page.
You have now set up your digital store! Before testing, see the tips below.
Hints and Tips
- Use Heading Tags as titles for your products. This will help your SEO. Use an H2 or H3 Heading Tag.
- Use Alt Text for your product images. Remember to name the image file in line with what the image is, e.g. the name of the product the image is displaying
- Security. As well as wanting to sell your digital goods, you will also want to make sure it is done securely to avoid digital theft. Remember to add the code as outlined above in the ‘Thank You’ page. You may also want to disguise the filename of your Thank You page so it is less obvious as to what its function is. You may also want to remind your customers not to share the Thank You page link either if it is appropriate to do so.
Creating a digital store take a few steps. The blog above creates a simple webstore. More sophisticated and secure options are possible which we will explore further in future posts.
Watch the Video
To see the YouTube video of this blog, navigate to ‘How to sell your digital goods online – Selling Digital Goods with EverWeb & PayPal’
EverWeb on Social Media
You can also find EverWeb on the following social media platforms:
Twitter handle @ragesw
Sneak Peak! Animation Effects Coming To EverWeb Soon!
March 22nd, 2017We’re so excited about this upcoming feature that we had to share it with you!
The next release of EverWeb will include an animation engine so you can create lots of super live effects for your website! You’ll be able to create awesome animations with just the click of a button!
To see some of these animations in action check out the home, features and pricing pages of the EverWeb website or follow the link to our Sneak Peak video Animation Effects Coming To EverWeb Soon!
We hope you are looking forward to this great new feature in our next big release!
EverWeb on Social Media
You can also find EverWeb on the following social media platforms:
Twitter handle @ragesw
EverWeb Blogging: Which Comment Engine Should I Use?
March 9th, 2017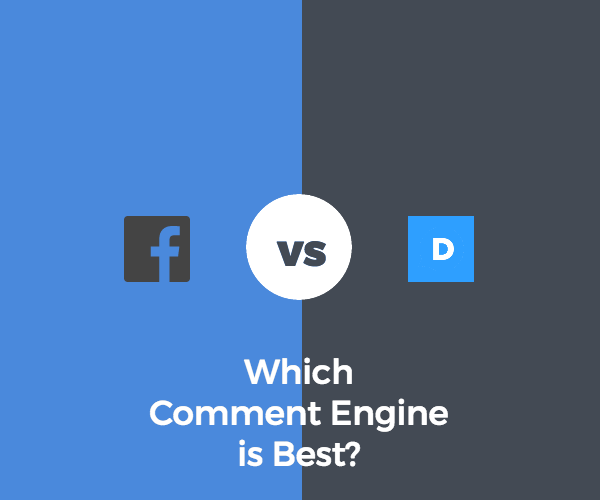
EverWeb’s blogging feature has the option to include a comment engine so your visitors can add their own comments to your blog posts. Typically, only users registered with the comment engine provider can add comments which are displayed in chronological order after the blog post itself. As the blog ‘administer’ you will usually be responsible for overseeing, or ‘Moderating’, the Comments Section.
Do You Need To Use A Comment Engine?
The first question you should ask yourself is ‘Do I need to use a comment engine at all?’ It’s often a question that is overlooked as it is generally assumed that if you have a blog, you have a Comments Section. There are great reasons to use a comment engine: It helps engage your audience with what you are doing, it fosters debate which may help you develop your products and services and it tells your audience that your website is live and active! The downside, however, is that you have to administer the comments, answer questions and respond to any issues or complaints that may arise. Additionally, you also have to police the comments section for spam and for potential abuse. Moderating can be a stressful business.
So, there are pros and cons to having a comment engine for your site. If you are happy to go ahead, the next task is to decide which comment engine best suits your needs.
Selecting Your Comment Engine
EverWeb gives you the choice of Disqus or Facebook Comments. These are the two most popular comment engines out there although there are others. It is up to you to decide on which engine to use, The decision should be based mainly around the audience that you have, or want to attract, to your website and its blog.
Disqus and Facebook Comments essentially do the same thing and both have their strengths and weaknesses. Essentially there are a number of questions that will determine which Comment Engine is best for you.
- Where is my target audience? If you have a great Facebook presence, FaceBook Comments may be better for you. If your audience is largely non-Facebook users then Disqus may be better.
- How do the Moderation features stack up? As administrator of the Comments Section, you will probably be the one to ‘moderate’ the comments that come in. Responding to comments may require timely action. Policing the comments may be important if your comments section gets spammed, or trolled or if abusive language is used. These tasks require management, so you will want your comment engine to have the tools you need, when you need to use them
- User friendliness. Typically comment engines will ask you to register first before you can post your comments. Once registered, the user will typically use a ‘handle’ by which they will be known when commenting. The user will then need to log in to the comment section of your website to leave a comment. In all, it is important that your user’s experience of logging in, commenting, replying, sharing and so on, are easy and quick to do. Make sure that the user experience matches your goals for your blog.
- Ease of set up and management. Both Facebook Comments and Disqus have their own tools to set up and manage their comment engine. FaceBook does this through a ‘Developer App ID’ whilst Disqus uses a ‘Shortname’ handle, both of which are created when you first setup your account. The two approaches to set up and management of your commenting environment are different yet achieve the same result. It is worth while taking some time to explore both tools from a management perspective before choosing the one suits your needs best.
- Ease of administration. As the Moderator of your blog, you will want administatration tasks to be as easy as possible. Check that the comment engine you intend to use does what you want in this respect e.g. Do you want to be notified when a comment is logged, do you want to vet comments before they ‘go live’ in your comments section (e.g. To filter out spam) etc.
Disqus and FaceBook Comments Compared
I noted earlier that the two comment engines have many features in common. However, there are some definite distinctions to be noted, which are outlined below. Remember that both products are often updated so this list is subject to change!
Disqus
Disqus has the following distinguishing features:
- Discussions in real time
- Login via Facebook, Twitter, Google, Yahoo! Microsoft Live and more!
- Comments can be threaded, imported and exported
- Comments are easy to edit
- Discovery feature to help find other website content
- Moderation of comments can be done via Email
Disqus is often favored for
- Real time commenting and alerts and an
- Easy to use interface
FaceBook Comments
Facebook has the following distinguishing features:
- You can comment immediately if you are logged in to FaceBook
- Login via either Facebook, Yahoo! or Microsoft Live
- Comments can be threaded
- Like and Reply options included
- Free data analytics
- Comments can be ordered by the number of Likes
- Includes a well regarded anti-spam tool
FaceBook Commenets is often favored as it
- Allows visitors to publish comments on their public Facebook Profile
- When large numbers of website visitors already use Facebook
When you have chosen your comment engine, the next step is to create your FaceBook Developer App ID or Disqus Shortname. The best course of action at this stage is to refer to the EverWeb User Manual as this takes you through the process in detail.
Adding Your Comment Engine To Your EverWeb Blog
Once you have selected and set up your Comment Engine, add the FaceBook App ID or Disqus Shoretname to your EverWeb Blog. To use the Comment Engine, just tick the ‘Enable Comments’ box in the Widget Settings of your blog ‘posts’ page.
When you publish your website, the Comments Section will be available for use. Registered users will be able to log in to the commenting engine and add their comments.
Blogging and user interaction can be great for your website and rewarding and fun for your users with the right comment engine and with proper ‘Moderation’!
If you have a question or comment, please let us know in our own Comments Section below! Thanks!
EverWeb on Social Media
You can also find EverWeb on the following social media platforms:
Twitter handle @ragesw