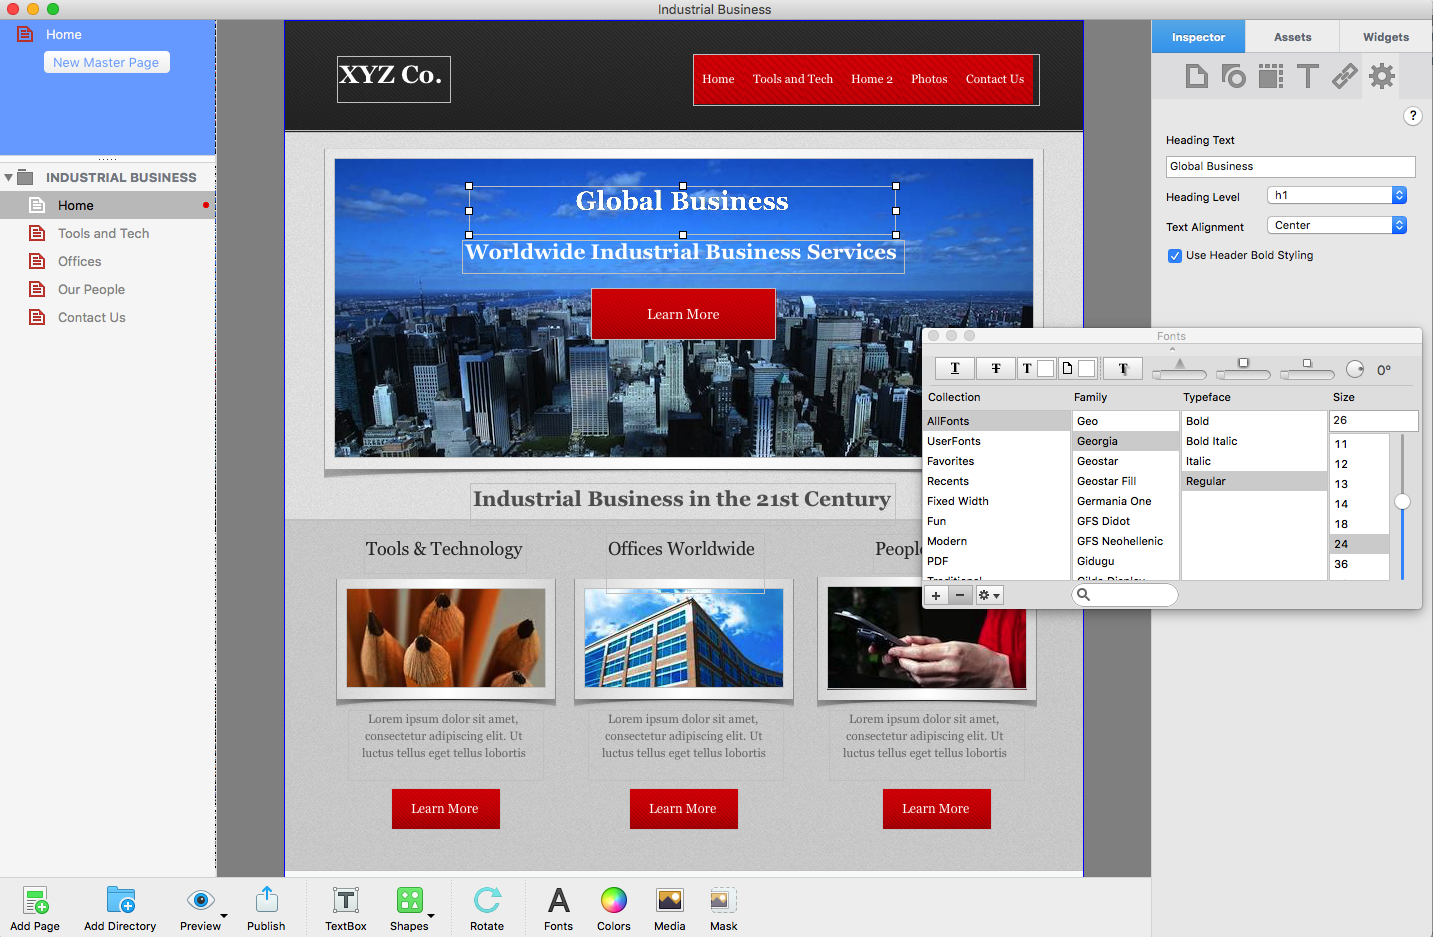
One of the most important parts of the EverWeb User Interface is the Web Page List as it is where all the web pages you create are listed. The Web Page List has many different functions and features which are explored below.
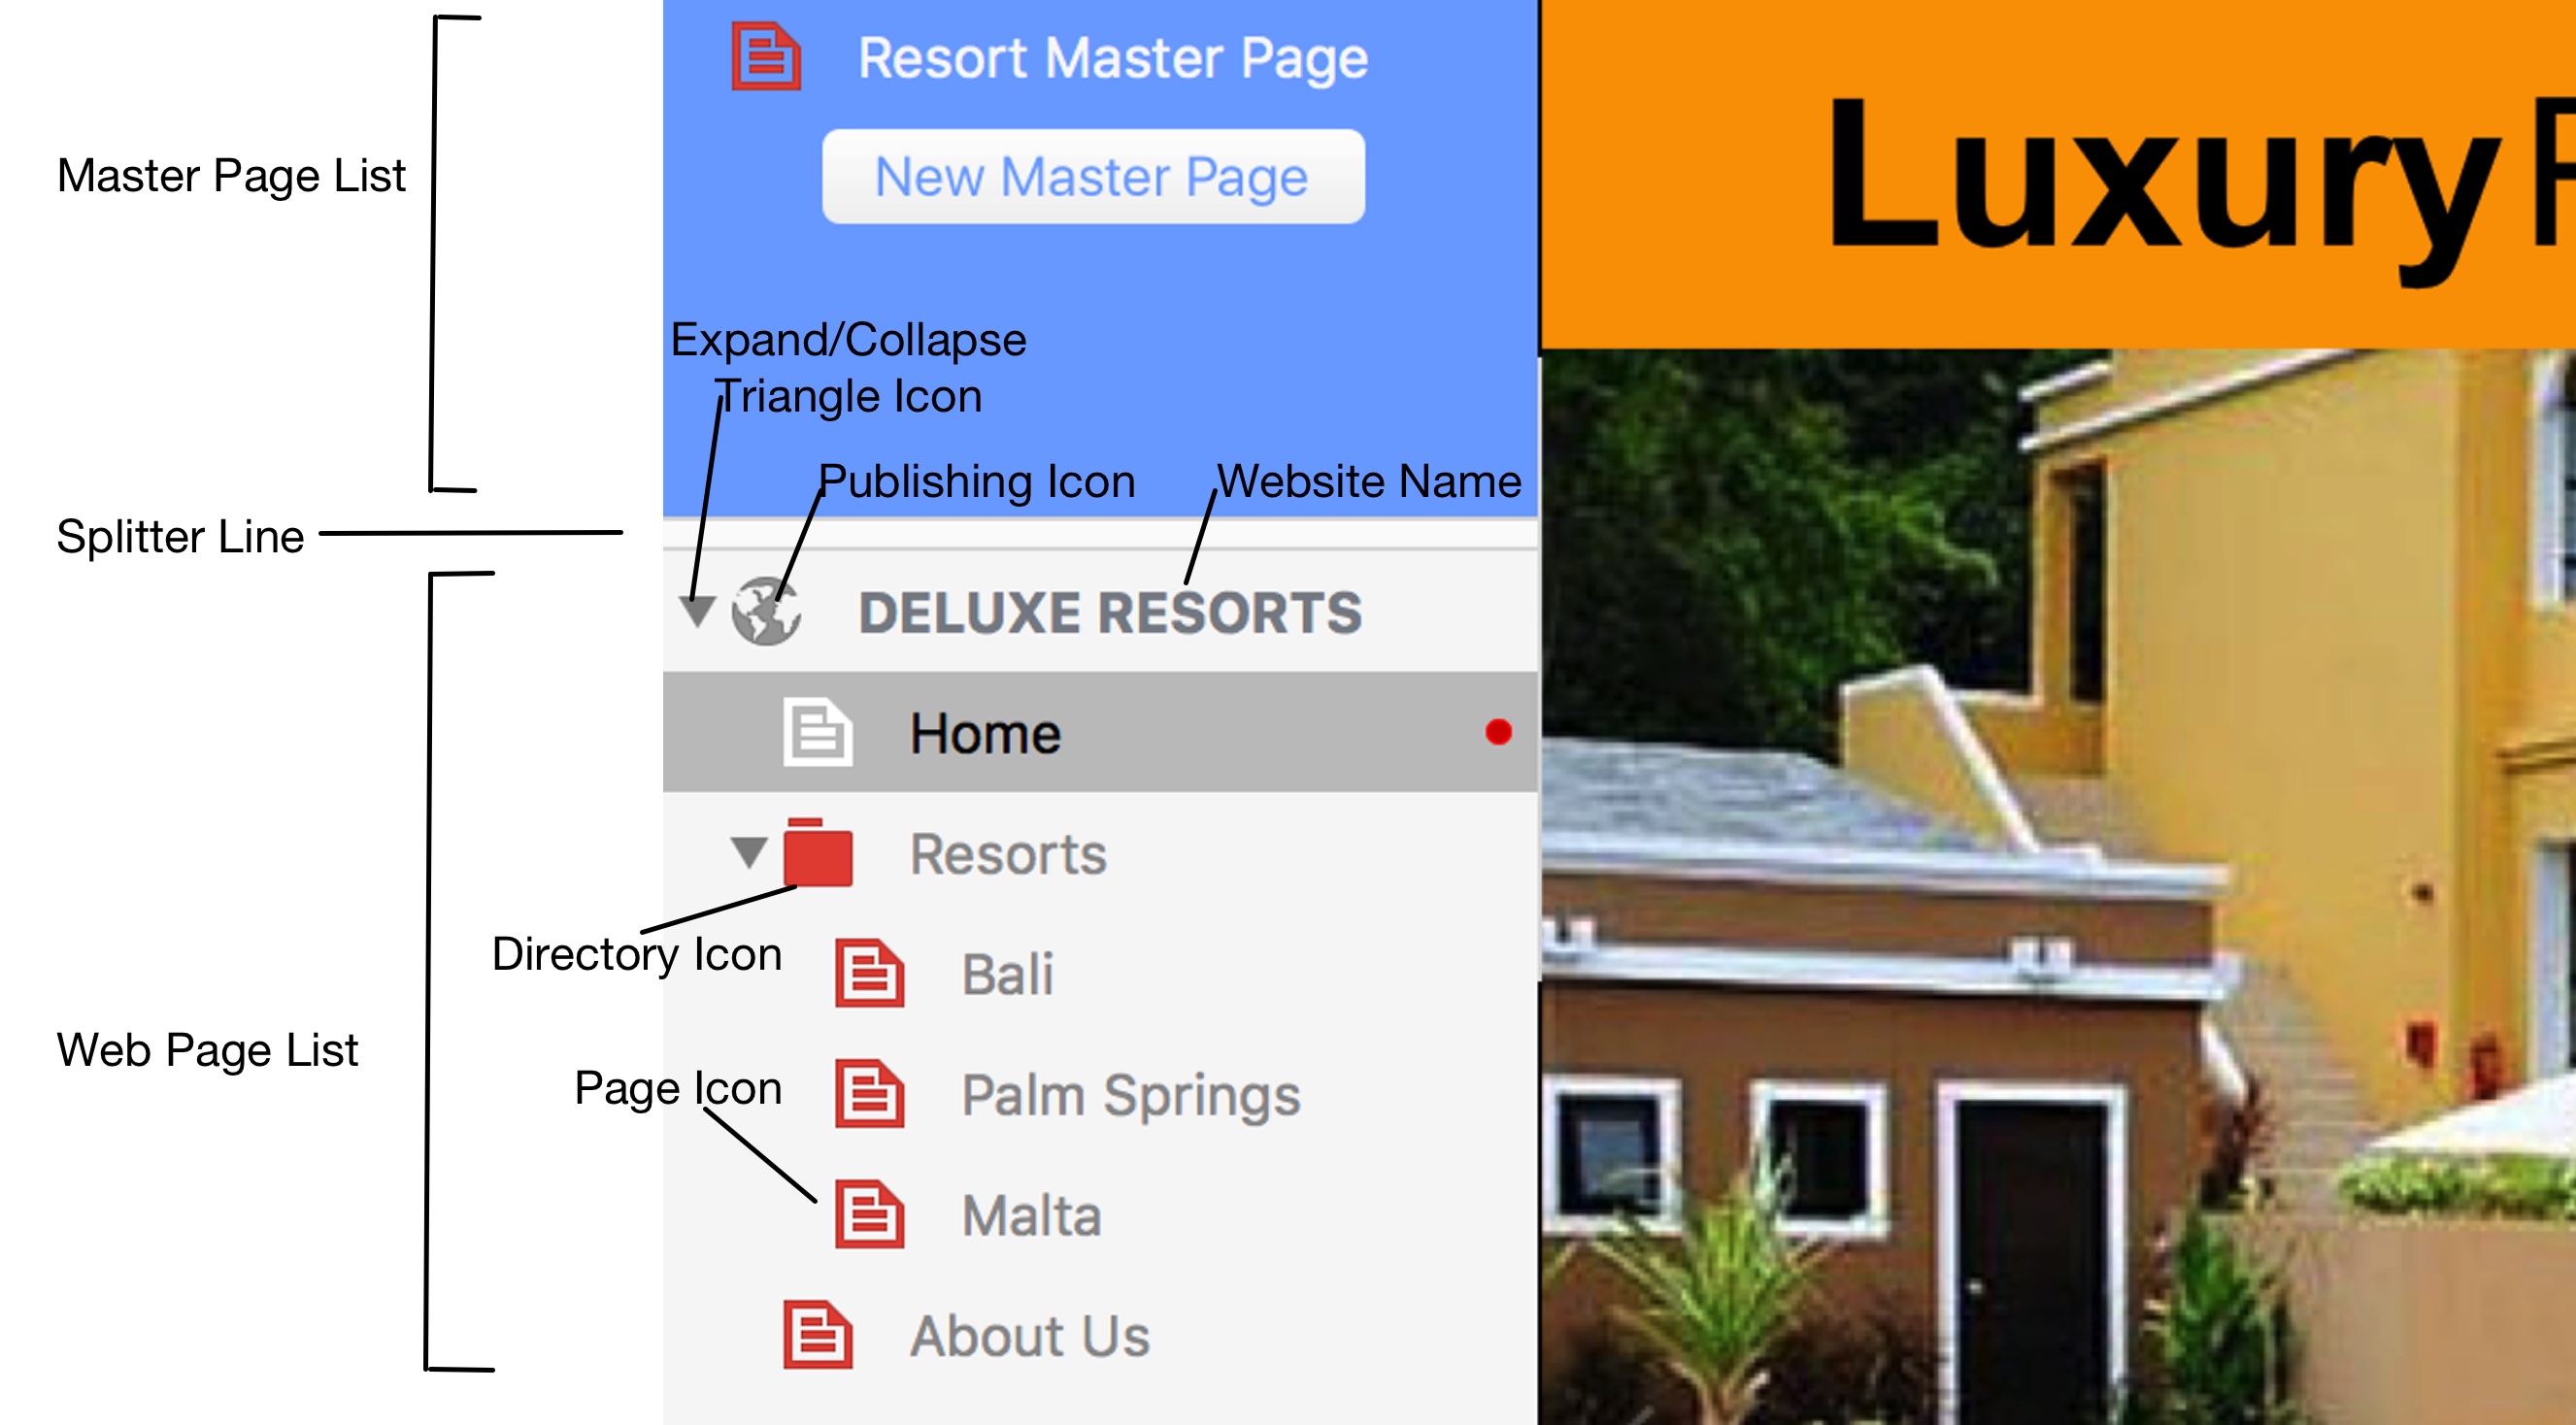
The Web Page List lists all of the pages that you create in your EverWeb website project. The blue colored Master Page List contains one Master Page – ‘Resort Master Page’. The grey colored regular page list includes the website’s Home Page, a Directory Page called ‘Resorts’ containing three pages used in Drop Down Navigation Menu and an About Us page.
The Web Page List Structure
The Web Page List (WPL) runs down the left hand side of Everweb’s User Interface and has two sections separated by a splitter line (see above screenshot.) The blue section at the top is the Master Page List. The grey area below it is the regular page list. Between the sections is a ‘splitter’ line which can be moved up and down to show more or less of the Master Page List from view. If you move the splitter line up high enough you can hide the Master Page List altogether this usually is not recommended. To move the splitter line, click and drag it up or down to where you want it.
If you have long page names in your website project click and drag the WPL’s right hand margin to the right to see more of the page names. Conversely click and drag the margin to the left to see less of the page names.
Both sections of the WPL allow you to create, select and delete pages. If you secondary click (a two finger tap) on a page name a context sensitive menu appears with options listed below. If you secondary click on the top line of the great area containing the website name, only ‘New Page’ and “Clear ‘Using Assets’ Indicator” are available.
New Page: Creates either a new Master Page or a new regular web page. Alternatively, you can create pages using the menus, shortcut keys or the Toolbar ‘Add Page’ button (for regular web pages only).
Rename: Opens the editing box for the highlighted page where you overtype the page name with a new name. It’s actually quicker to double click on the page name to edit it.
Delete Page: Deletes the highlighted page immediately. If you delete the page by mistake press Cmd+Z straight way to undo the action.
Duplicate: This is a useful option when you want to create a new page that is similar to the one you are highlighting
Convert To Directory: This menu option is only available in the regular page list. Regular pages can be converted to Directory Pages. A directory is like a folder that you put web pages in to. In EverWeb, directories are also used for Drop Down Navigation Menu structures which are discussed in detail below. Once you convert a regular page to a Directory Page, you can’t change it back. If you have have converted the wrong page in to a Directory Page, press Cmd+Z immediately to undo the action.
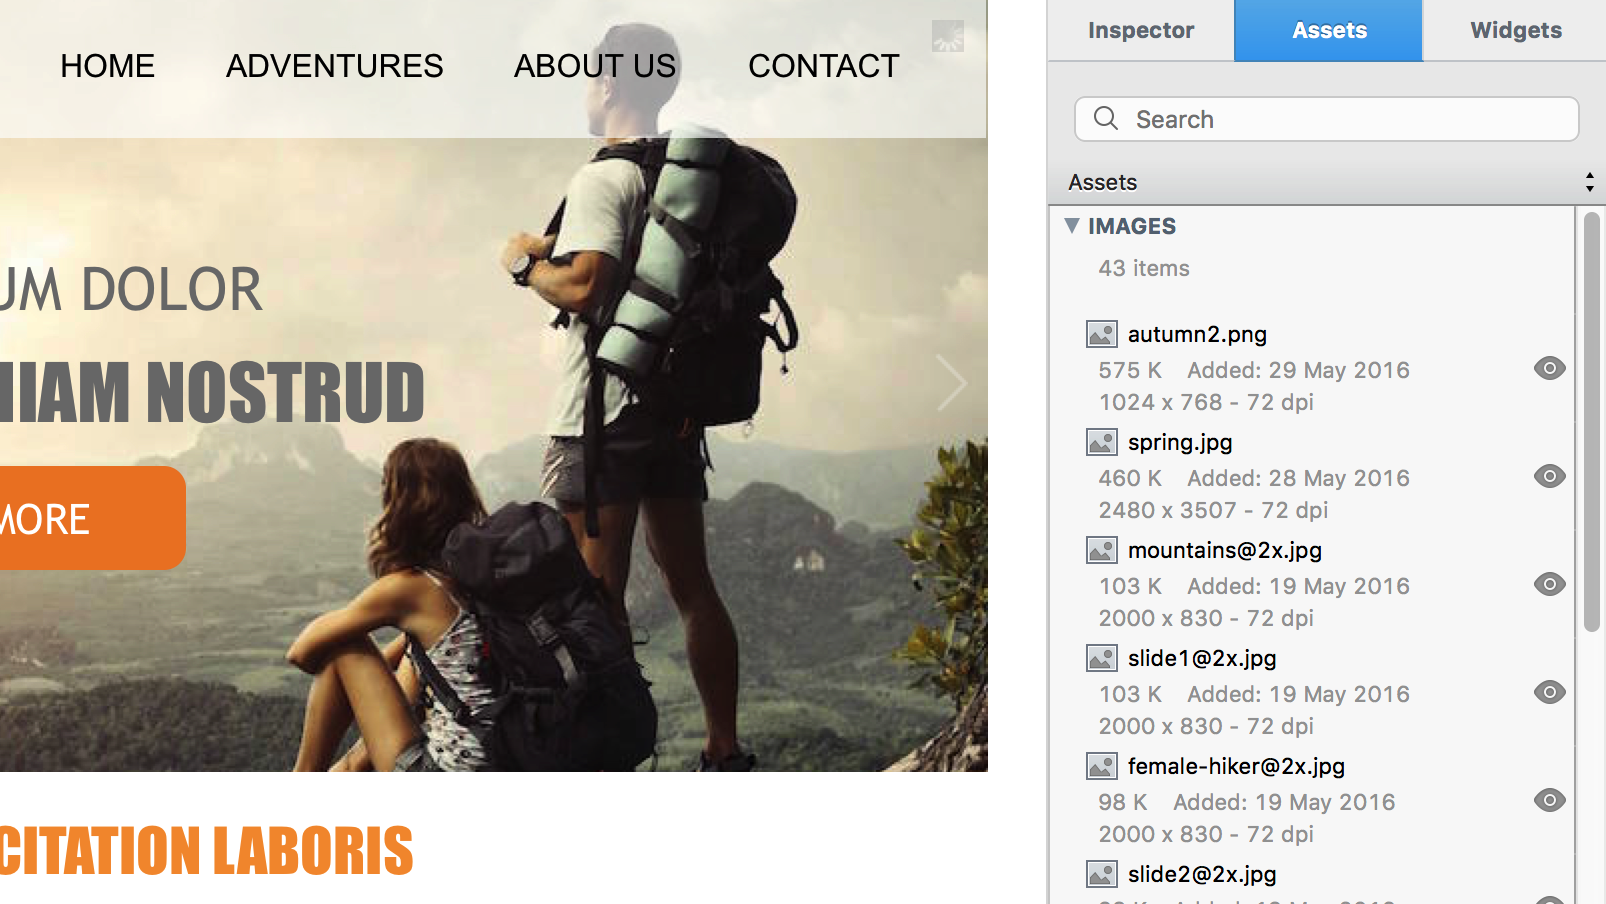
Clear ‘Using Assets’ Indicator. EverWeb has a feature in the Assets tab to find all pages that are associated with a particular Asset e.g. if you have a picture that is used on more than one page you can find which pages it is on. First go to the Assets Tab and highlight the picture’s filename. Next, secondary click on the filename and a menu appears that includes the option ‘Find Pages Using Asset’. When you click on this option, all pages using the picture will be highlighted in yellow in the WPL. To clear the yellow highlight, click on the “Clear Using Assets’ Indicator”.
Web Page List Icons
The top of the grey regular Web Page List is headed by a line containing a triangle symbol, a folder or globe icon and the website project name. If you click anywhere on this line the Editor Window changes to the website project’s Site Publishing Settings. Use this dialog box to tell EverWeb where to publish your website to.
When setting ‘Publish To’ in the Site Publishing Settings the Publishing icon to the left of the website name changes to reflect your choice of publishing location. If you choose ‘Folder’, the icon becomes a folder indicating that you are publishing to your local hard disk. Publishing to ‘Folder’ is useful when building your website so you can safely test it before going live. The Globe icon is displayed when publishing to the Internet, either to EverWeb (if you have an EverWeb+Hosting plan) or via FTP to your own host provider.
The Triangle symbol on the left hand side of the top line expands or collapses the content beneath it. If you click on the triangle at the top of the grey WPL area, all the pages beneath it ‘collapse’ and are hidden from view and the triangle points to the right instead of downwards. Click the triangle again to ‘expand’ the view and make the pages visible again. The triangle appears whenever you use directories which is useful if you don’t need to see the pages contained inside them or when you want to have more vertical display space available in the WPL. The triangle symbol also appears in many other areas of EverWeb such as in the Page Tab of the Inspector Window.
On the right of the Publishing icon is the website project name. By default this is initially set to ‘NEW WEBSITE’. To rename you website project double click on the name and type over it. Press Enter to finish.
Web Pages, either Master Pages or regular web pages, use the Page icon and directories use the Folder icon. These icons can be either grey or red in color. When an icon is grey it means that the page or folder has not been changed since it was last published. When the icon is red, the page or folder has been changed since it was last published. For example, if you edit a Master Page, all regular pages using it will change to a red icon in addition to the Master Page’s page icon itself.
When you select a page in the WPL, a ‘dot’ to the right of the web page name displays providing an additional visual indicator that the page is currently selected.
The Master Page List
The blue colored Master Page List is where you create, select, manage and delete Master pages. There are a number of different ways to create a Master Page: The ‘New Master Page’ button, the File -> New Master Page… menu, the keyboard shortcut ^Shift+Cmd+N or the “+” symbol in the Master Page section of the Page Inspector. Additionally, secondary clicking in the blue Master Page section you display a context sensitive menu including the ‘New Page’ option.
Master pages are listed in the order you create them and cannot be moved as you can with regular pages. In addition, you cannot create Directory Pages for Master Pages.
To delete a Master Page, select the page in the Master Page List and press the backspace key. The page will be deleted immediately. If you delete a Master Page by mistake, press Cmd+Z immediately to undo the deletion. Remember that if you delete a Master Page it will be removed from all the regular web pages that it was attached to.
TIP: If you have designed a regular page that should have been a Master Page, drag and drop it from the regular page list in to the Master Page List area. This creates a copy of the page in the Master Page List.
The Regular Web Page List
Adding regular web pages to the WPL is done in much the same way as for Master Pages: The ‘Add Page’ button in the Toolbar, the File -> New Page… menu, the keyboard shortcut Cmd+N or secondary clicking in the grey regular web section to display a context sensitive menu including the ‘New Page’ option.
Deleting regular web pages also works in the same way, just highlight the page in the the WPL and press backspace. Again, if you have made a mistake, press Cmd+Z to immediately undo the action.
Regular web pages and Directory Pages in the regular page list section can be moved by dragging and dropping them to where you want them. If you are using EverWeb’s Navigation Menu Widget it will inherit the page order of the regular page list so ordering pages appropriately is important. To exclude pages from the Navigation Menu Widget un-tick ‘include page in navigation menu’ in the Page Inspector for the page(s) you want to exclude.
Directories
EverWeb uses directories in the regular page list of the WPL for a number of different purposes. The main reason is that they provide the structure needed for drop down menus in the Navigation Menu Widget. As you can see in the screenshot above, the pages Bali, Palm Springs and Malta are in the Directory ‘Resorts’. For more information on the Navigation Menu, please see the blogs on Adding a Menu and Styling Options for EverWeb’s Navigation Menu Widget. Directories are also useful if you want to create your own blog in EverWeb or if you just want your website’s pages properly organised.
To create a directory first create a regular page. Next secondary click on the page you just created and select ‘Convert to Directory’ from the menu. The page icon changes to a folder icon indicating that the page has been converted. Note that once you converted a regular page you cannot change it back. If you realize that you have converted the wrong page, press Cmd+Z to immediately undo the action.
To add a page into a directory drag and drop an existing page underneath and to the right of the directory, then drop it in place. You will see a guide line to help you when you perform the move. Once you have dropped the page in to the directory, you may need to click on the triangle to the left of the folder icon to see the page you have just dropped in there.
If you don’t have existing pages to add in to the directory, just highlight the Directory Page name and secondary click to bring up the sub menu. Select ‘New Page’ and choose the template you want to use. The page is added in to your Directory structure.
You can move pages within a directory just by dragging and dropping them to their new location. You can even take pages out of the directory altogether by dragging the page to the left and either up or down until the page is outside of the directory structure, then dropping it in it’s new location.
The Web Page List offers a flexible and easy way to organize your website project. Getting familiar with the Web Page List will also help improve your workflow as seen by some of the shortcuts outlined above.
In the next instalment of the Getting Started with EverWeb Guide we take a look at the Assets Tab.
As always please let us know if you have any comments and questions. We’re happy to help. You can also find EverWeb on the following social media platforms:
Facebook
Google+
Flipboard
YouTube
Twitter handle @ragesw