What’s New in EverWeb 3.8: New UI, Contact Form Features, Assets List Features, Instant Preview and More!

August 11th, 2022

We are super excited to announce the release of EverWeb 3.8 with a revamped UI, a new mass mailing feature for Contact Forms Enhanced Addon, a New Asset List feature to help you group image assets page by page, Instant Preview, new Blogging features and much more! You can find the full list of new and improved features below as well as the usual bug fixes!

Which Version of EverWeb is For You?

EverWeb is available in the following versions:

  • If you are running an Intel Mac running OS X 10.10, macOS Yosemite, El Capitan, Sierra, High Sierra, Mojave, Catalina, Big Sur or Monterey EverWeb version 3.8 is available for you.
  • If you are running an Apple Silicon Mac running macOS Monterey or Big Sur, EverWeb version 3.8 is available for you as a Universal Binary. EverWeb will run natively without the need to use Rosetta 2.
  • If you are running OS X 10.7 – 10.9 (Lion, Mountain Lion, Mavericks) EverWeb version 2.9.1 is available for you.
  • If you are running OS X 10.6 EverWeb version 2.5.2 is available for you.

When updating to the latest version of EverWeb, the update process will automatically download the correct version of EverWeb for your operating system.

EverWeb 3.8 Includes…

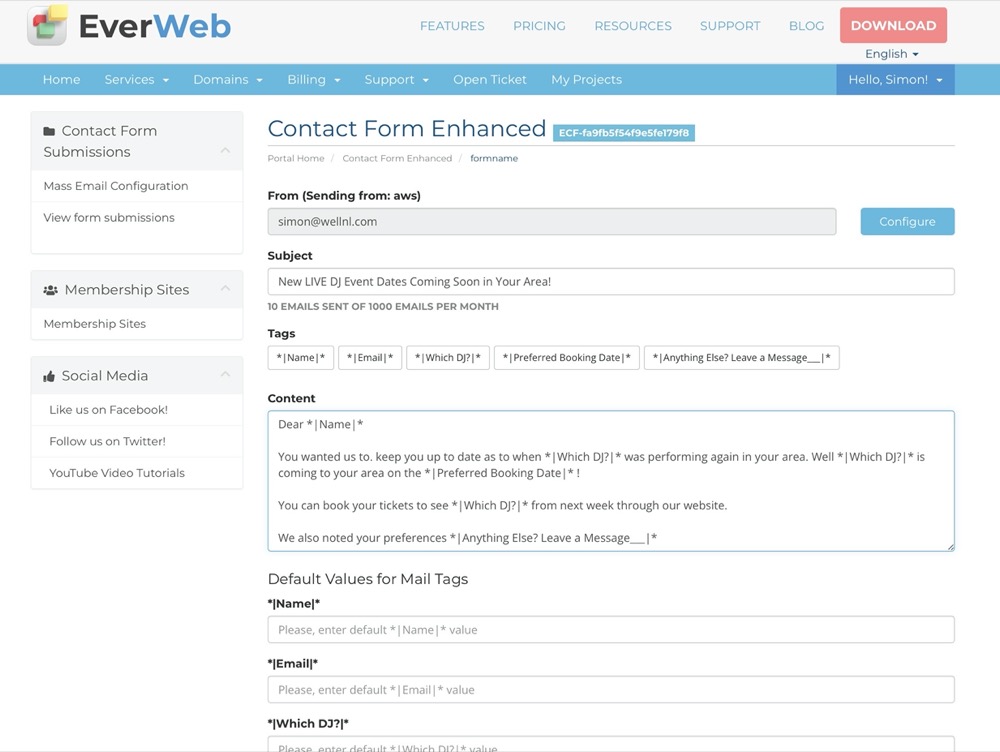
[NEW] Contact Form Advanced option ‘Mail Sending’ lets you select ‘EverWeb’ for email sending. You won’t have to use SMTP details and it will work with any web host and any email.

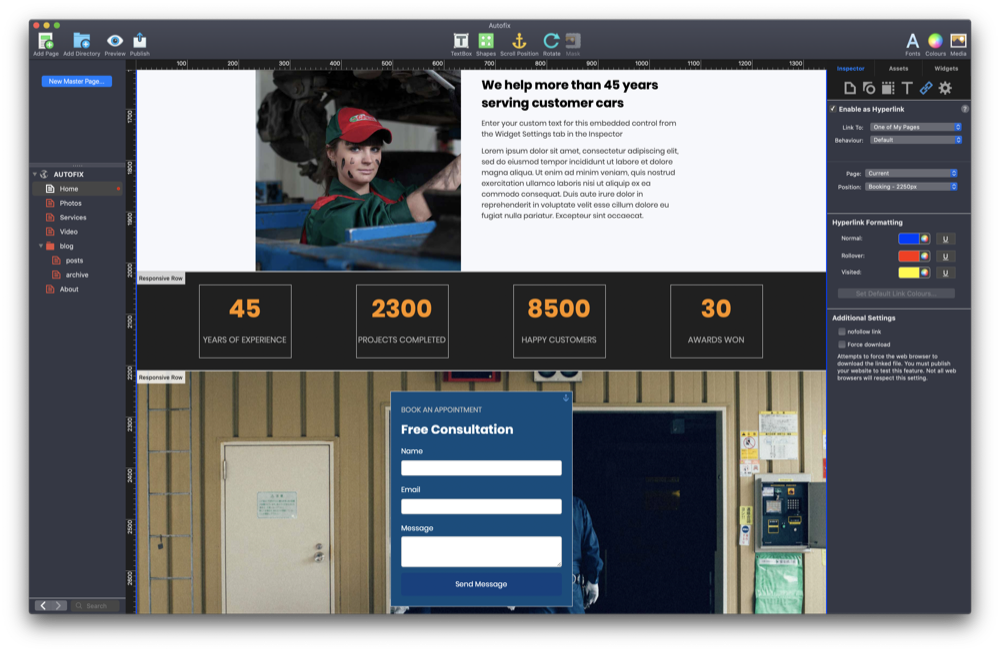
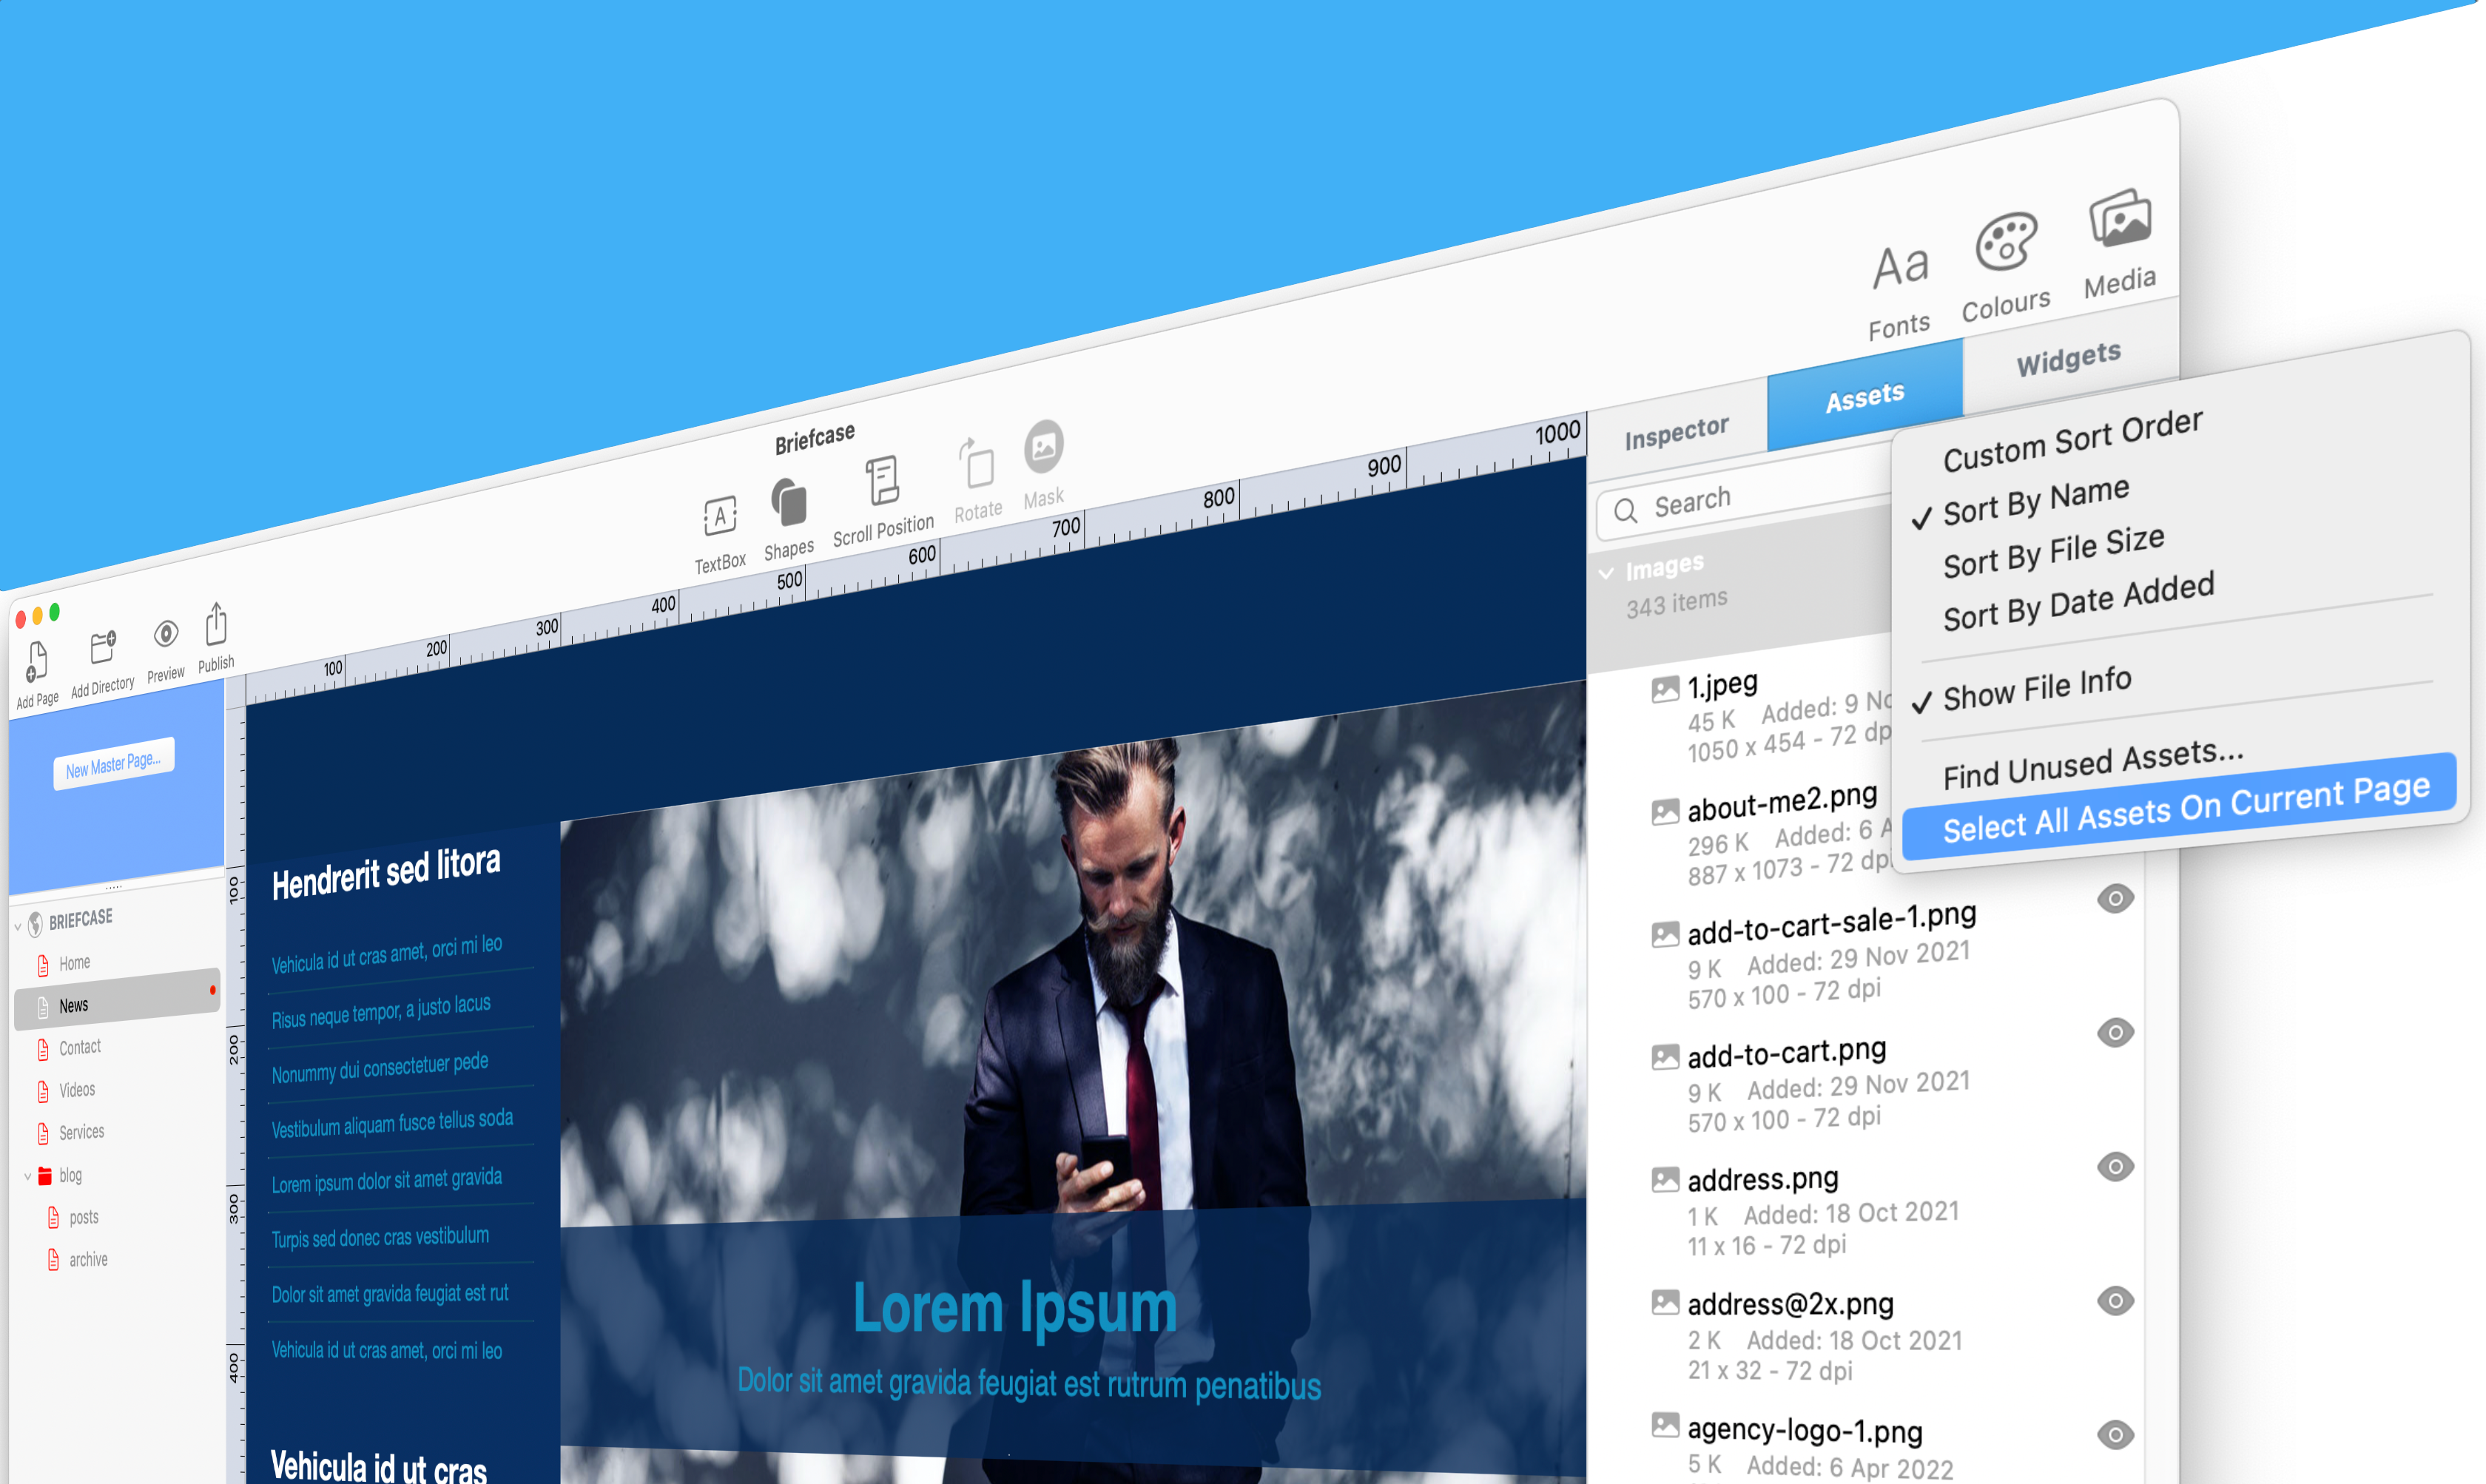
[NEW] The Assets list now has an option to select all assets on the current page. You can then click the new folder button and EverWeb will put all the selected widgets into that folder.

[NEW] Instant Preview: If you use the ‘Preview on Server’ option in Preferences->General->Use Preview Server, EverWeb does not have to regenerate all pages. Previews will be instant now.

[NEW] Updated UI for the Projects Window-> a down arrows replaces the up-down arrow for users running macOS older than macOS Big Sur.

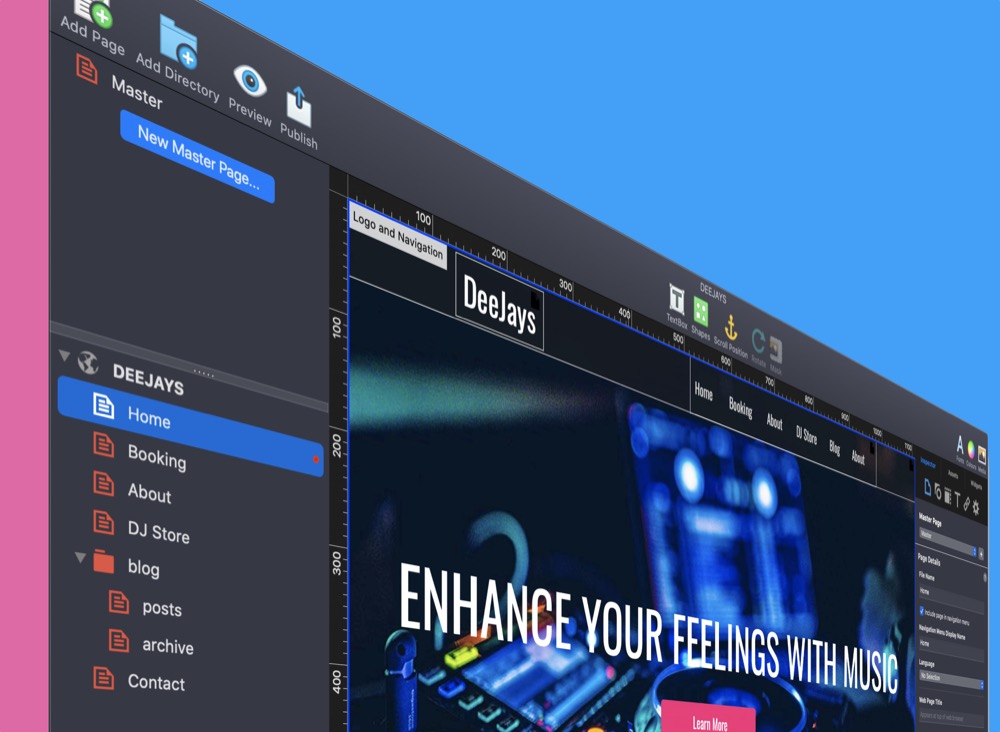
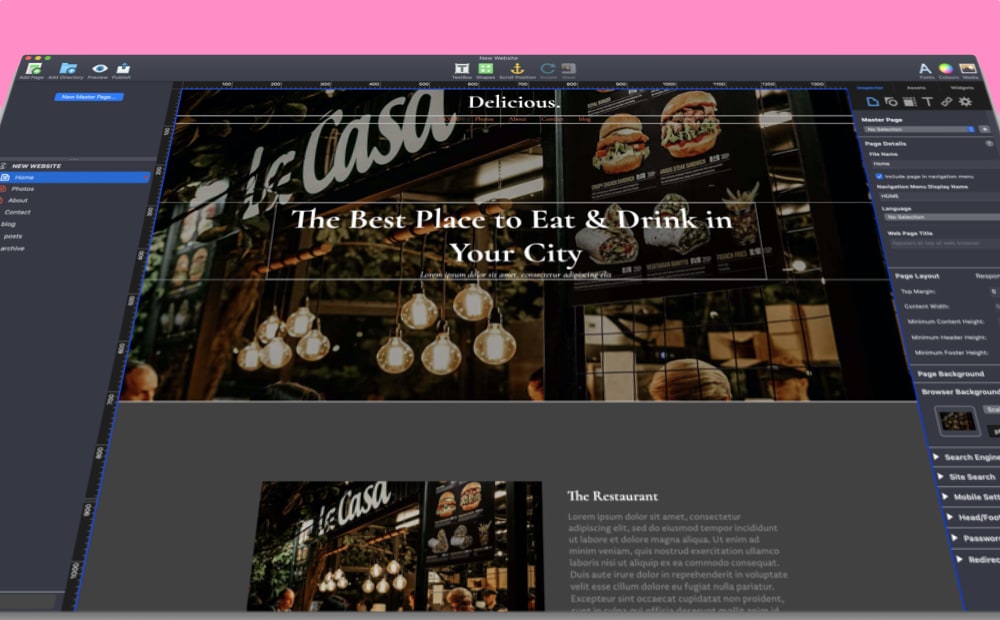
[NEW] Redesigned Toolbar icons if you use macOS Big Sur or later.

[NEW] New UI when updating widget previews in the Design Canvas.

[NEW]New option in the Assets List to ‘Select all Assets’ on the current page.

[NEW] The Blog Post Header and Date fields can now be left, center, or right aligned.

[NEW] Image padding is available for the blog post cover image.

[NEW] More expanded inline Help messages.

[IMPROVED] Dragging and dropping from Photos will attempt to get the caption used for the photo.

[IMPROVED] Using Preview on Server option in Preferences will make it so you don’t have to regenerate the entire site when publishing, it will only generate the current page.

[IMPROVED] The Image Gallery Widget has a new navigation icon in the top right corner of the widget, on macOS Big Sur or later, to move the widget around the page.

[IMPROVED] Big improvement to widget generation time on M1 Macs.

[FIX] Fix for frame image settings when previewing.

[FIX] Fixed frames issue in the Responsive Row Widget.

[FIX] Fixed crash with some widgets on M1 MacsNew Contact Form Advanced option ‘Mail Sending’ that lets you select ‘EverWeb’ for email sending. You won’t have to use SMTP details and it will work with any web host and any email.

[FIX] Fixed problem with some links with anchors in them.

[FIX] Fixed FlexBox widget linking options.

[FIX] Fixed a problem with mobile pages and Instant Previews.

[FIX] If SEO PowerUp has expired but the Optimize for Search engines option is still selected, the user will be notified.

How To Update To EverWeb 3.8

You can easily update EverWeb by either:

  1. Launching EverWeb then going to the EverWeb menu at the top of the screen and selecting ‘Check for Update’ or by
  2. Downloading EverWeb from the EverWeb website.

After downloading EverWeb, double click on the EVERWEB.DMG file. A window will open. Drag the EverWeb icon on to the Applications folder icon. Once the file has been copied, you can close the installation window, delete the .DMG file and eject the EverWeb disk on the desktop by dragging it to the Trashcan.

Remember, you won’t lose any previous data when updating as your website project files are stored elsewhere on your computer.

The update is free for EverWeb + Hosting users and EverWeb Standalone users who are within their 1 year of free upgrades and support period.

You can easily check your EverWeb Standalone free update period from EverWeb’s Preferences window or from your client area.

If you have passed your one year of free EverWeb updates, you can purchase 1 more year of upgrades and support from your client area.

You can easily re-download earlier versions of EverWeb from your client area if you are not ready to purchase an additional year of updates and support.

Login to your client area and go to the ‘Manage Product’ page. On the left of this page, select ‘Downloads’ and choose the version of EverWeb that you need.

More Information About EverWeb

For more information about the new version of EverWeb, please check out the following resources:

  • The EverWeb website which has up to the moment information in it’s blogging section
  • New EverWeb videos on YouTube
  • The EverWeb User Manual in EverWeb’s Help-> User Manual menu
  • The EverWeb Discussion Forum

If you can’t find what you need, or have any other questions, comments or feedback please let us know. We’re happy to help.

EverWeb on Social Media

You can also find EverWeb on the following social media platforms:

Facebook

Flipboard

YouTube

Twitter

Instagram

Exploring the EverWeb Client Area

July 25th, 2022

When you purchase EverWeb, as part of the purchasing process, you create your EverWeb client account for the type of product you have purchased – EverWeb+Hosting or EverWeb Standalone if you use your own hosting. Your account is set up in what we refer to as your ‘EverWeb Client Area’.

Why Do I Need An EverWeb Account?

Once you have setup your EverWeb customer account and purchased EverWeb, you need to enter the same account email address and password in EverWeb itself. To do this, log in to EverWeb, then enter your login details using the EverWeb-> Preferences-> Account menu option. Once you have entered in your account email address and password, check the box Add to Keychain so you do not need to login again. Under your login details, you will then see the products and services that you have purchased and their ‘Next Due Date’.

It is important to login in EverWeb itself because without these details you will not be able to publish your website to the Internet! The other important reason for having an EverWeb account is that it enables you to do some behind the scenes administration tasks if you need to. In this post, we will be giving you an overview of some of these features!

Logging In To Your EverWeb Client Area

There are a few ways in which you can log in to your EverWeb Client Area.

  1. Using your browser. In your browser go to the following URL: https://billing.ragesw.com/clientarea.php. Enter your EverWeb account email and password to login to your EverWeb Client Area.
  2. In EverWeb go to the File-> Edit Publishing Settings menu option, then click on the ‘Manage Account’ button in the bottom right hand corner.
  3. Again in EverWeb, use the EverWeb-> Preferences-> Account menu option and again click on the Manage Account button in the right hand corner under your product details.

EverWeb Client Area Features

Your EverWeb Client Area is probably a part of EverWeb’s eco-system that you will not use very often but it is worth knowing what it does offer you. Below is a list of some of the Client Area’s main features:

  1. Support Ticket logging and tracking.
  2. Purchased Product and Renewal notifications.
  3. Account Administration.
  4. Email Administration (EverWeb+Hosting only).
  5. Contact Forms Enhanced Addon Administration (if purchased).
  6. Website Metrics (EverWeb+Hosting only).
  7. Webmail Access (EverWeb+Hosting only).
  8. Domain Services.
  9. Access to the EverWeb Discussion Forum.
  10. Available Product Downloads.
  11. EverWeb Knowledgebase.

The Client Area Dashboard

Once you have logged in to your Client Area, you will see a dashboard of your main customer details and purchases. If you click on any one of the dashboard boxes – Services, Domains, Tickets or Invoices – you will be taken to the relevant page for that feature.

Client Area features can also be listed down the left hand side of the page you are currently on so, for example, on the dashboard page your own Client information is displayed so that you can edit and update it easily if you need to. You will also see on this screen your Client Area account contacts, shortcuts etc. In addition if you have purchased EverWeb’s Contact Forms Enhanced Addon you will have access to your Contact Forms Submissions from this screen.

The options in the left hand side of each page of the Client Area are context sensitive so that you will always see only the options that are relevant to what you are doing at the time.

Quick Client Area Tools and Tips!

There are lots of options to explore in the Client Area, but here are some of the typically most popular things that you may want to do…

  • Log a Support Ticket: Just click on the ‘Open Ticket’ menubar option. To quickly check the status of any existing just click on the Tickets dashboard button.
  • Using the EverWeb Knowedgebase: There is a wealth of information in EverWeb’s knowledgebase. Just click on the Support-> Knowledgebase menu option and enter your question in the search box.
  • When are my products an services renewing? You can quickly find out when your EverWeb products or services are going to renew just by clicking on the Services dashboard button.
  • When is my domain going to renew? In this case, just click on the Domains dashboard button to see your domain history and when any active domain will be up for renewal.
  • How do I gedownload my version of EverWeb? If you ever need to redownload the latest version of EverWeb you purchased you can do so easily via the Support-> Downloads menu option.

All the Options You Need…

In this post we have given you a top level view of EverWeb’s Client Area. There are a lot of features that we have only mentioned briefly or have not covered at all. If you take the time to explore the menu options in the Client Area you will find a wealth of configuration options. Some of these are quite technical so our advise is not to change anything unless you are 100% knowledgeable about what you are doing. If not, you can always ask out Support Team who will happy to help and guide you as needed.

Please let us know if you have any questions on the EverWeb Client Area, we are here to help!

EverWeb on Social Media

You can also find EverWeb on the following social media platforms:

Facebook

Flipboard

YouTube

X

Instagram

EverWeb’s Contact Form Advanced Widget Primer!

July 10th, 2022

When EverWeb launched back in November 2013, it came with a number of ‘widgets’ which help to extend the reach of EverWeb without the need to modify EverWeb’s core features and functionality in the process. Widgets were a familiar, but limited, feature of Apple’s defunct iWeb website builder that EverWeb has capitalized and expanded upon since its inception.

The Original Contact Form Widget

The very first version of EverWeb included the Contact Form widget which provided similar features to those found in iWeb. The widget features five fields for visitors to fill in so is super simple and quick to use. In fact, the widget remains essentially unchanged since its launch in the current 3.7 version of EverWeb. The only real update has received has been to to make it a full width capable widget for use in responsive website design.

So, why has the widget not been developed further? The answer lies in its successor, the Contact Form Advanced Widget!

Introducing the Contact Forms Advanced Widget

The Contacts Form Advanced widget was introduced in EverWeb version 2.0 to give EverWeb users a widget that was highly flexible, customizable and secure. The original Contact Form widget is still provided for when your needs are very simple or for legacy usage.

Our recommendation is that, wherever possible, you use the Contact Forms Advanced widget. If you are still using the original Contact Form widget you may want to replace it with the Advanced version of the widget. There are three good reasons for doing so:

  1. The newer widget is more secure against spam due to its security measures both internal to the widget and through the use of Google’s reCAPTCHA tool if it is implemented in the form.
  2. The Contact Form Advanced widget has gained a host of customizable features since its launch and its existing features are also often expanded, or improved, upon. We will be looking at the widget’s main features of the widget later on.
  3. You can expand the widget’s capabilities with the Contact Forms Enhanced Addon, which is available to purchase from your EverWeb Client Area.

Security & Form Validation Features

The Contact Forms Advanced widget uses your SMTP details to provide a more secure way of making sure that your form does not get hijacked by spammers or malware bots taking over your form. Although entering your SMTP details may be time consuming, it is a one off operation that will help keep your form secure. Instructions are provided on how to enter your SMTP details for both EverWeb+Hosting customers and for those of you who use your own hosting provider.

The other security option the form uses is Google’s reCAPTCHA anti-spam tool. All you need to do sign up for the the service and generate the Site and Security Keys for the site you want to use reCAPTCHA with. When using the form, your visitor will need to verify that they are human by clicking on photos of objects presented to them.

One of the other important features of a contact form is its validation and confirmation for the visitor that the form has been sent. The widget includes validation (e.g. when using required fields in the form) and allows you to provide a customized Email message to the person submitting the form once the ‘Send’ button has been clicked upon.

Using Form Controls

The cornerstone feature of the Contact Form Advanced widget is its Form Controls. A Form Control is a user defined field that can usually be fully customized e.g. you could have a text field, an email field, a header field or a drop down menu field. When you select the Form Control you want to use, you will see the options that are appropriate for the control within the Widget Settings. There are seventeen Form Control types to choose from. This means that you can design your contact form confident that there will always be the right Form Control available to use in it. Some Form Controls, such as the Radio Button, you can even import your options list from an external text file if you want.

Form Controls can be designated as ‘required’ so that anyone using the form must complete the required field before they can send the form.

To help guide your visitors on how to complete fields in the form, the widget has two options: Placeholder Text lets you add help text within the field itself. When a visitor starts to type in the field, this help text is then replaced by the visitor’s input. The second help option is to use the Control Instruction/Tip field which can be used to display help text under the field in question.

Formatting Options

The Contact Form Advanced widget gives you the control and finesse that you need to customize the look of your contact form so that it will blend in perfectly with your website. Many of the Form Controls have their own font options so you can mix and match as you need.

Formatting options can also be applied to the contact form’s Send button as you can use the text you want, in the style you want, or you can opt to use a button image, which like a hyperlink has normal, mouse down and mouse over options. As a third alternative you can also use EverWeb’s Styled Button to design your own button, a feature which can also be found in other EverWeb widgets.

The EverWeb Contact Forms Enhanced Addon

The EverWeb Contact Forms Enhanced Addon was introduced in EverWeb 3.0 taking the ability of the Contact Form Advanced widget further. If you purchase the add-on, when visitors use your contact form, the data they input into the contact form is stored by EverWeb in a dedicated secure area on our servers so it can be used later. This is great if you want to build up a mailing list, or you have specific contact forms for different purposes. You can analyse the data returned for each of your contact forms and download it for use in a spreadsheet if desired.

The Contact Forms Enhanced Addon also allow your visitors to upload files to a dedicated secure area in your EverWeb Client Area so you can then download them at your convenience later.

EverWeb’s Contact Form Advanced widget is an incredibly powerful contact form tool and when used with the Contact Forms Enhanced Addon, takes managing and analysing your contact form data to the next level.

If you have any questions about the Contact Form Advanced widget, Contact Forms Enhanced Addon or EverWeb itself, please let us know in the Comments Section below.

EverWeb on Social Media

You can also find EverWeb on the following social media platforms:

Facebook

Flipboard

YouTube

X

Instagram

Integrate Your App In To EverWeb!

June 23rd, 2022

When you create your website, you’re doing more than just creating your online presence. You are actually creating a hub for your online world that can, if you want, stretch across the whole of the Internet. The website that you have created in EverWeb can easily be used to extend the reach of your online universe through integrating your site with other apps. Increasing the reach of your site will give it more visibility, help better facilitate communication with your site’s target audience, helps get you more visitors and sales, as well as improving your SEO as well.

Integrating EverWeb with other apps and programs is easy and there is an ever increasing list of integrations to be found listed on the EverWeb site.

Here are just some of the ways you can integrate EverWeb with the rest of the electronic universe!

Email

Email has been a core feature of our lives for many a year, be it for work or for pleasure, email is an essential tool in our online world. Integrating with EverWeb is easy, just select the piece of text, or object, you want to link your email address to then go to the Hyperlinks Inspector. Click on the dropdown menu in the ‘Link To’ field then select ‘An Email Message’. Then all you have to do is to enter in the email address you want and the email subject. Once finished, publish your site and test!

If you have an EverWeb+Hosting plan you can also link you email to an external email app such as Apple Mail, or to an webmail client service such as Horde or Squirrel. To find out more about how to set up links to these apps and services, just go to the Site Publishing Settings screen in EverWeb and check out the links in the Email Addresses section. You can also find links for setting up email on our YouTube channel.

Adding Buttons To Your Site

The second way to integrate other apps and programs into your site is through adding buttons. EverWeb comes with 10 built in buttons that can be added to the pages of your site. The buttons listed are designed for use with email apps and social media, such as FaceBook, Twitter and Instagram. to add a button to your page, go to the Insert-> Button menu option. Choose the button you want from the list. You will then be asked to link the button to the associated app e.g. if you chose Twitter, you would add in your Twitter handle. The button by default is 64 x 64 pixels. To change the size of the button, it is best to select the button, then go to the Metrics Inspector. Check the ‘Constrain Proportions’ checkbox so the button retains its shape then change the height or width of the button as desired.

Start the Conversation with a Blog!

EverWeb’s blogging feature is a great way to expand on topics you don’t have space for in the regular pages of your site. It’s also a great way to announce events, sales etc. It’s also a great way to engage with your target audience in a way in which you can control through a Comments Section. EverWeb supports two Comment Engines: Disqus and FaceBook Comments. Once you have signed up for the service you want to use, just add the Disqus shortname or FaceBook App ID in to the Comment Options section of the blog Posts and you’re in business!

For more detailed information about which Comment Engine you should use, how to sign up for a Comment Engine and how to integrate your Comment Engine in to EverWeb, check out the chapter on blogging in the EverWeb User Manual.

Widgets, Widgets, Widgets!

Widgets are the ideal way in which you can integrate features from other apps and programs in to your website without having to leave EverWeb. Widgets also bring the most common features that you need in to one place so you can often be more efficient using the Widget Settings for e.g. the PayPal widget rather than searching through PayPal to find all the settings you need… Furthermore, widgets are often updated to add new and updated features from the original app. The PayPal widget in EverWeb 3.7, for example, gained a new discounts for order quantity feature that many users had requested.

If there’s an app that you want to hook into from EverWeb that’s not currently available, you can either ask us directly about it in the Feature Request page on the EverWeb Discussion forum, or check out the widgets that have been developed by third party widget providers such as EverWeb Garden and EverWeb Widgets.

Finding The Hook…

Sometimes finding a hook in to the app of your choice may not be easy. There are literally millions of apps out there, so it will always be the most popular apps that will have the best chance of a widget being developed. However, third party widget providers may also make a custom widget for you and there’s always another option: The HTML Snippet Widget.

Many apps have a way in which you can link to them through some user specific generated HTML Code. You then copy this code and paste it in to EverWeb’s HTML Snippet widget to establish the link that you need. So if you need to find the hook from EverWeb to your app, check out your app’s features to see if it offers this kind of linking.

EverWeb’s Contact Forms Enhanced Addon

If you use EverWeb’s Contact Form Advanced widget you may want to store and work with the data that you gather from your contact forms. You can easily link your contact form data using EverWeb’s Contact Forms Enhanced Addon. The data collected in the contact forms is stored securely and can then be exported Excel or CSV formats making contact form data analysis and mailing lists based on specific criteria easy to create.

integrating with EverWeb is usually incredibly straight forward. If you need to integrate your app with EverWeb but don’t know how, or if it is possible, let us know and we will see if we can find an easy way to make it possible!

EverWeb on Social Media

You can also find EverWeb on the following social media platforms:

Facebook

Flipboard

YouTube

X

Instagram

Adding SEO to Your Blog Posts in EverWeb!

June 10th, 2022

If you are a blogger you will probably know already that creating blog posts with unique content on a regular basis can be great for your SEO! Blogs are great for ‘longer form’ reading and for when space on your site’s regular pages doesn’t allow you to provide for in-depth explanations, analysis or information on the subject at hand.

Blogging is good for your SEO and EverWeb allows you to create text rich content that you can complement with images and media too. Additionally, whilst most websites remain relatively static with their pages only being updated on a relatively infrequent basis, blogging often is a regular change to your site’s content and so helps keep you visible to web crawlers!

SEO and Your Blog Post’s Content

Getting the most out of your blog posts to maximise your SEO impact takes a bit of knowledge about how SEO works and how you can implement it within your EverWeb created posts. The first thing we recommend is to review the SEO for EverWeb Video course. Whilst this course may not be specifically tailored for bloggers, it does give you SEO basics that can be applied to blog posts as well as to the regular pages in your site. As a bonus, the course may also help you review your regular pages for SEO! As an example, you should usually try to put your SEO keywords in to the first two paragraphs of your post if possible. Always remember, though, that you should not sacrifice your content just for the sake of adding keywords in to your post or page.

The second important thing to remember when blogging is to keep your content unique. One of the tricks to blogging is that you will usually have some ‘evergreen’ content. This is the blogging content that you can recycle on a regular basis e.g. getting started information, annual events and so on… The catch comes if you just lift content from your old post, change a few words, then publish it as a new blog post. For web crawlers, that equates to plagiarising your own work and your SEO will get dinged for it as a result. The key to evergreen content is to use the theme (e.g. ‘Getting Stared with EverWeb’) but put a new spin, or twist, on the theme and create something new from that point.

Choose a Format for Your Blog Post

When writing a blog post, typically you should choose an approach, or style, that suits the post. Usually this will fall in to one of the following categories:

  • How to do something post
  • Step by step tutorial post
  • A post based on one or more lists
  • An opinion based post
  • Product or service review post
  • Comparison review post

Framing your post in one of these ways together with putting your own spin on your post will help not only garner new visitors to your post, but will ultimately help your SEO. Try looking at posts from other bloggers who are in a similar field or market to find out what you think is successful or not in terms of approach and format for your own blog.

Implementing SEO in Your EverWeb Blog Posts

Whilst content is king in your blog posts, there are several things you can do in EverWeb’s blogging environment that will help give your SEO a boost…

Short Summaries and Keywords

Your blog will always benefit by adding a short piece of text explaining to your potential visitor what the post is about. If you perform a search in your browser for the post, you will see in the results set that the short piece of explanatory text is shown beneath the blog post title. If you do not add explanatory text, you will see the first few lines of the post instead, so you always have a choice here as to whether to use explanatory text or not.

EverWeb calls this explanatory text a ‘Short Summary’. To add a Short Summary, just highlight the blog post in the Blog Post List then click on the settings cog and select Edit… A dialog box will appear where you can enter in your Short Summary. If possible, and appropriate, include SEO keywords too.

Adding Keywords In To Your Post

Whilst you could add your SEO Keywords in to your Post, it may be more beneficial to use the dedicated Keywords section below the Short Summary to add in your SEO Keywords. This has the advantage of avoiding the need to try to use the Short Summary to do everything SEO when it is not necessary to do so. When adding keywords, choose one or two only.

Add ALT Text to Your Post Cover Image

Adding ALT Text to your Blog Post Cover Image makes it easier for those who are vision impaired or when your browser fails to display the image. This is when the ALT Text comes in to effect as it will display the text for you in place of the image. So, make your ALT Text descriptive about what the image represents. If possible you can also use your SEO Keywords here if it is appropriate to do so. You should always use ALT Text with your images if appropriate to do so, and its use can also have a knock on SEO benefit.

If you are using EverWeb 3.7.1 or higher, your blog post image will also be used if you are social media sharing on Twitter, LinkedIn or FaceBook.

Add ALT Text to Images in the Blog Post Editor

If you have added images directly in to the text of your post, you can also add ALT Text to these images too. Just select the image in the Blog Post Editor Window. You will then see the Image Editor Toolbar. This may appear above or below the image. If you do not see the toolbar, it may be that you need to drag the splitter line that sits between the blog post editor window and the blog post preview window down to reveal the Toolbar. Once the Toolbar is visible, click on the ‘I’ icon and enter in your ALT Text.

Remember Your Blog Post’s Title!

The final thing to remember with your post is its title. Again, make sure that this is as SEO friendly as you can make it, but again, do not compromise this in order to try boost your SEO. Content first is always the rule before SEO.

Blogging in EverWeb is easy and straightforward. Adding SEO to your posts may take a bit of research and dedication to implement, but is worth it for the SEO rewards!

Responsive Row Revamped in EverWeb 3.7!

May 26th, 2022

If you are designing a responsive website in EverWeb, you are most likely to have used the Responsive Row widget at some time in your page design. This venerable widget debuted in EverWeb 2.8 when we launched responsive website design capability. The Responsive Row widget came along with the FlexBox, Text Section and Responsive Image Gallery widgets providing core functionality to EverWeb’s responsive page design feature.

The Responsive Row widget is a unique in that it is the only widget that you can contain another widget and this is also its main purpose. When designing a responsive website, there may be times where you might want to use a fixed width widget, for example, the PayPal or FaceBook Like widget. The fixed width nature of these widgets means, however, that they cannot be used on their own and so need to be placed within a container – the Responsive Row widget.

This is not to say though that the Responsive Row widget is limited to use with fixed width widgets. You can add any widget in to it e.g. you might want to group FlexBox, or Text Section, widgets together in a row. Furthermore, the widget is great for full width background images, spacing objects and for padding when using widgets that do not have their own top and bottom margins options. You can even create slide shows too using the recently introduced Fill Slideshow option.

Remember, though, that there are also plenty of times where using a Responsive Row widget can be complete overkill. Check out our blog ‘Responsive Row: To Use or Not To Use’ to find out how to work smart with the widget!

Responsive Row Gets Visual!

One of the goals for EverWeb 3.7 was to make the Responsive Row widget easier to use so that you could better see the objects that you were moving around within a Responsive Row or if you were moving objects from one Responsive Row to another.

With this in mind, EverWeb 3.7 now displays the object you are moving as you move it. If you select more than one object in the Responsive Row to move to a different location within the Responsive Row, you will now see that the selected objects are visually stacked as you move them ‘en-masse’. This makes dragging and dropping objects much easier and intuitive to do than previously. The same principle applies if you are moving on or more objects between one Responsive Row and another.

Secondary Clicking Options

The second goal improving the Responsive Row widget in EverWeb 3.7 was to make it easier to remove objects from a Responsive Row. As you ma know already, you can right click on objects in a Responsive Row widget to select, and move, them to other Responsive Row widgets. In EverWeb 3.7 you can now detach an object from a Responsive Row by secondary (right) clicking on the object you want to remove from the Repsonsive Row, then selecting the ‘Remove from Responsive Row’ option. The object will now be ‘detached’ from the Responsive Row and will become a free floating object.

More Help and Tips!

The final goal third goal for the Responsive Row, and EverWeb in general, with version 3.7 was to improve context sensitive help. You may also have noticed that generally in EverWeb 3.7 there are more context sensitive help dialog boxes. Most of these dialog boxes can be checkboxed so that you do not see them again if you don’t want them visible again. If you change your mind later on, you can reverse this by going to the EverWeb-> Preferences-> General menu option and click on the “Reset ‘Don’t Show Again’ Dialogs” button which is also new EverWeb 3.7 feature.

The wider use of context sensitive messages in EverWeb 3.7 also extends to the Responsive Row widget! We also added a new message box for when you add a Responsive page to your site. You now see a brief description of what a responsive site it and that you can use the Responsive Row widget within your responsive page design if you need to.

We hope that the changes to the Responsive Row widget and the addition of more context sensitive help makes working on responsive pages even easier than before. Let us know what you think in the Comments Section below!

EverWeb on Social Media

You can also find EverWeb on the following social media platforms:

Facebook

Flipboard

YouTube

X

Instagram

What’s New in EverWeb 3.7.1: Edit Links, Follow Links, Social Media Sharing and More!

May 6th, 2022


Although EverWeb 3.7.1 is primarily a maintenance and stability release, we’ve added new features to help you follow the links that you have added to your site and to make editing your links easier. There’s also improved social media sharing and improvements to the Fill: Slideshow feature. A full list of what’s new, improved and fixed in EverWeb 3.7.1 is below.

Which Version of EverWeb is For You?

EverWeb is available in the following versions:

  • If you are running an Intel Mac running OS X 10.10, macOS Yosemite, El Capitan, Sierra, High Sierra, Mojave, Catalina, Big Sur or Monterey EverWeb version 3.7.1 is available for you.
  • If you are running an Apple Silicon Mac running macOS Monterey or Big Sur, EverWeb version 3.7.1 is available for you as a Universal Binary. EverWeb will run natively without the need to use Rosetta 2.
  • If you are running OS X 10.7 – 10.9 (Lion, Mountain Lion, Mavericks) EverWeb version 2.9.1 is available for you.
  • If you are running OS X 10.6 EverWeb version 2.5.2 is available for you.

When updating to the latest version of EverWeb, the update process will automatically download the correct version of EverWeb for your operating system.

EverWeb 3.7.1 Includes…

[NEW] Blog posts will use your Post Image as the image that appears when sharing to Twitter, Facebook, LinkedIn and all other social media platforms.

[NEW] The Blog Post Title will be used when sharing each post on Social Media.

[NEW] Secondary (Right) click has an “Edit Link” option.

[NEW] Secondary (Right) click-> Follow Link works for shapes with a link and navigation bar.

[NEW] Follow link option works for links set to “next” and “previous”.

[NEW] Template Settings Window will now find and copy widgets to the project file (holding down option and going to the File menu->Template Settings).

[NEW] Opening a project that has widgets in it will ask to install them.

[IMPROVED] When you drag an image over shapes set to “Image Fill” or “Slide Show” you will see an indicator that you can drop the images in there.

[IMPROVED] Slide Show fill objects accept image files being dropped on it. They will be added to the Slide Show.

[IMPROVED] You can now click the pagination button ellipses at the bottom of the Slide show object to switch between slides.

[IMPROVED] The Section labels that appear when dragging objects around will disappear after 2 seconds automatically and will show up less frequently.

[IMPROVED] Shape Options-> Fill-> Parallax Scrolling option has been merged in to the Fill section.

[IMPROVED] The Contact Form widget’s Widget Settings now includes the label ‘Simple Contact Form’ at the top of the settings.

[FIX] Fixed a bug with right/center aligned text in a text object “jumping” when trying to edit it.

[FIX] Fixed shadow code on European OS.

[FIX] You can no longer link a Navigation Menubar object.

[FIX] The Fill Slide Show left arrow button works properly when clicked upon.

[FIX] Fixed a potential crash with the RSS Feed Widget.

[FIX] Fixed a scrollbar issue in Inspector.

[FIX] The Contact Form widget’s default height has been increased.

[FIX] OG tags now work properly for blog posts.

How To Update To EverWeb 3.7.1

You can easily update EverWeb by either:

  1. Launching EverWeb then going to the EverWeb menu at the top of the screen and selecting ‘Check for Update’ or by
  2. Downloading EverWeb from the EverWeb website.

After downloading EverWeb, double click on the EVERWEB.DMG file. A window will open. Drag the EverWeb icon on to the Applications folder icon. Once the file has been copied, you can close the installation window, delete the .DMG file and eject the EverWeb disk on the desktop by dragging it to the Trashcan.

Remember, you won’t lose any previous data when updating as your website project files are stored elsewhere on your computer.

The update is free for EverWeb + Hosting users and EverWeb Standalone users who are within their 1 year of free upgrades and support period.

You can easily check your EverWeb Standalone free update period from EverWeb’s Preferences window or from your client area.

If you have passed your one year of free EverWeb updates, you can purchase 1 more year of upgrades and support from your client area.

You can easily re-download earlier versions of EverWeb from your client area if you are not ready to purchase an additional year of updates and support.

Login to your client area and go to the ‘Manage Product’ page. On the left of this page, select ‘Downloads’ and choose the version of EverWeb that you need.

More Information About EverWeb

For more information about the new version of EverWeb, please check out the following resources:

  • The EverWeb website which has up to the moment information in it’s blogging section
  • New EverWeb videos on YouTube
  • The EverWeb User Manual in EverWeb’s Help-> User Manual menu
  • The EverWeb Discussion Forum

If you can’t find what you need, or have any other questions, comments or feedback please let us know. We’re happy to help.

EverWeb on Social Media

You can also find EverWeb on the following social media platforms:

Facebook

Flipboard

YouTube

Twitter

Instagram

Discover NEW and Improved Hyperlinking Features in EverWeb 3.7!

May 6th, 2022

Hyperlinking in the recently released EverWeb version 3.7 adds some great new, and expanded, capabilities to the stalwart feature that’s been around since the very first EverWeb release.

Hyperlinking is an essential, integral part of building your website as most website developers will want to add links to other pages in their site, to pages in an external site, to a file, or link to an email app. All these features debuted with EverWeb 1.0 and since then EverWeb’s added a number of other hyperlink related features which we will outline below as most features have been enhanced with the release of EverWeb 3.7. We begin, however, with a brand new hyperlinking feature: Force Download.

EverWeb’s New Force Download Option

Prior to EverWeb version 3.7, if you set up a link to a file, such as a PDF file, when you clicked on the associated link, the file would open in the browser window. If you wanted to save the file, you could do so at this time. In EverWeb 3.7, you now have the ‘Force Download’ option which automatically downloads the file to your visitor’s device when they click on the associated link. This is very useful as it saves the step of the visitor having to view and manually download the file. One thing of note if you use Force Download is that the feature depends on whether the browser in use allows for this function. Some browsers may not support the feature or allow you to customize the browser settings to stop such downloads.

To use Force Download, just tick its checkbox in the Hyperlinks Inspector or in any other hyperlinking dialog boxes within EverWeb.

‘Nofollow’ for Links You May Not Trust…

The ‘nofollow’ option was introduced in to EverWeb with version 1.9 and instructs search engines NOT to visit the site, or rather, not to ascribe credit to boost the ranking of the destination site based on the link. Check the ‘nofollow’ checkbox when you need to have the link but want to exclude it from SEO crawls as you do not have confidence or trust in the linked site.

The ‘Nofollow’ checkbox appears in the Hyperlinks Inspector and In EverWeb 3.7 is now included in all hyperlinking dialog boxes.

Choosing Your Link Behavior

Since EverWeb 1.9 you have been able to open a hyperlink in the current browser window, a new browser window or in a popup window. These features are now available in all hyperlinking dialog boxes within EverWeb.

Easier Scroll Position Linking

The last hyperlinking feature is Scroll Position where you can create two types of links for on your page. The first is where you ‘Insert Fixed Scroll Position‘ on the page which should only be used for Center or Left Aligned Page Layouts. The second type of Scroll Position, ‘Set Selected Shape as Scroll Position‘ allows you to link to an object on a page such as a TextBox or shape. This type of Scroll Position can be used on both fixed width page layouts and Responsive Page Layouts.

Prior to EverWeb 3.7, if you wanted to add a link in a widget using the ‘Link’ button, or via the Styled Text Editor within a widget, you would need to ‘hardwire’ the link using the URL field in the hyperlinking dialog box. In EverWeb 3.7, you no longer need to do this, as the hyperlinking dialog boxes now all include a ‘Position’ field which will display the Scroll Position names for the page you have selected. This makes linking a lot easier when using Scroll Position.

Hyperlinking Dialog Boxes

All of the above mentioned features are available in the Hyperlinks Inspector tab of the Inspector Window. Depending on the context of what you are linking to e.g. a page, a file or an email, some options may, or may not, be available for you to use.

Where EverWeb 3.7 differs from previous versions is that the features of the Hyperlinks Inspector are now available when you click on the ‘Link’ button within widgets, or when you click on the Hyperlink button in the Styled Text Editor within a widget that includes e.g. the FlexBox or PayPal Widget.

If you are creating a link in a blog post, you can use the hyperlink button in the Blog Post Editor Window’s Toolbar, although this will only give you options to quickly set up a hyperlink. If you need to use any of the above options in a Blog Post, highlight the text or image you want to link to, then go to the Hyperlink Inspector and check the ‘Enable as Hyperlink’ box to make all of the hyperlinking options available for use.

…and There’s More to Come!

EverWeb’s 3.7’s new Force Download feature and improved hyperlinking throughout the app will make linking much easier and more flexible for all EverWeb users. But stay tuned as we are planning more updates for hyperlinking in an upcoming EverWeb release!

if you have any questions about Hyperlinking in EverWeb, or any EverWeb related questions, please let us know in the Comments Section below. We’re happy to have you comments and feedback and to answer any questions you may have.

EverWeb on Social Media

You can also find EverWeb on the following social media platforms:

Facebook

Flipboard

YouTube

X

Instagram

What’s New in EverWeb 3.7: Responsive Row Improvements, New Hyperlinking Options, Optimizations and Much More!

April 25th, 2022

We are incredibly excited to announce the release of EverWeb 3.7! New features are now included for hyperlinking using there Hyperlinks Inspector, Scroll Position and within Widgets supporting hyperlinks. There’s also a visual makeover for the Responsive Row widget making adding, moving and deleting objects more intuitive, plus some improvements for the Contact Form Advanced widget and Quantity Discounts are now available in the PayPal widget. Plus lots of optimizations and future improvements making EverWeb 3.7 the best version yet!

Which Version of EverWeb is For You?

EverWeb is available in the following versions:

  • If you are running an Intel Mac running OS X 10.10, macOS Yosemite, El Capitan, Sierra, High Sierra, Mojave, Catalina, Big Sur or Monterey EverWeb version 3.7 is available for you.
  • If you are running an Apple Silicon Mac running macOS Monterey or Big Sur, EverWeb version 3.7 is available for you as a Universal Binary. EverWeb will run natively without the need to use Rosetta 2.
  • If you are running OS X 10.7 – 10.9 (Lion, Mountain Lion, Mavericks) EverWeb version 2.9.1 is available for you.
  • If you are running OS X 10.6 EverWeb version 2.5.2 is available for you.

When updating to the latest version of EverWeb, the update process will automatically download the correct version of EverWeb for your operating system.

EverWeb 3.7 Includes…

[NEW] Force download option under hyperlink tab in Inspector. So it will tell the browser to download a PDF file for example rather than load it in the browser.

[NEW] Widgets that have a link button and widgets that use the Link button in the Styled Text Editor can now link to a popup window, another window and to an anchor.

[NEW] Widgets that have a link button and widgets that use the Link button in the Styled Text Editor now include a nofollow.

[NEW] Widgets that have a link button and widgets that use the Link button in the Styled Text Editor can now include a force download option (where supported by the browser).

[NEW] Widgets that have a link button and widgets that use the Link button in the Styled Text Editor now support Scroll Position directly in the dialog box making it easier to link to any position in a page.

[NEW] Widgets that have a link button and widgets that use the Link button in the Styled Text Editor can now link to First/Next/Previous/Current page.

[NEW] You can now drag and drop images into the Fill SlideShow list from the Finder.

[NEW] You can now drag and drop images onto Fill option -> Slide Show.

[NEW] The PayPal Widget has added an ‘Apply Discount to Quantity’ option.

[NEW] Full width text objects now resize their height properly on responsive pages.

[NEW] Completely changed how Responsive Rows work so objects within them are more visual and dynamic.

[NEW] Backup preferences has a reveal in finder option for the backup folder.

[NEW] You can add a Required setting to dropdown menu controls in the Contact Form Advanced widget.

[NEW] Form submission emails now have a direct download to any file uploads for Contact Forms Enhanced users.

[NEW] The Site Publishing Settings screen now includes an Email Settings button so that you can easily see your email settings. You can copy and paste fields from this screen in to your own email app for easier email set up.

[NEW] Tips appear when dragging objects close to section boundaries advising you to hold down the Command key to move objects between sections.

[NEW] You can reset all ‘Don’t Show Again’ dialogs so they appear again using the EverWeb-> Preferences-> General menu option.

[IMPROVED] Better instructions when using Responsive pages and the Responsive Row widget.

[IMPROVED] Many of the dialog boxes in EverWeb are now in the macOS Big Sur style. For example, any OK/Cancel dialogs and all dialog boxes that have a ‘Don’t Show Again’ option.

[IMPROVED] Secondary (right) click-> Paste at Mouse Location in a responsive row will place the pasted object after the object underneath the mouse.

[IMPROVED] Text handling in TextBoxes has been improved.

[IMPROVED] How objects drag and drop within a Responsive Row widget.

[IMPROVED] Header/Footer code sections under Edit Publishing Settings are slightly larger.

[IMPROVED] Optimizations for getting very large widget previews (such as blogs).

[IMPROVED] Optimizations for Responsive Rows and opening older projects with Responsive Rows.

[IMPROVED] External links will remove any line breaks in the links if they are pasted in the field.

[FIXED] Duplicate and Copy menu items for blog pages are disabled appropriately.

[FIXED] Shapes set to anything except rectangle/round rectangle with no fill option and borders are exported properly.

[FIXED] Fixes password protection when the password is just a number or when you have the same password but different cases for the letters. In either case the password would be stored incorrectly.

[FIXED] A bug in the Contact Form widget and PHP 8.

[FIXED] The Asset file name in the assets list when Show File Info is selected will properly cut off the text so it doesn’t overlap the eye preview icon.

[FIXED] Fixed an issue with adding pages to a blog. You can’t do it anymore.

[FIXED] Fixed an issue with Contact Forms Advanced widget and the Placeholder field text in Firefox.

[FIXED] Undo for “Remove from Responsive Row” works properly.

[FIXED] The large gap that would appear below the blog main widget and the footer of the blog page.

How To Update To EverWeb 3.7

You can easily update EverWeb by either:

  1. Launching EverWeb then going to the EverWeb menu at the top of the screen and selecting ‘Check for Update’ or by
  2. Downloading EverWeb from the EverWeb website.

After downloading EverWeb, double click on the EVERWEB.DMG file. A window will open. Drag the EverWeb icon on to the Applications folder icon. Once the file has been copied, you can close the installation window, delete the .DMG file and eject the EverWeb disk on the desktop by dragging it to the Trashcan.

Remember, you won’t lose any previous data when updating as your website project files are stored elsewhere on your computer.

The update is free for EverWeb + Hosting users and EverWeb Standalone users who are within their 1 year of free upgrades and support period.

You can easily check your EverWeb Standalone free update period from EverWeb’s Preferences window or from your client area.

If you have passed your one year of free EverWeb updates, you can purchase 1 more year of upgrades and support from your client area.

You can easily re-download earlier versions of EverWeb from your client area if you are not ready to purchase an additional year of updates and support.

Login to your client area and go to the ‘Manage Product’ page. On the left of this page, select ‘Downloads’ and choose the version of EverWeb that you need.

More Information About EverWeb

For more information about the new version of EverWeb, please check out the following resources:

  • The EverWeb website which has up to the moment information in it’s new blogging section
  • New EverWeb videos on YouTube
  • The EverWeb User Manual in EverWeb’s Help-> User Manual menu
  • The EverWeb Discussion Forum

If you can’t find what you need, or have any other questions, comments or feedback please let us know. We’re happy to help.

EverWeb on Social Media

You can also find EverWeb on the following social media platforms:

Facebook

Flipboard

YouTube

Twitter

Instagram

Using Text in EverWeb’s Responsive Pages: Part Two

April 14th, 2022

In the first part of this blog post, we looked at the various ways in which you can add text to a responsive page in EverWeb and the effect of doing so on the page on different devices.

In this second part we look at how you create scaleable text in your web pages.

Creating Scalable Text in a Responsive Page Layout

If you want your text to scale according to the device that it is displayed upon, you will need to use EverWeb’s ‘Show on Device’ feature which you can find in the ‘Responsive section’ of the Metrics Inspector. Usually this section will be greyed out unless you click on an object in a Responsive Row, then the settings will become active. There are four options: Show on Mobile, Tablet, Desktop and Wide Desktop. By default all of these options are ticked.

We can use these options to create scaleable text. For each device type, we can create a TextBox that specifically suits that device. So for a mobile device you may want smaller text, slightly larger text for a Tablet, your ‘standard’ size text for a desktop and maybe a little larger text for wide desktops.

  1. First of all, add a Responsive page to your site or select a responsive page that already exists in your site.
  2. Next drag and drop a Responsive Row widget from the Widgets tab on to your page, or select a Responsive Row that already exists in the page, that you want to add scaleable text to.
  3. Make sure that the Responsive Row widget is selected.
  4. Now add a TextBox to the page using the TextBox button in the Toolbar. As the Responsive Row widget was already selected, the TextBox should be created as an object within the Responsive Row. The TextBox will appear as a fixed width object so will appear as a square TextBox within the Responsive Row. If you want to check, go to the Metrics Inspector where you will see the ‘Full Width’ box is not checked.
  5. If you have accidentally added a TextBox outside of the Responsive Row widget, it will appear as a full width object on the page. You can add this object back in to the Responsive Row by secondary (right) clicking on it, then selecting the ‘Embed In’ option. Choose the Responsive Row that you want. Note that the TextBox will still be full width, so to make it fixed width, go to the Metrics Inspector tab and uncheck the Full Width checkbox, then resize the TextBox to the size you want within the Responsive Row if you need to.
  6. Once you have added the TextBox in to the Responsive Row, add the text that you want to it. Style the text as you desire using the Fonts Panel which you can access from the Toolbar or by using the Cmd+T shortcut key.
  7. When setting the text size, set the size as you would if the text were to be displayed on a desktop device. This will give you a ‘baseline’ text size e.g. 18 point.
  8. Now that you havre established a baseline font size, it is also a good time to think about text sizes on other device types. You may want use the same text size on a tablet device. On a wide desktop, though, you may want a larger text size e.g. 20 point and on a mobile device you may want a smaller text size e.g. 14-16 point. You may also want to consider how to size text that’s used for page and section titles at this stage. Make sure that your text sizing scheme is consistent across all the pages you are using scaleable text on.
  9. Consider also the text itself that you have added to the TextBox. Do you want all of the text displayed on a mobile device or will you want to have less ‘detail’ and more ‘headline’ text only? Also for a wide desktop, maybe you have some additional text that you would like to add but did not have the space for on a desktop device. Again, we will come back to this soon.
  10. Now that you have your ‘baseline’ TextBox, make sure it is selected then use Cmd+D to duplicate it three times. You now have four TextBoxes, one for each device type.
  11. Set the Text font size for each TextBox and also remove or add text to the TextBoxes as appropriate for each device. For example, you could choose the TextBox on the far left of the Responsive Row to be the one for your mobile device. In this case, I might want to cut the amount of text down and set the font size for the TextBox title to be 18 point with the body text set to 14 point. The next TextBox to the right would then be for tablets, having e.g. title font size of 20 and body text size at 16 point with my ‘default’ amount of text. Continue the same way for the Desktop and Wide Desktop TextBoxes.
  12. Finally, select the TextBox you want to use for Wide Desktop. In the Metrics Inspector, go to the Responsive section and uncheck Desktop, Tablet and Mobile. Next select Desktop and uncheck Wide Desktop, Tablet and Mobile. For the Tablet TextBox uncheck Mobile, Desktop and Wide Desktop and finally for the Mobile TextBox uncheck Tablet, Desktop and Wide Desktop. You should see one TextBox on screen.
  13. Now either resize the EverWeb app, or Preview and resize the browser to see the text scaling up and down as you in increase and decrease the width of the browser or app window.
  14. For more information, check out our video on Show on Device.

Working with Text and Images

In the third part of this post, we will look at how you can work creatively with Text and other objects, such as images in a responsive page.

If you have any questions about this post, or about EverWeb in general, please let us know in the Comments Section below!

EverWeb on Social Media

You can also find EverWeb on the following social media platforms:

Facebook

Flipboard

YouTube

X

Instagram